

DxO PhotoLab
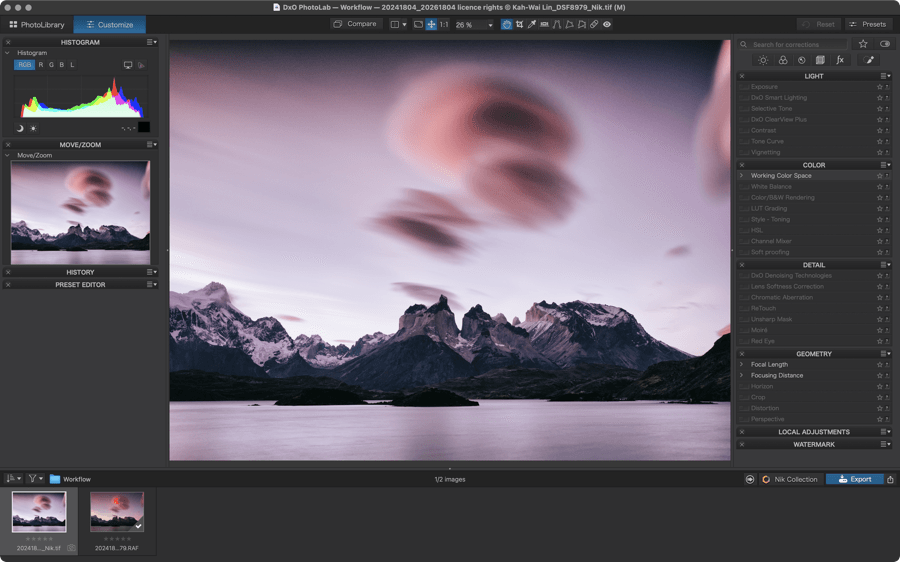
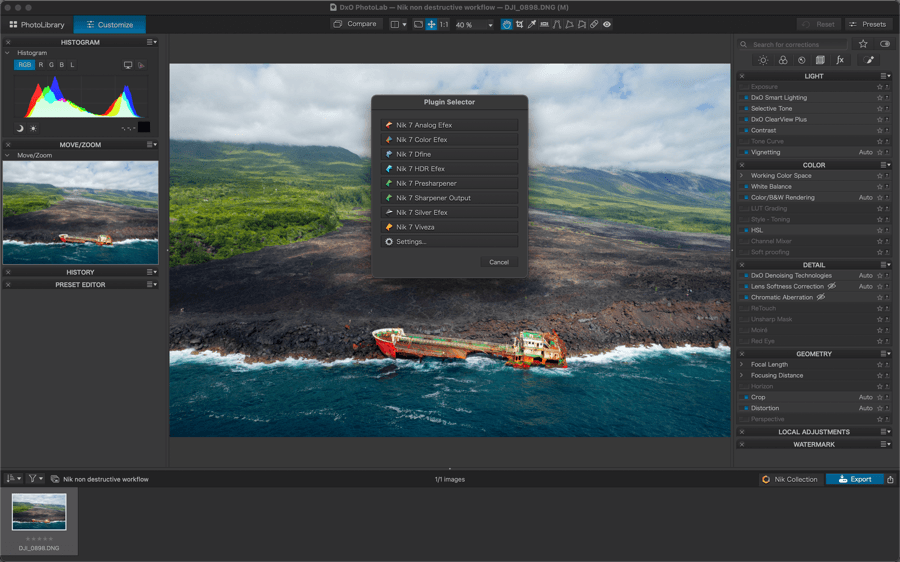
Nik Collection is accessible to DxO PhotoLab users as a set of external applications via a dedicated button present in the image browser, both in the Photo Library tab and the Customize tab.
If the Switch to mode is used (transfering the image from one plug-in to another, the image returned to DxO PhotoLab will be the version processed with the last plug-in.
If the Quick Export mode is used, the files will not show up in DxO PhotoLab.
Correction Settings
The first thing to do is to set the type of file you will transfer to one of the Nik Collection plugins:
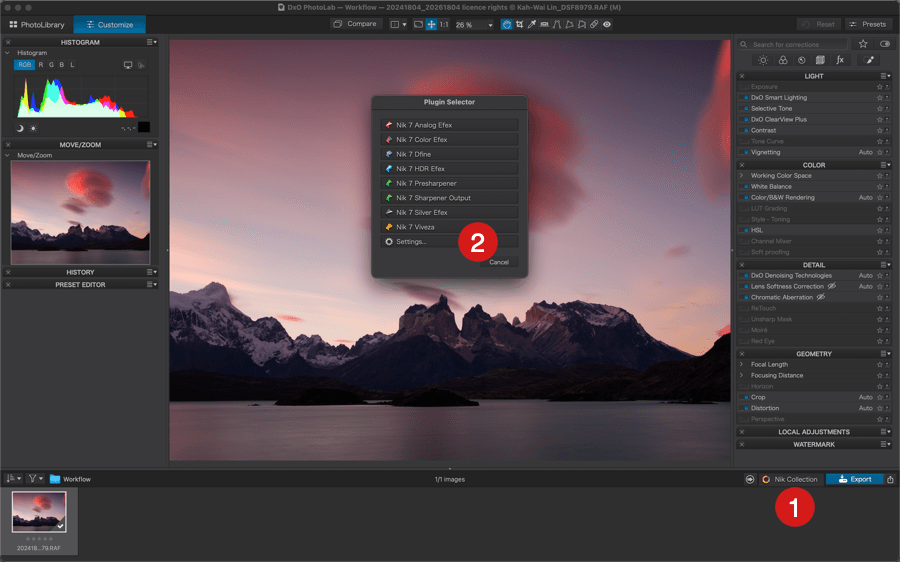
- In the bottom right, in the DxO PhotoLab image browser toolbar, click the Nik Collection button.
- In the Plugin Selector, click Settings.
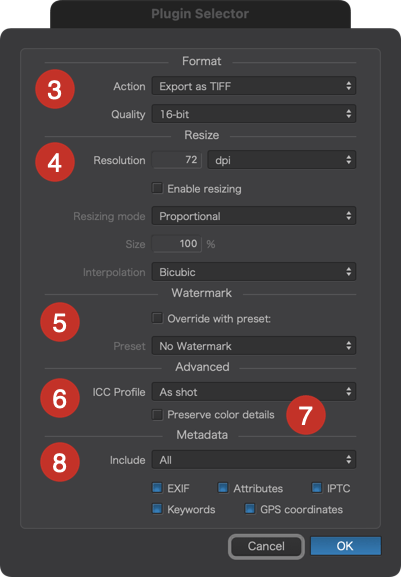
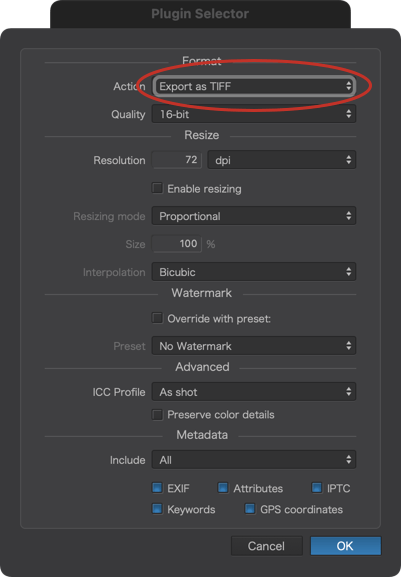
- In the Format section, choose the file format:
- Action: gives you the choice between TIFF and JPEG.
- Quality (for TIFF format): Choose from 16-bit, 8-bit, or 8-bit with compression (depth per channel, R, G, and B).
- Quality (for JPEG format): the slider adjusts the compression level.
- In the Resize section, you will determine the physical characteristics of images to be processed in the Nik Collection:
- Resolution: Set to 72 ppi (dots per inch) by default, this setting has no influence on image characteristics until you specify a physical dimension (changing this value automatically activates the resize options). Indeed, if a lab or a printer asks you for 240 or 300 ppi, you will also have to resize the image (for example, a 50×75 cm print at 300 ppi).
- Resize the image: Click the box to manually activate the resizing options (automatic activation when changing resolution).
- Maximum dimension: lets you set the dimension of the wider side of the image in pixels (px) for images intended for electronic (web) distribution, or the physical dimensions of the wider side of the image in centimeters or inches for images intended for printing.
- Interpolation: Allows the use of algorithms in the case of physical enlargement of the image, with the algorithms Bicubic (default), Sharper Bicubic, or Bilinear.
- The Watermark section allows you to overlay a text and/or graphic watermark created in DxO PhotoLab. However, at this point, we recommend that you apply a watermark only after processing the image in the Nik Collection.
- In the Advanced section, you can assign a space or color profile in the ICC Profile menu:
- As shot: Default choice, keeps the original profile of the image transferred from DxO PhotoLab to Nik Collection, and back.
- Same as Soft Proofing: Applies the profile selected in DxO PhotoLab Soft proofing mode.
- sRGB: Select this space for general use (web, inkjet printing, minilab).
- Adobe 1998: Select this space for a print run at a print supplier.
- Choose Profile: Lets you locate and assign an ICC profile stored on your operating system (adds to the menu).
- Clear Menu: Deletes added profiles.
- Protect saturated colors :
- By default, the checkbox is unchecked: no saturated color protection.
- Checked box and softproofing profile: saturated color protection is applied, with the value applied to the color protection slider in the softproofing subpalette.
- Include (PC) / Metadata (Mac): This section allows you to select and control the information that will be included or not in the metadata of exported images:
- Include: the dropdown menu gives you the option to include All (unchecked options will be automatically checked), None, Copyright & contact info only, or Copyright only metadata with the export. If you select one of these options and check or uncheck any of the boxes, the menu will show Custom.
- Check boxes: They allow you to include or exclude the desired metadata based on the choice made in the Include menu:
- EXIF: attaches information about the camera and shooting settings.
- Attributes: attaches the sorting attributes (Pick, Reject) and the star rating.
- IPTC: attaches the information entered in the IPTC fields.
- Keywords: attaches the keywords.
- GPS coordinates: attaches the geographic coordinates (latitude, longitude, elevation).
Recommended settings
In general, when processing images in the Nik Collection, maintain maximum quality workflow. You will be able to modify your files afterwards, depending on their usage, during the export phase in DxO PhotoLab.
For a maximum quality workflow, especially if you plan to do further processing and retouching later or need to provide documents of the highest quality:
- 16-bit TIFF format.
- Do not change the resolution Do not resize.
- No watermark (apply it at the end of the workflow for an export, for example).
- Original ICC profile.
For a maximum quality workflow, but without considering further processing afterwards:
- JPEG format, 75-100% compression Do not change the resolution
- Do not resize.
- No watermark (apply it at the end of the workflow for an export, for example).
- Original ICC profile.
For a standard workflow, without the need for further processing, for posting on Facebook or sending by email:
- JPEG format, 70-75% compression Do not change the resolution
- Resize to 2048 pixels.
- No watermark (apply it at the end of the workflow for an export, for example).
- sRGB profile.
Standard workflow
The workflow from DxO PhotoLab is very simple:
- Process your original image in DxO PhotoLab (automatic corrections, white balance, tone, noise, etc.).
- If you want to send a batch of images to the Nik Collection, for batch processing (all plugins) or an HDR merge, make sure they are all selected in the image browser.
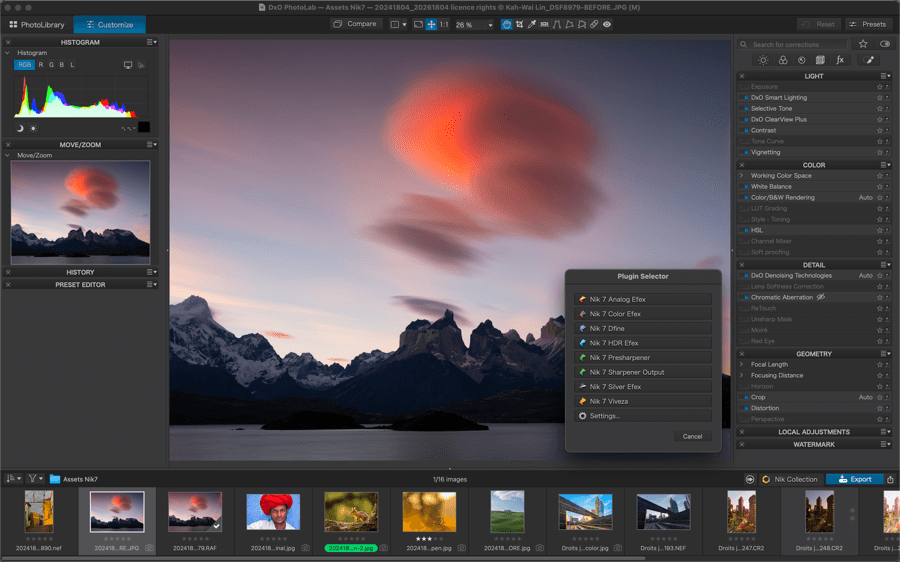
- Click the Nik Collection button.
- In the Plugin Selector, click the button for the desired plug-in.
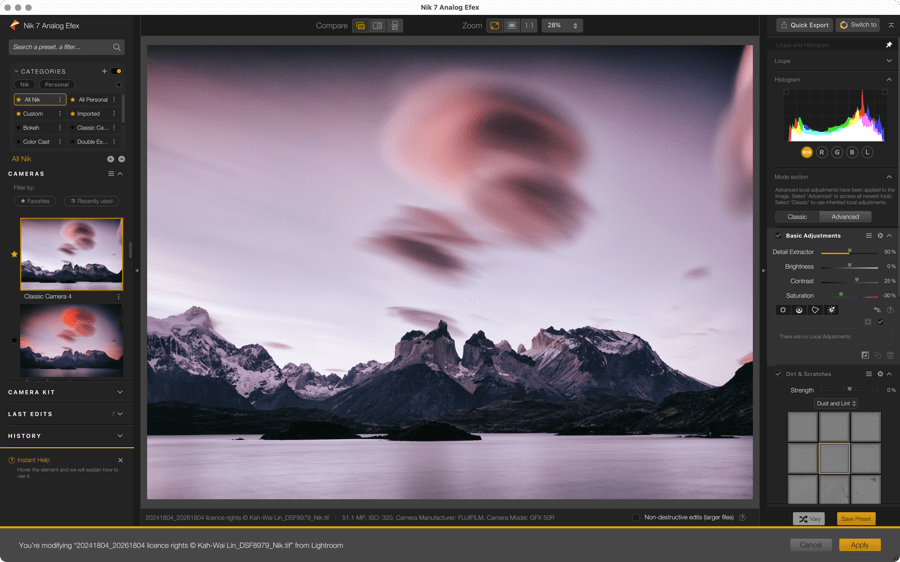
- The plugin will open.
- Process your image in the plugin.
- Once finished, click Apply or Apply all if there are multiple images.
- Your processed image will return to DxO PhotoLab.
- If you start from a folder, the image returned from the Nik Collection will appear next to the original with the same name, but with the suffix _Nik added, with the extension depending on the file format chosen in the settings.
- If you start from a project, the image returned from the Nik Collection will not be directly visible, as it is not automatically assigned to that project. To view both the original and the processed image in the Nik Collection, right-click the original and select View Image Folder.
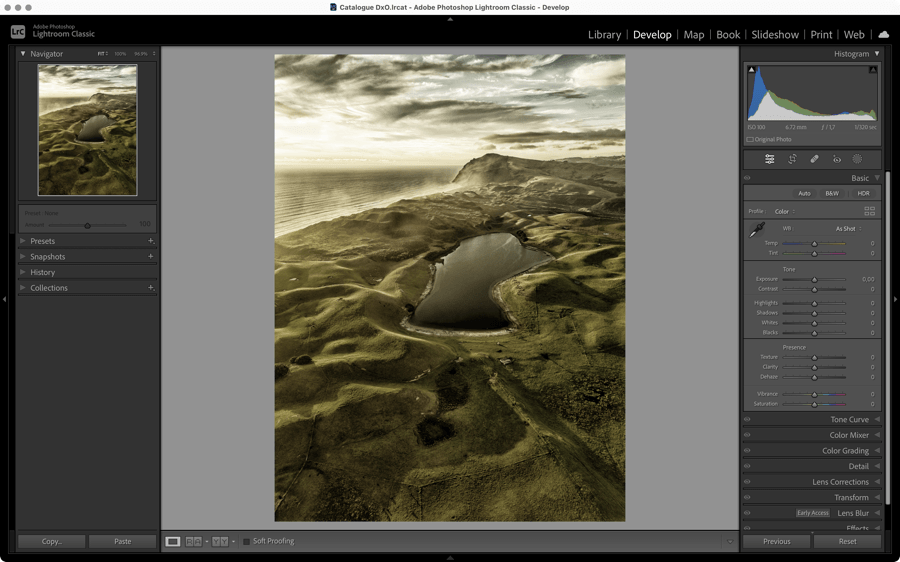
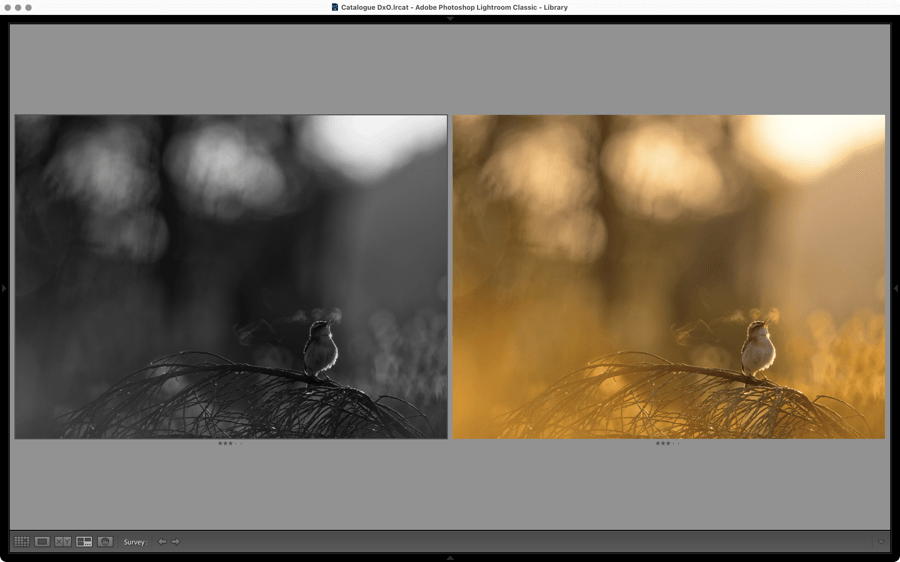
Adobe Lightroom Classic
The Nik Collection was one of the very first external editors made available for Adobe’s workflow program. Please note that Nik Collection is only compatible with Lightroom Classic, as the cloud variant, Lightroom (formerly Lightroom CC), does not currently have an interface for plugins.
External editing preferences
To change the default settings after installing the Nik Collection or to set the files that will be transferred to the Nik Collection as desired:
- Open Lightroom Classic Preferences/Settings (PC: Edit menu, Mac: Lightroom Classic menu).
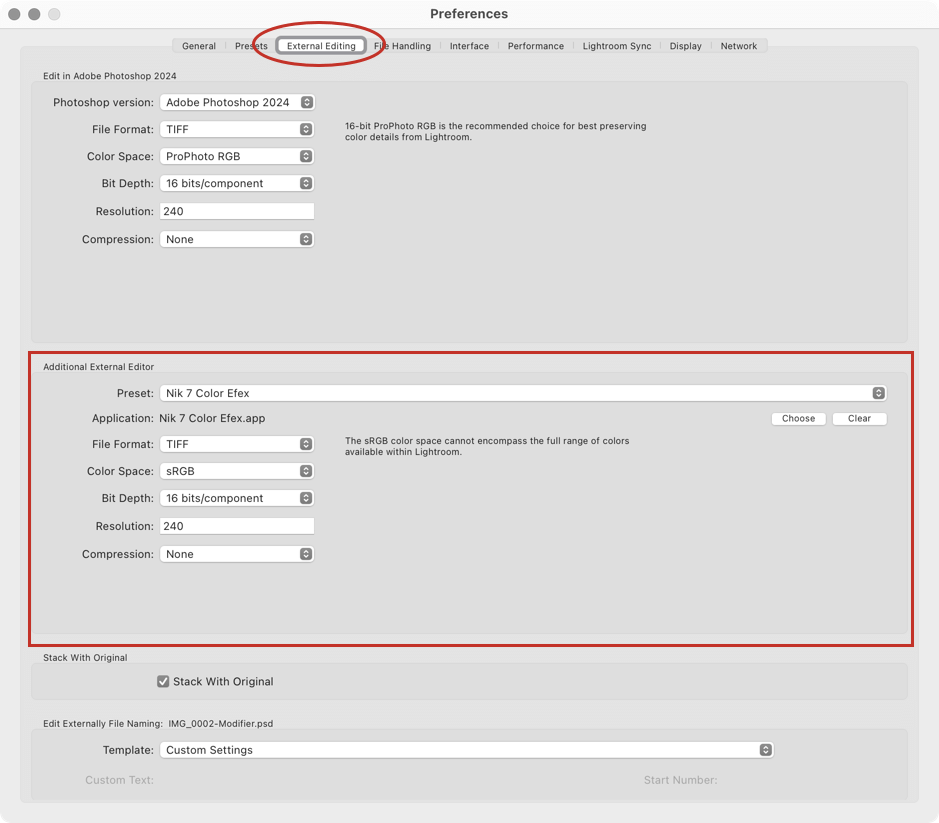
- Go to the External Editing tab.
- In the Additional External Editor section, select one of the Nik Collection plugins from the Preset list.
- Choose from among the following settings:
- File format: Choose TIFF or JPEG.
- Color Space: Choose Prophoto RGB, Adobe RGB (1998), P3 Monitor, or sRGB.
- Depth: Select the depth per R, G, and B channel, either 16-bit (TIFF and PSD) or 8-bit (TIFF, PSD, and JPEG).
- Resolution: 240 (leave as is).
- Compression: TIFF format only; LZW or ZIP methods are available to save disk space.
- In the Preset menu, the plugin name is followed by: (modified). Go to the very bottom and select Update Preset.
- For other plugins, repeat the previous steps.
- In the Stack with Original section, select the checkbox to allow the processed image to be returned to the Nik Collection with the original as an expanded stack.
- If you wish, you can create your own suffix in the Edit File Name Externally section. Otherwise, the suffix _Modify will be added to the original file name to form the name of the file processed in the Nik Collection.
- Exit Preferences (no restart required).
You can leave the External Editing Preferences as they are, and configure the files in the dialog box that appears when transferring from Lightroom Classic to one of the Nik Collection’s plugins (see the paragraph about Standard workflow below).
Recommended settings
For a maximum quality workflow, especially if you plan to do further processing and retouching later, or to provide documents of the highest quality :
- 16-bit TIFF format
- Adobe RGB Space (1998)
- Do not change the resolution
- For a maximum quality workflow without any further processing: JPEG format, 75 to 100 % compression.
- sRGB space
- Do not change the resolution
For a standard workflow, without the need for further processing, for posting on Facebook or sending by email:
- JPEG format, 65-75% compression
- sRGB space
- Do not change the resolution
In general, when processing images in the Nik Collection, maintain maximum quality workflow. You will be able to modify your files afterwards, depending on their use, during the export phase in Lightroom Classic.
Standard Workflow with Lightroom Classic
The step-by-step procedure explained here concerns the interaction between Lightroom Classic and all the plugins of the Nik Collection, with the exception of Nik HDR Efex (see next paragraph).
If the Switch to mode is used (transfering the image from one plug-in to another, the image returned to Lightroom Classic will be the version processed with the last plug-in.
If the Quick Export mode is used, the files will not show up in Lightroom Classic.
From a RAW file
The workflow with RAW files, as well as DNGs generated by cameras, requires the creation of a TIFF or JPEG file, depending on the settings in Lightroom Classic’s external editing preferences (which implies output from a RAW stream):
- Make basic corrections to your originals.
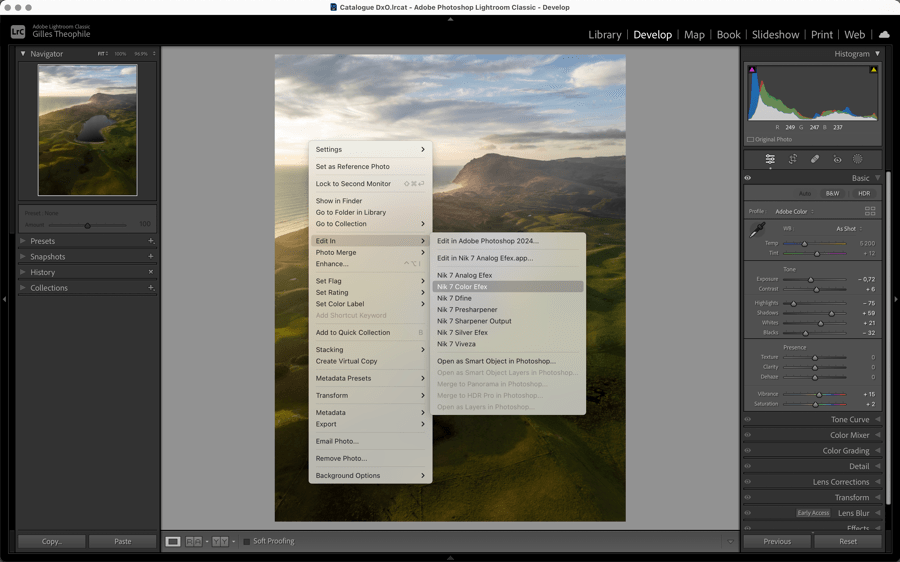
- In a folder or collection, select one or more images.
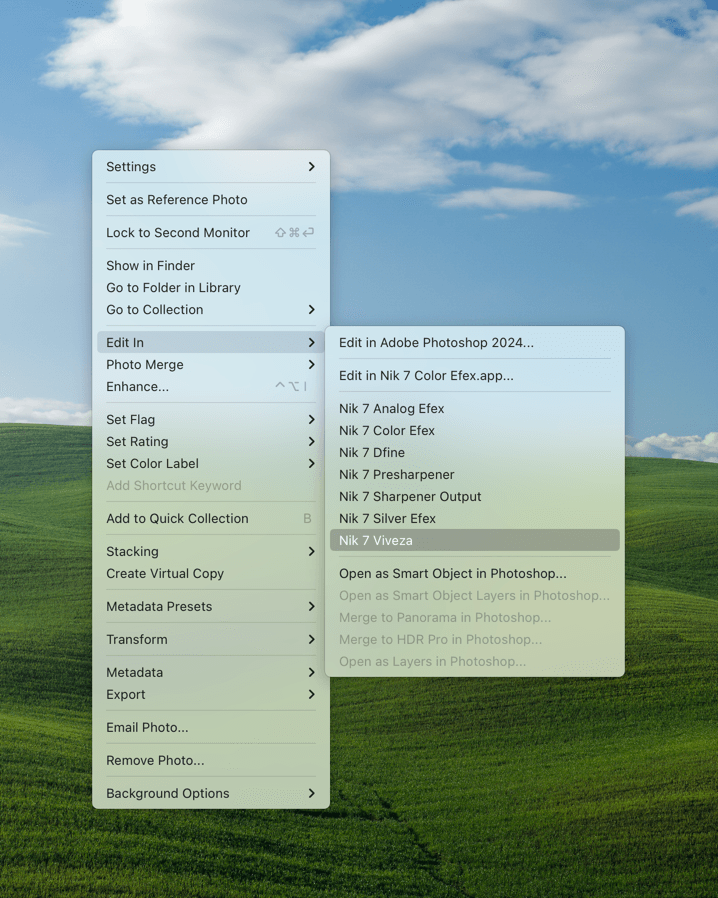
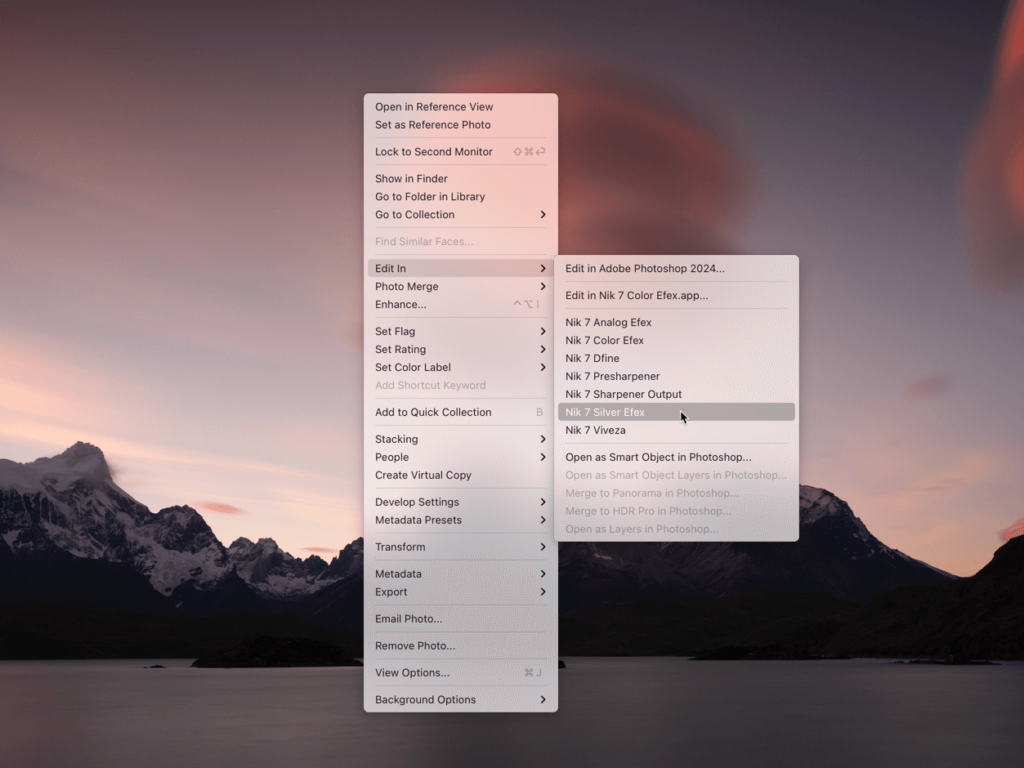
- Right-click, and from the cascading menus, choose Edit in and select the desired plugin.
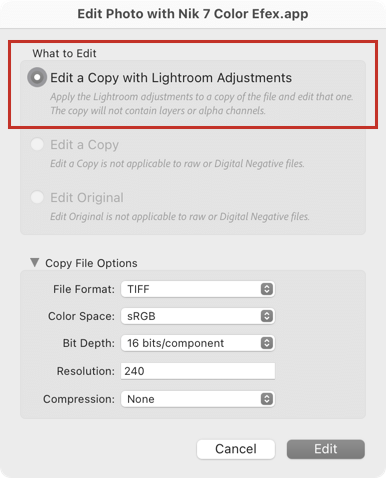
- In the Retouch Photo(s) with dialog box:
- Only the Edit a Copy with Lightroom Adjustments option is available. In this case, Lightroom Classic will generate a file according to the options in the External Editing Preferences, to which it will apply any corrections made beforehand.
- By deploying the File Copy Option arrow, you can change your external editing preferences.
- Click on Edit.
- The images will open in the selected plugin.
- Process your images.
- Click Apply or Apply all if there are multiple images, the plugin closes, your images are returned to Lightroom Classic, stacked with their originals in the starting folder or collection with the filename followed by the suffix set in the External Editor Preferences.
From a TIFF or JPEG file
Several scenarios are possible here, as your TIFF or JPEG files may come from other sources, unless they are files that you have already processed in the Nik Collection :
- In a folder or collection, select one or more images.
- Right-click, and from the cascading menus, choose Edit in and select the desired plugin.
- In the Retouch Photo(s) with dialog box, select one of the following options :
- Edit a Copy with Lightroom Adjustments: a copy of the file or group of files will be generated (it will apply any corrections made beforehand in Lightroom to the file(s)).
- Modify a copy: The copy created will not include any corrections made in Lightroom Classic.
- Modify the original: transfers the selected file(s) as is, without creating a copy.
- By deploying the Copy File Options arrow, you can change your external editing preferences (unless you have modified the original).
- Click on Edit.
- The images will open in the selected plugin.
- Process your images.
- Click Apply or Apply all if there are multiple images, the plugin closes, your images are returned to Lightroom Classic, stacked with their originals in the starting folder or collection with the filename followed by the suffix set in the External Editor Preferences.
Smart Copy/Paste
Smart Copy/Paste mode is a great way to speed up workflow with the ability to apply the latest corrections made in the Nik Collection to a batch of images ready to be exported by Lightroom Classic.
Process the image and copy the parameters:
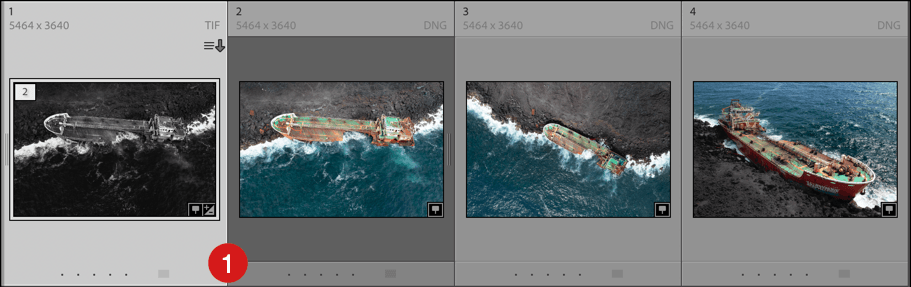
- In Lightroom Classic, select a photo and process it with one of the plugins from the Nik Collection.
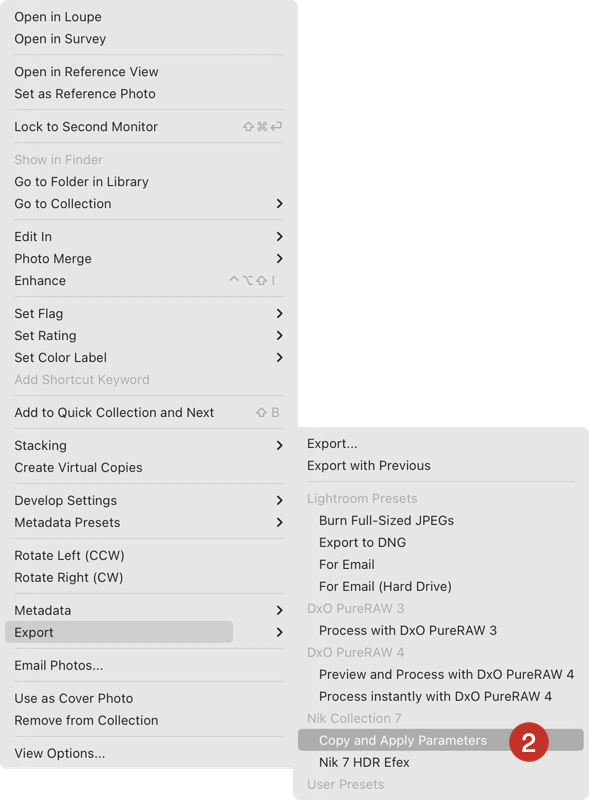
- Once the processed image is back in Lightroom Classic, right-click on it (be sure to do this on the TIFF or JPEG image coming back from the plugin, not on the original Raw file).
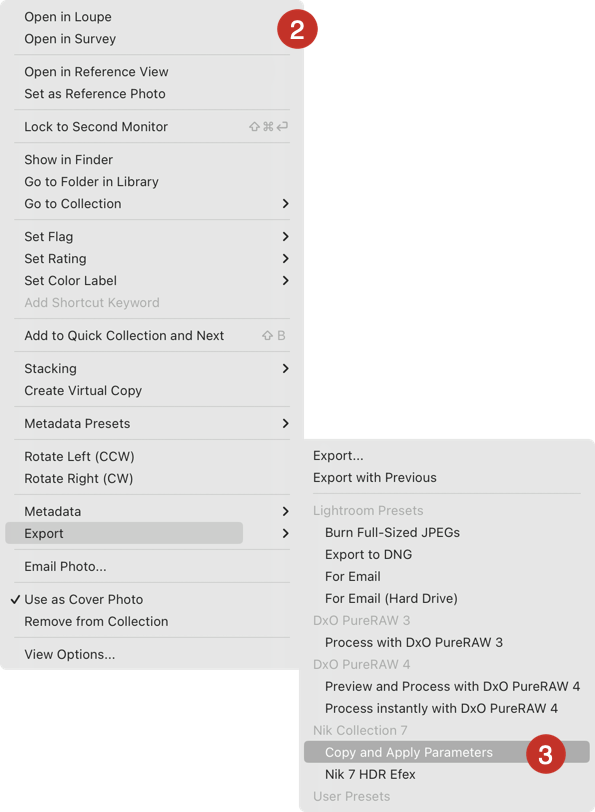
- In the context menu, go to Export > Nik Collection and then select Copy and apply.
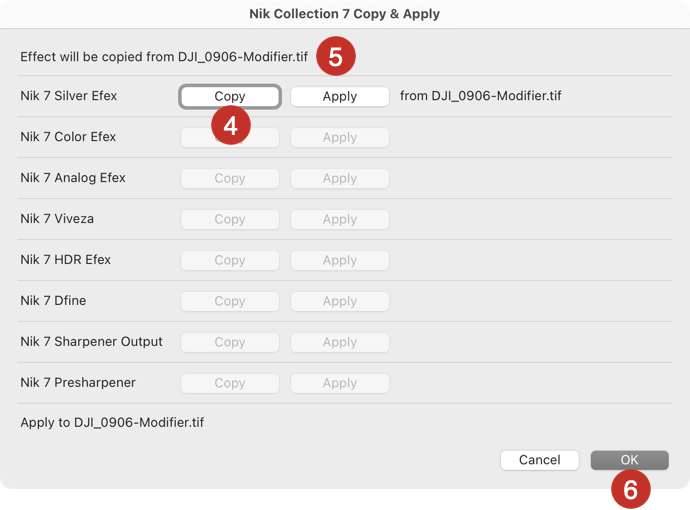
- In the dialog box, click on the Copy button that corresponds to the plug-in you are using.
- The dialog box shows the name of the file from which the associated effects and settings are copied.
- Click OK. The dialog box closes.
Paste the settings to the destination image:
- In Lightroom Classic, select the destination image (or images).
- Right-click and, in the context menu, go to Export > Nik Collection > Copy and apply.
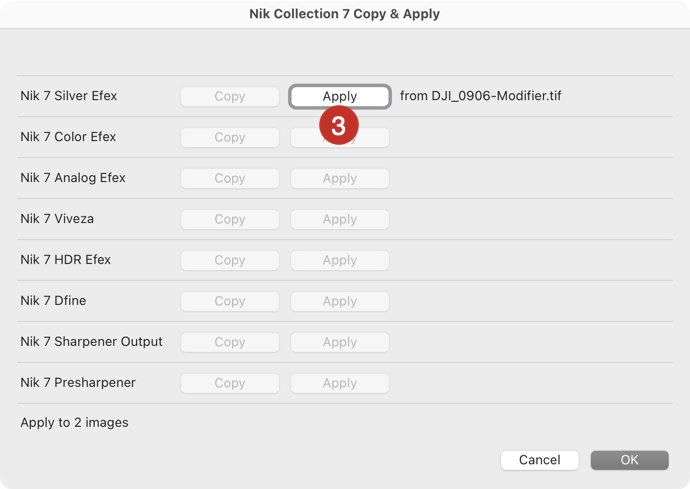
- In the dialog box, click on the Apply button that corresponds to the plugin you are using.
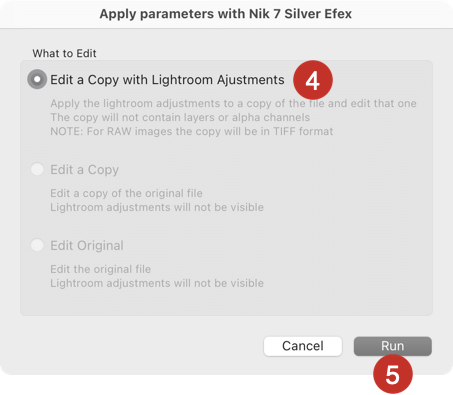
- A dialog box gives you the option of creating a copy. If the destination images are Raw files, only the Edit a copy with Lightroom adjustments option will be available, if the destination images are bitmap files (TIFF, JPEG, etc.), all options will be available, and will allow you to either create a copy or edit the destination image itself.
- Click on Run.
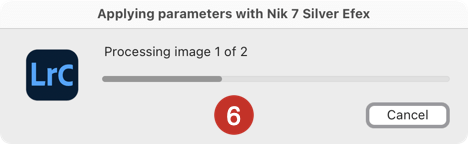
- A series of progress bars from Lightroom Classic and the Nik Collection will show you the current process (no Nik Collection plug-ins will open). If the destination images are Raw files, Lightroom Classic generates the image copies and the Nik Collection effects are applied (if the destination images are bitmap files, the effects will be applied according to the option chosen in step 4).
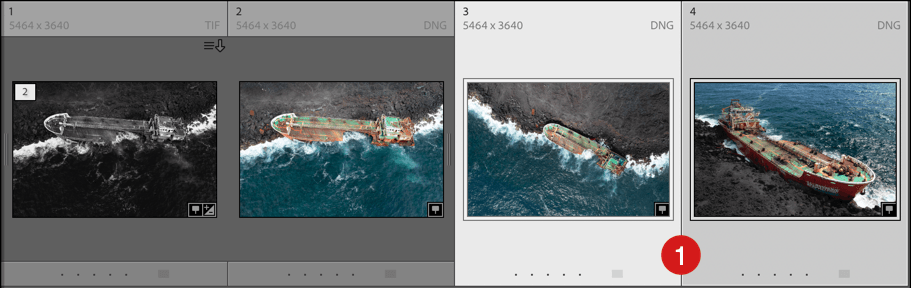
- If you started from a Lightroom Classic folder (and not a collection), the processed images are automatically stacked with the starting image, but the stack is expanded to display the results. Click OK to close the Step 3 dialog box if it is still open.
Workflow with Nik HDR Efex
The workflow for merging photos with Nik HDR Efex is unique and does not go through the Edit In cascading menu, but rather through the Export command.
Direct access
- Make basic corrections to your originals.
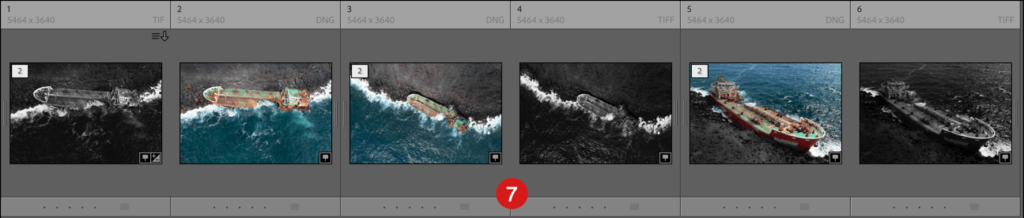
- In a folder or collection, select the images to merge.
- Select the images.
- Right-click and from the cascading menus, select Export and then Nik HDR Efex.
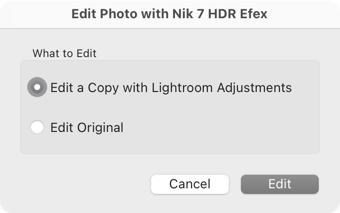
- A dialog box prompts you to choose between processing the originals directly, or creating a copy with the Lightroom settings. If you start from RAW files, and because Nik HDR Efex cannot open RAW files, select Edit a copy with Lightroom Adjustments. If you start from TIFF or JPEG files, you can select Edit originals.
- Lightroom Classic generates the files.
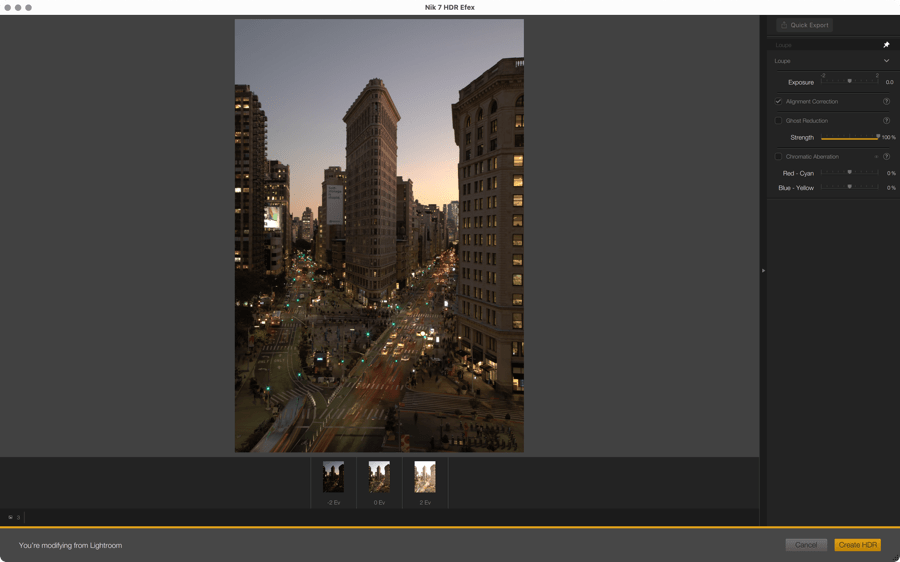
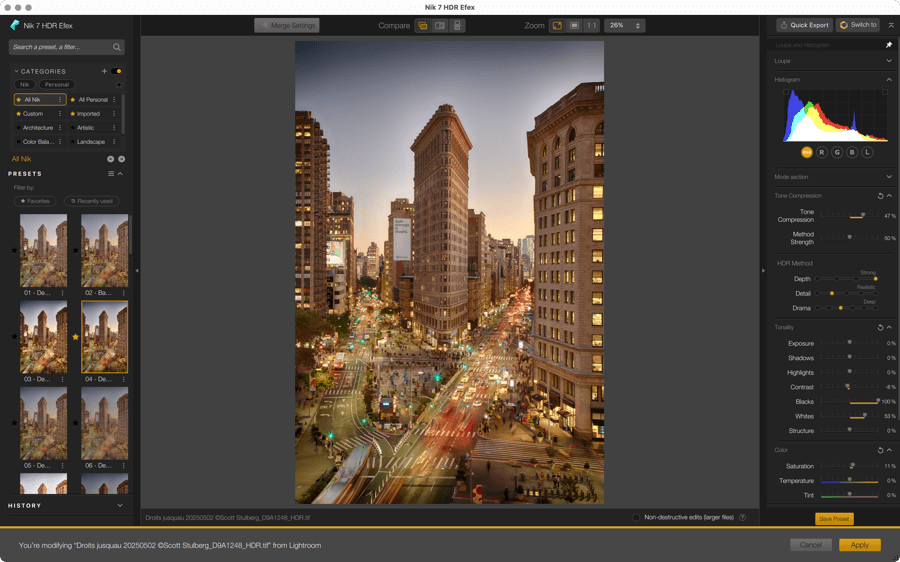
- The Nik HDR Efex Merge window opens. Create the HDR image, edit it in Nik HDR Efex, and then click on Save, or Save all if there are several images, at the bottom right.
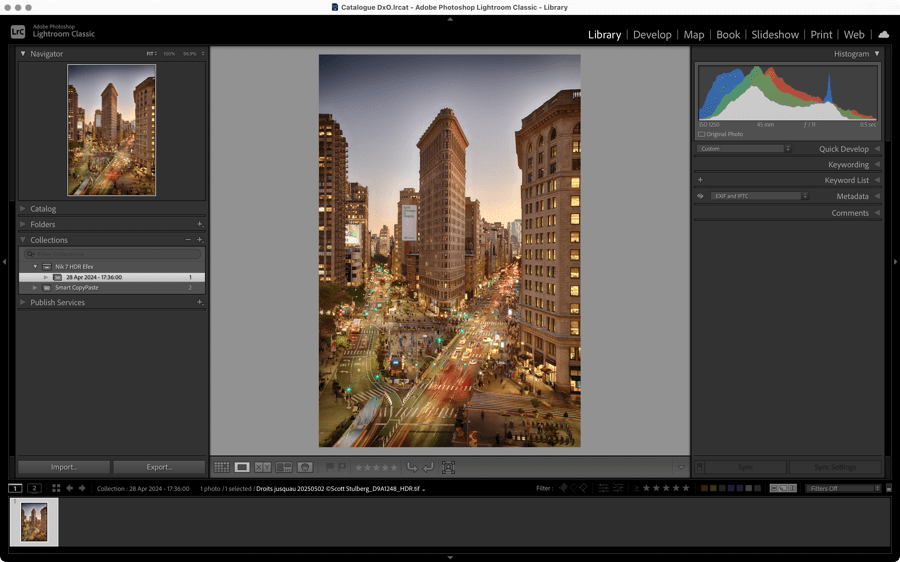
- Lightroom Classic automatically switches to a collection labeled with the return date and time, within a collection set named Nik [version number] HDR Efex, to display the created image. In the original folder or collection, the HDR image is stacked with the originals, and the file name has the suffix _HDR.

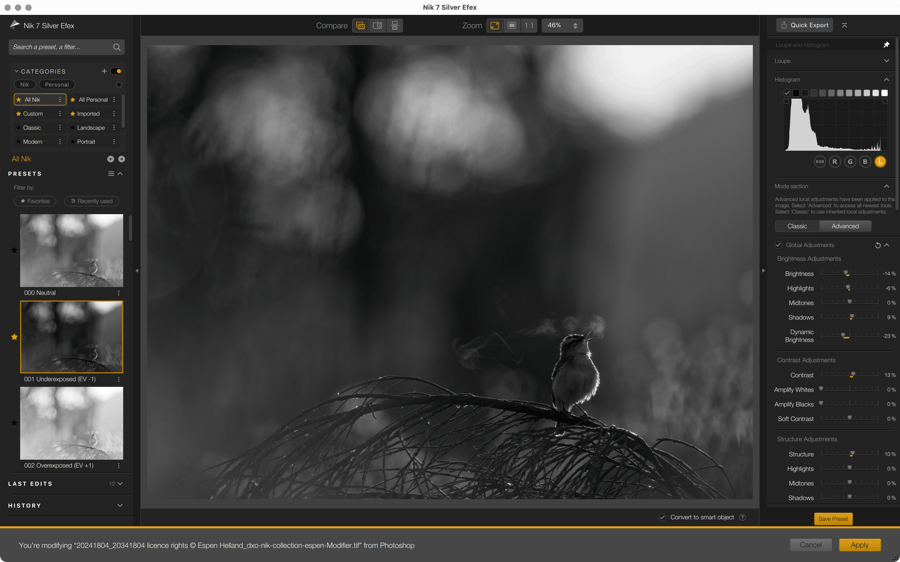
Non-destructive workflow combining Lightroom Classic and Photoshop
From Lightroom Classic, you can benefit from two reversible workflows, one via Photoshop, presented here, the other via the Nik Collection (see the Non-destructive workflow section at the end of this page).
Reversible workflow via Photoshop (smart objects)
First processing:
- In Lightroom Classic, make the basic corrections to your originals.
- In a folder or a collection, select the image (or images) to process in Nik Collection.
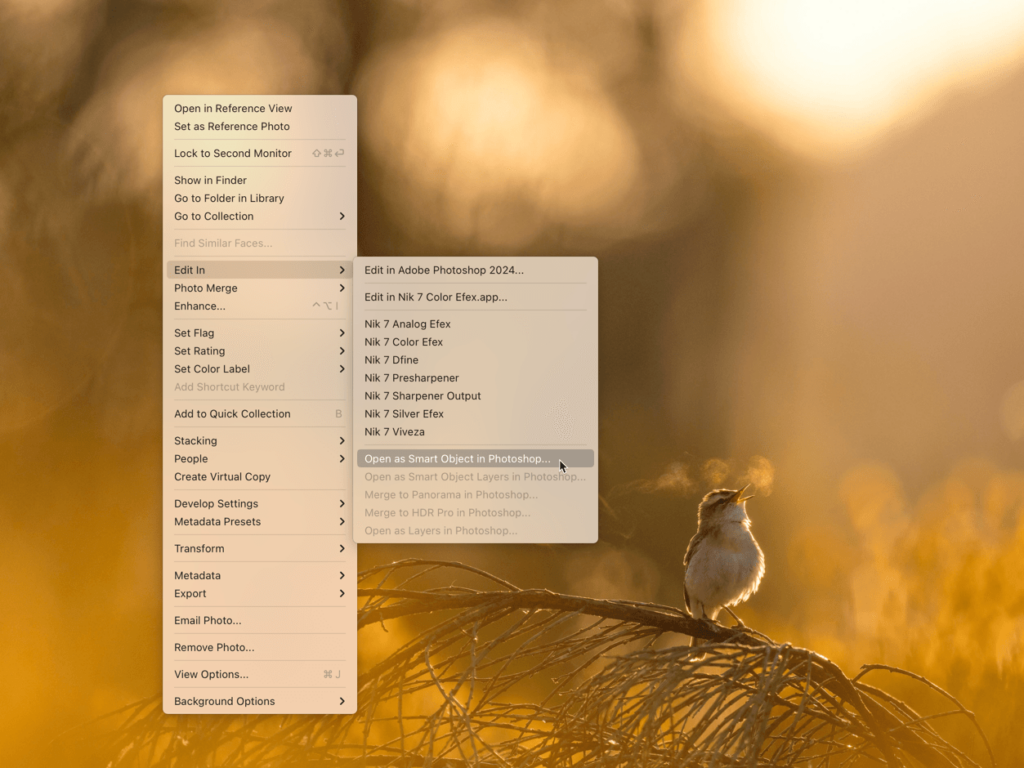
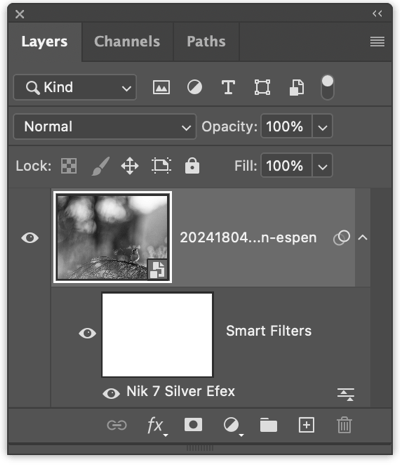
- Right-click and, from the cascading menus, choose Edit In and then Open as Smart Object in Photoshop.
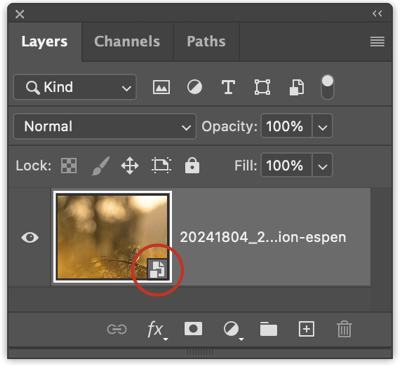
- The image opens as a Smart Object in Photoshop.
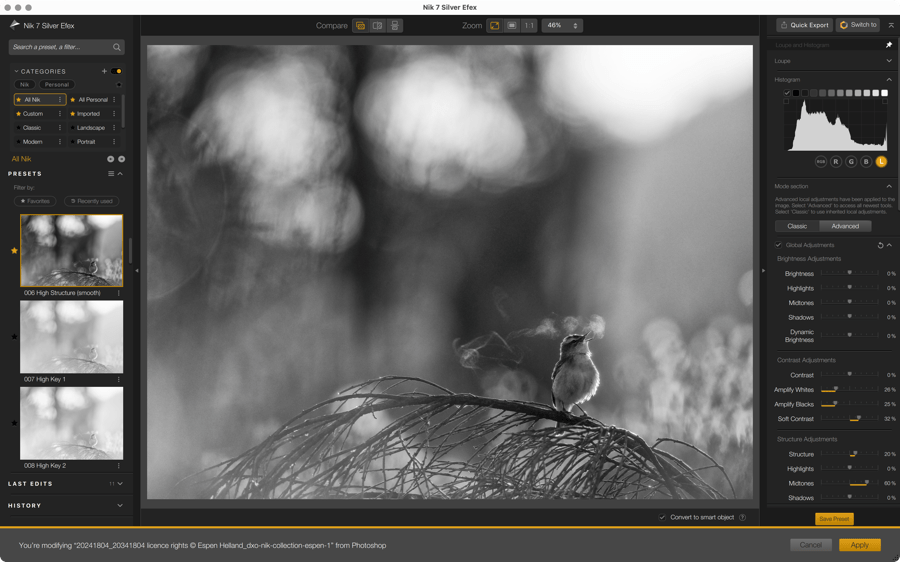
- Process the image in the Nik Collection with the reversible Photoshop workflow, as explained in the chapter Workflow with Adobe Photoshop.
- Back in Lightroom Classic, the processed image is stacked with the original.
Modify the processing:
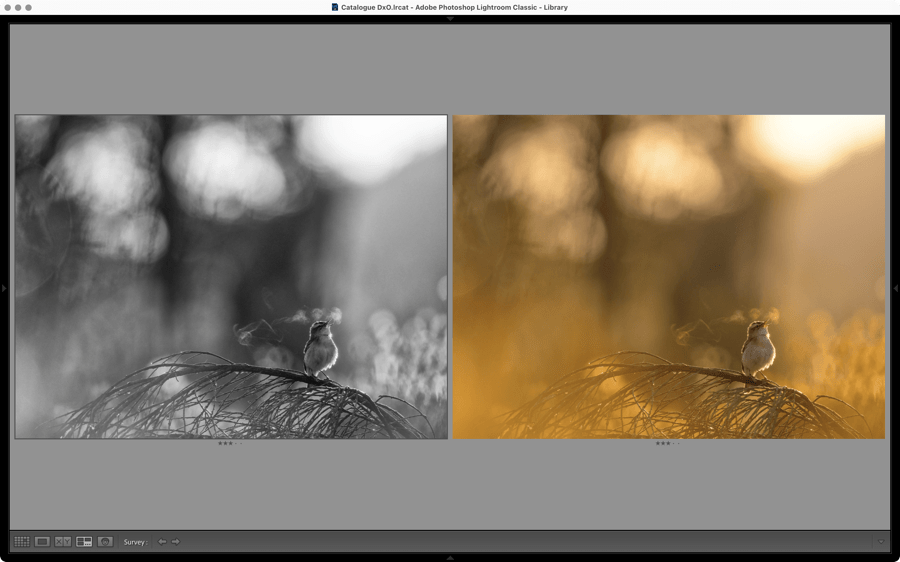
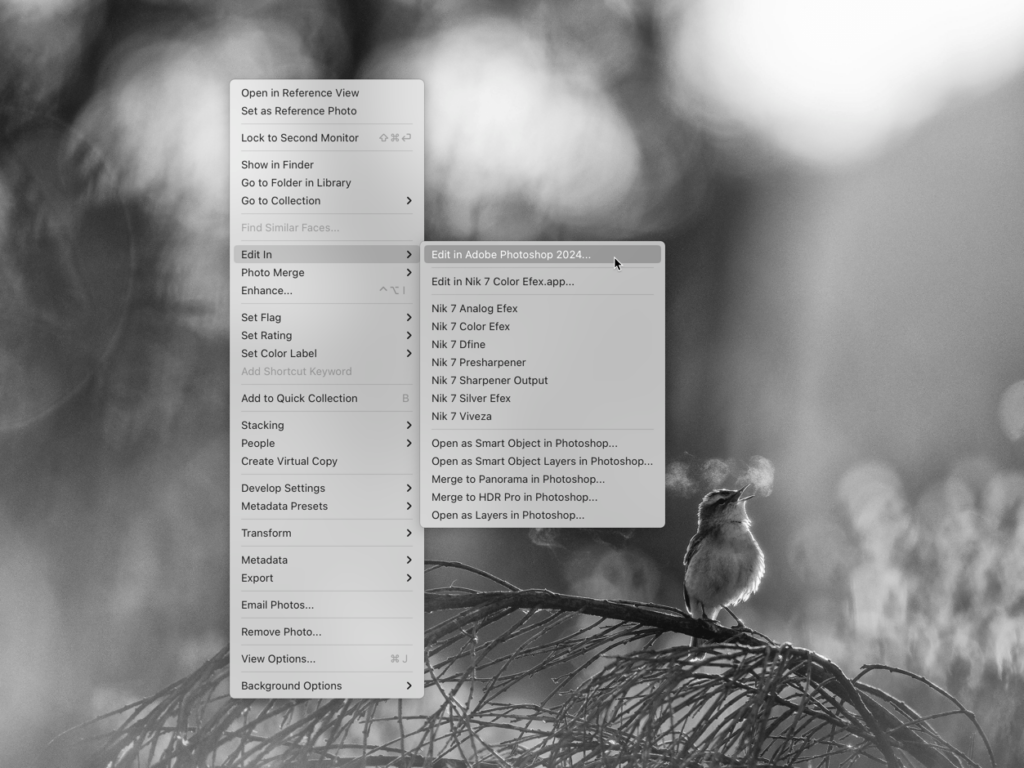
- In Lightroom Classic, select the previously processed image.
- Right-click then Edit in and Edit in Adobe Photoshop (no need to reselect Open as Smart Object in Photoshop).
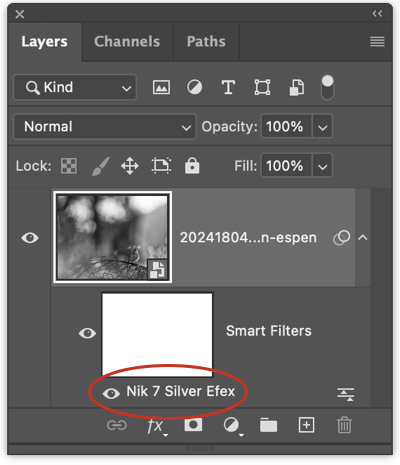
- The image opens in Photoshop, follow the steps explained in the chapter Workflow with Adobe Photoshop, in particular the part devoted to reopening and resuming processing in the Nik Collection.
- After saving in the Nik Collection then in Photoshop, the image returns to Lightroom Classic and its thumbnail is refreshed with the modified processing.
Serif Affinity Photo
The Serif program is an alternative to Adobe Camera Raw and Adobe Photoshop, and you can use the plugins from Nik Collection in it.
Switch to functionality is not available when plugins are launched from Affinity Photo.
Nik HDR Efex works as a Affinity Photo plug-in too, except the merge function.
If the Quick Export mode is used, the files will not show up in Affinity Photo.
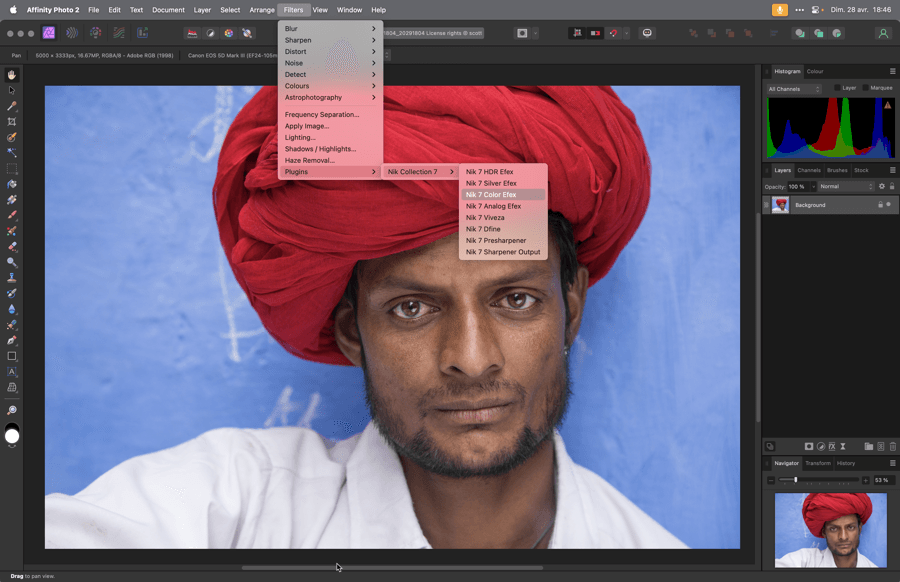
Workflow with Affinity Photo
To process your images in the Nik Collection in Affinity Photo:
- In Affinity Photo, develop your RAW files or process your TIFF, PSD, JPEG, or other files as you normally do (basic corrections, etc.).
- Go to Filters > Modules > Nik Collection and select the plugin you wish to work with.
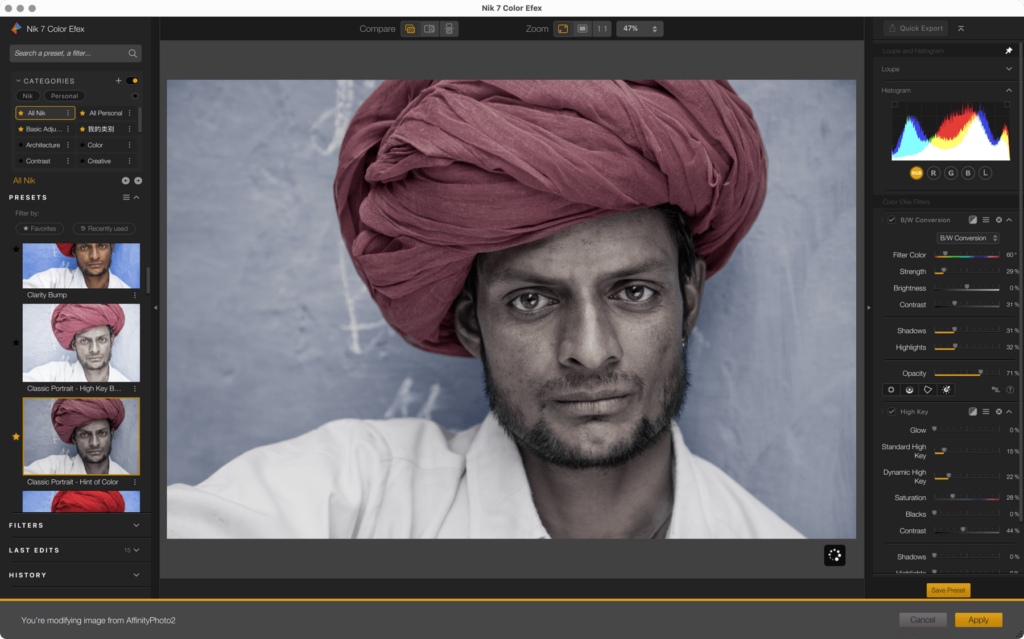
- Once you have finished working with the plug-in, click OK.
- The Nik Collection plug-in will apply the processing and then close.
- The processed image is displayed in Affinity Photo.
- If you want to return to the image at a later time, you can save it in Affinity Photo format (.afphoto extension) via the File > Save or Save as menu.
- If you want to use your image, export it in the desired format via File > Export.
Standalone mode
You can use the Nik Collection plugins in standalone mode without using a host application (Lightroom, Photoshop, etc.), as long as you use TIFF or JPEG files.
In standalone mode, you can open a mix of JPEG and TIFF images.
- On Mac, you can directly launch any Nik Collection plugin as follows:
- If you have added the Nik Collection apps icons in the Dock, click on the icon.
- Right-click on an image and then, in the cascading menus, select Open with and then a plugin.
- On PC, you can directly launch any Nik Collection plugin as follows:
- Double-click on the icon of the desired plugin in the Nik Collection folder on the Start menu, on the desktop shortcut, or on the plugin icon on the Windows Task Bar (bottom) if you have pinned it there.
- Right-click on an image and then, in the cascading menus, Open with and select a plugin.
- The selected plugin opens.
- If you have opened the plugin directly, without an image, you can:
- drag and drop your images in the interface.
- go to the File menu and select Open (a system dialog box lets you select an image to open).
- Edit your image as desired.
- To save, go to the File menu and select Save, the processing is applied to the image and the plug-in will close. The processed image remains in the same format as when it was opened (JPEG > JPEG, TIFF > TIFF).
- If you want to create another version of the image, perhaps in a different format and location, go to the File menu and select Save Image As… A system dialog box allows you to change the name and choose the save location.
- If you have several images open and want to save all your changes at once, even if each one has different processing, select the Save All command from the File menu.
- On Mac, to exit the plugin, go to the menu that bears its name and then choose Quit {plugin name}.
- On PC, to exit the plugin go to the File menu and then select Quit.
Non-destructive workflow
You can benefit from a non-destructive and reversible workflow, to resume or modify your processing, in the following circumstances:
- Works with TIFF files only.
- Can be used in all plugins.
- Accessible via the following :
- Workflow with DxO PhotoLab
- Workflow with Adobe Lightroom Classic
- Standalone mode
The Nik Collection reversible workflow is not available in Serif Affinity Photo, nor in Adobe Photoshop, which has its own reversible workflow using smart objects.
The principle of the reversible, non-destructive workflow is based on encapsulating a second TIFF file in the TIFF file generated during transfer from the host application to the Nik Collection (or during the workflow in standalone mode). This doubles the size of the file that contains an input TIFF, an output TIFF, and the parameters and settings applied in the Nik Collection.
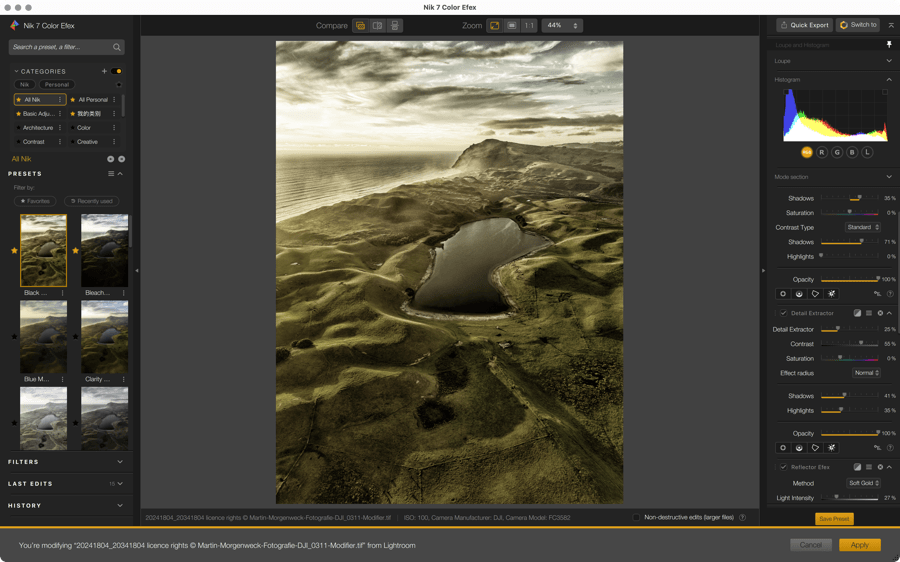
To take advantage of this workflow, simply check the Save and edit later option, next to the plug-in Save button (files will be larger).
Non-destructive workflow with DxO PhotoLab
Initial processing:
- Select a RAW, DNG or TIFF file in the Image Explorer. You can also select multiple images.
- Click the Nik Collection button.
- In the Plug-in Selector, click Settings.
- In the Edit in dialog box, choose Process as TIFF and export and confirm by choosing OK.
- In the Plugin Selector, select the desired plugin.
- The image will open in the selected plugin.
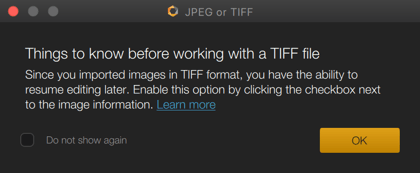
- A dialog box will be displayed in two cases:
- If it is a TIFF file, you are prompted to use the reversible workflow.
- If it is a JPEG file, you are prompted to use the TIFF format to take advantage of the reversible workflow.
- In both cases, you can select Do not display again.
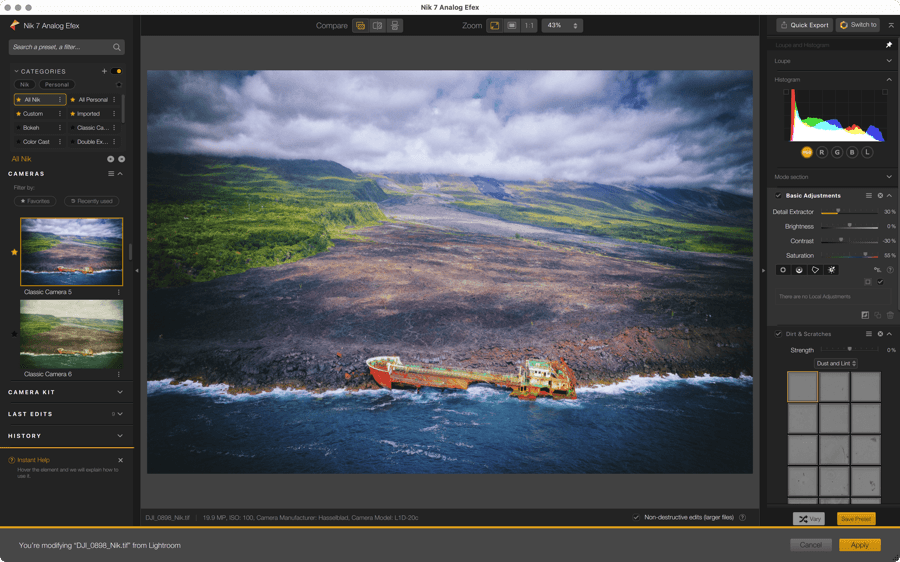
- Process your image.
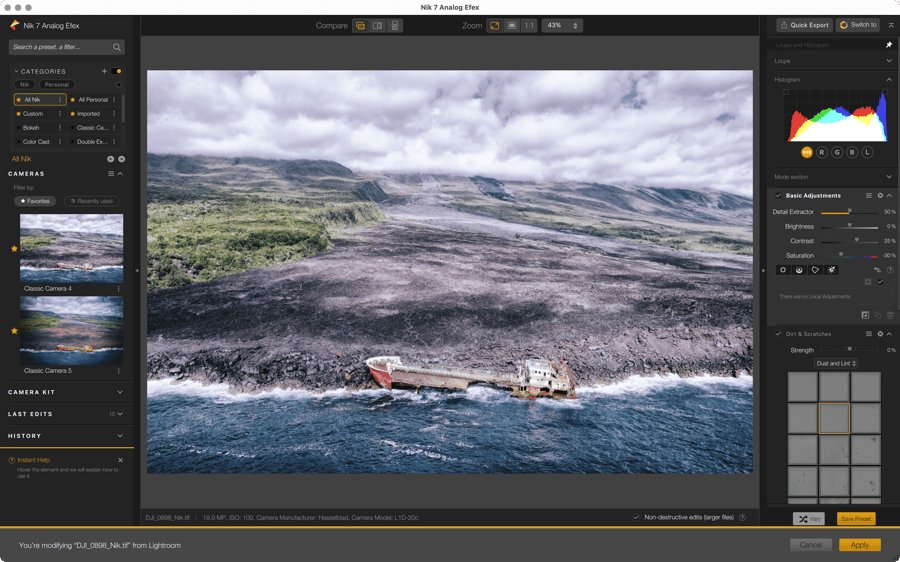
- Before saving, check the Save and edit later box. The checkbox is not active if your image is not in TIFF format.
- Click Apply or Apply all if there are multiple images.
- Processing is applied to the image, and then the plugin closes.
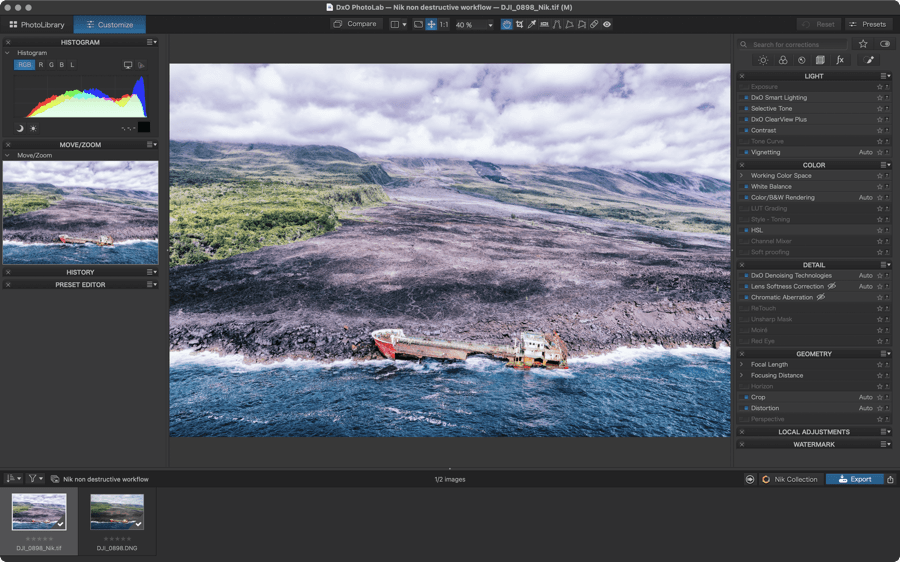
- The processed image is visible in DxO PhotoLab.

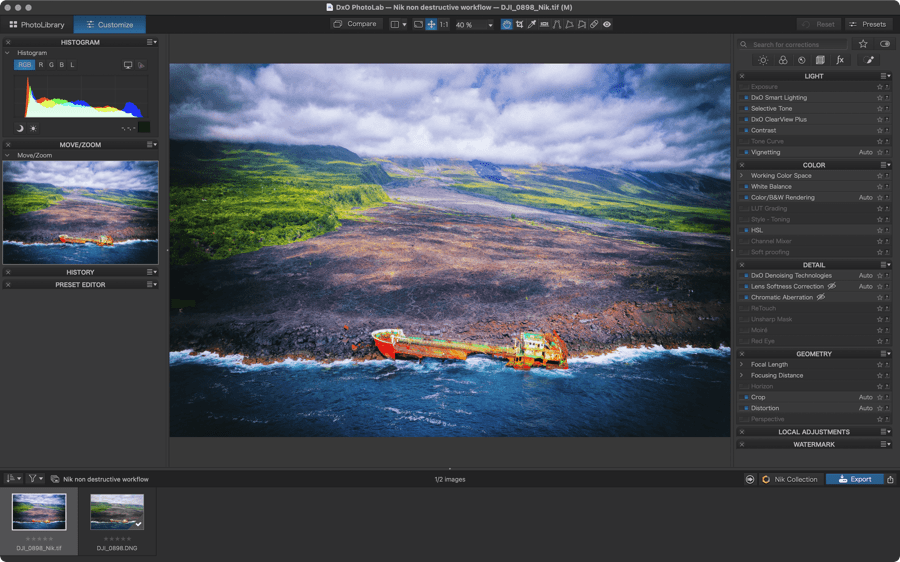
Modifying the processing (one or more images):
- Select the return TIFF file from the Nik Collection.
- Click the Nik Collection button.
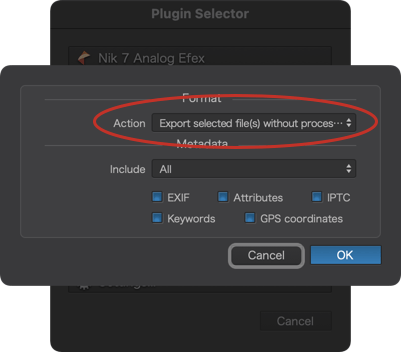
- In the Plug-in Selector, click Settings.
- In the Edit in dialog box, choose Export selected file(s) without processing and select OK to confirm.*
- In the Plugin Selector, click on the plugin you used for the first processing. (If you choose another plugin this time, its effects combine with the effects applied during the first processing.)
- The image will open in the selected plugin.
- Modify the processing of your image.
- Click Save.**
- Processing is applied to the image, and then the plugin closes.
- The processed image is visible in DxO PhotoLab.
* Choosing this option is crucial, because if you select one of the other two, you will not be able to change the processing.
** If you want to keep the ability to repeatedly change the processing of your image, make sure that you have checked the Save and edit later box.
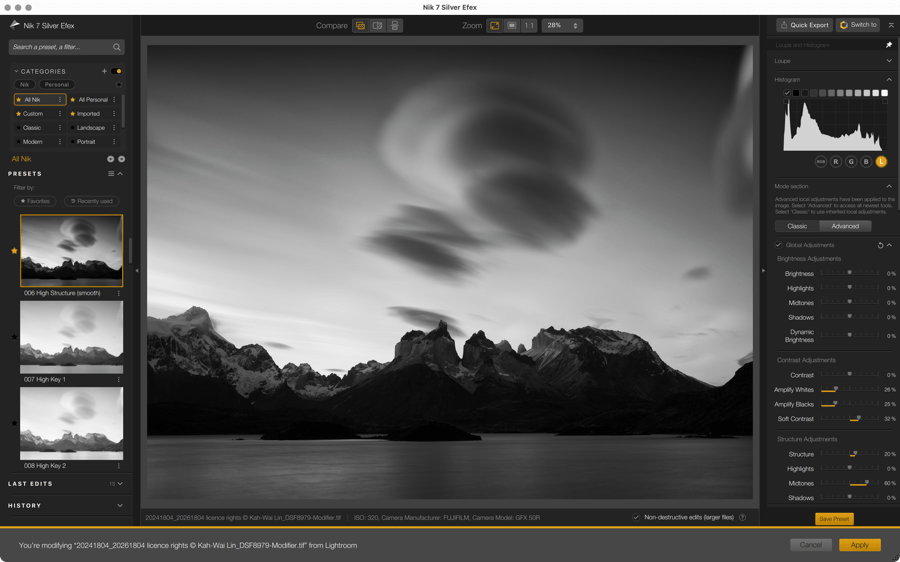
Non-destructive workflow with Adobe Lightroom Classic
Initial processing (you can process one or several images):
- Select a file.
- Go to the Edit in cascading menu and select one of the Nik Collection plugins*.
- In the Edit Photo With… dialog box, in the File Copy Options section, verify that the format is TIFF.
- The image will open in the selected plugin.
- A dialog box will be displayed in two cases:
- If it is a TIFF file, you are prompted to use the reversible workflow.
- If it is a JPEG file, you are prompted to use the TIFF format to take advantage of the reversible workflow.
- In both cases, you can select Do not display again.
- Process your image.
- Before saving, check the Save and edit later box.
- Click Apply or Apply all if there are multiple images.
- Processing is applied to the image, and then the plugin closes.
- The processed image returns to Lightroom Classic, stacked with the original.
* Nik Perpective does not support a reversible workflow. For Nik HDR Efex, access is via Export (see the Adobe Lightroom Classic page).


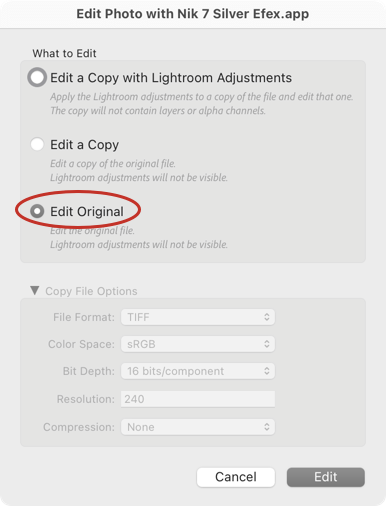
Modifying the processing (one or more images):
- Select the return TIFF file from the Nik Collection.
- Go to the Edit In cascading menu and select the plugin used in initial processing.
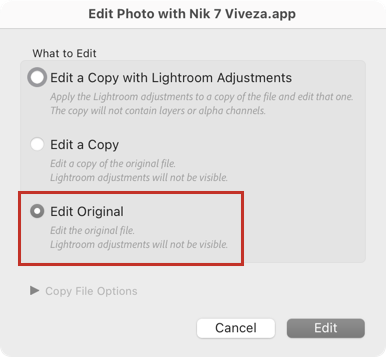
- In the Process Photo With… dialog box, select Edit Original or Edit Copy*.
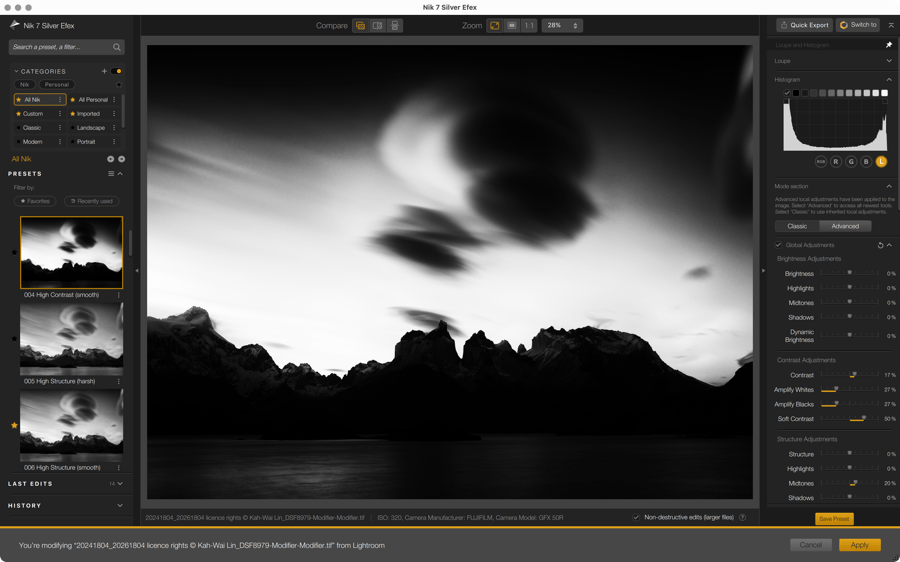
- The image will open in the selected plugin.
- Modify the image processing as desired**.
- Make sure the Non-destructive edits (larger files) checkbox is checked, otherwise uncheck it if you do not plan to edit it again**.
- Click Save.
- Processing is applied to the image, and then the plugin closes.
- The processed image returns to Lightroom Classic, stacked with the original.

* The Edit a Copy with Lightroom Adjustments option does not let you reverse the processing.
** You can re-edit the image as many times as you like, as long as you do not clear the Save and edit later check box.