

Nik Sharpener is composed of two separate modules, for two different stages of image processing: Nik Presharpener, for preliminary sharpening, and Nik Sharpener Output, for final sharpening.
IMPORTANT
This page presents Nik Sharpener’s specific features and tools. All the tools common to the other Nik Collection plug-ins are presented in the Interface and common tools page of this user guide. Here you’ll find information on the following points:
- Preferences.
- Interface.
- Categories, filters and presets management.
- Local adjustments.
Nik Presharpener
The Nik Presharpener plugin, as its name suggests, is intended for the preliminary sharpening of RAW files, which are generally softer due to several possible factors, including the presence of a low-pass filter in front of the sensor; in-camera processing; and processing applied to a file upon its import into RAW development software.
To take full advantage of Nik Presharpener, we recommend that you disable any in-camera sharpening and sharpening in the host RAW file processing software.
Nik Sharpener Output
The second plugin, Nik Sharpener Output, is intended for sharpening after the image development and processing phase, depending on the destination and the output medium (electronic distribution or printing, which require very different settings).
Preferences (Nik Sharpener Output)
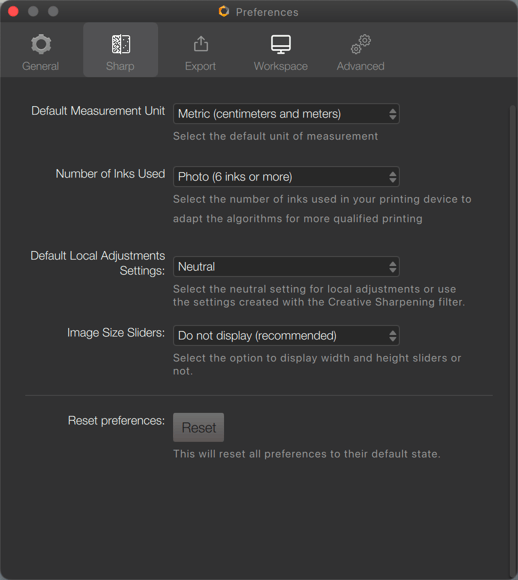
In the Sharp tab of the Preferences window, Nik Sharperner Output lets you configure the sharpening tools and calibrate the output file sharpening settings:
- Default Measurement Unit: Choose between metric and imperial values.
- Number of Inks Used: Allows you to adapt the accentuation algorithms to be used according to the type of printing: Normal, Photo (default setting) and Four-Tone.
- Default Local Adjustment Settings: From this menu, you can choose how a new local adjustment will function: on Neutral, the sliders will be set to 100% Output intensity and to 0% for the other Structure, Local Contrast and Focus sliders. The other option, Retain Creative Sharpening Settings, allows you to apply your own sharpening settings by default.
- Image Size Sliders: Choose whether or not to display the Image Width and Image Height sliders in the Output Sharpening section for all output types except Screen.
To save your options, click OK, otherwise click Cancel.
Special Display Modes


Nik Presharpener and Nik Sharpener Output offer specific display modes, to facilitate sharpening visualization:
- Sharpened Image: Normal image display with sharpening settings.
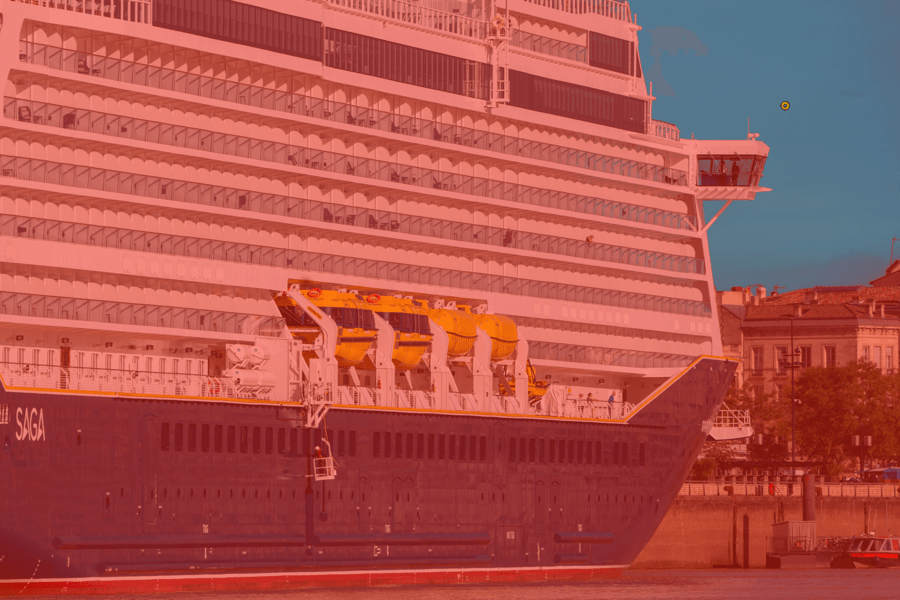
- Effect Overlay displays a red/orange color mask when placing a local adjustment or working with color ranges. This mask allows you to visualize the stacking of corrections: the more stacks, the denser the color mask becomes.
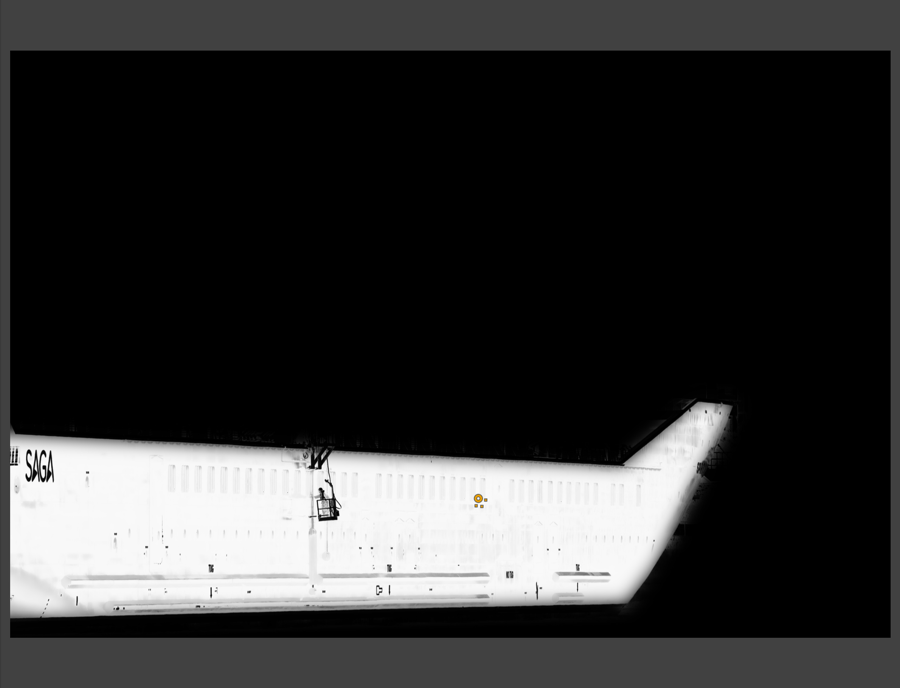
- Effect Mask shows the effect of highlighting with local adjustmentss or color ranges. White indicates a 100% application of sharpness enhancement, black indicates no sharpness enhancement, and intermediate gray values indicate more or less sharpness enhancement.
- Sharpening soft proof (Nik Sharpener Output): displays an sharpening preview according to the output options and physical size of the image. A scale is embedded in the lower left corner of the image to help judge the sharpness according to the size of the image. In short, it is an on-screen way of proofing sharpness.
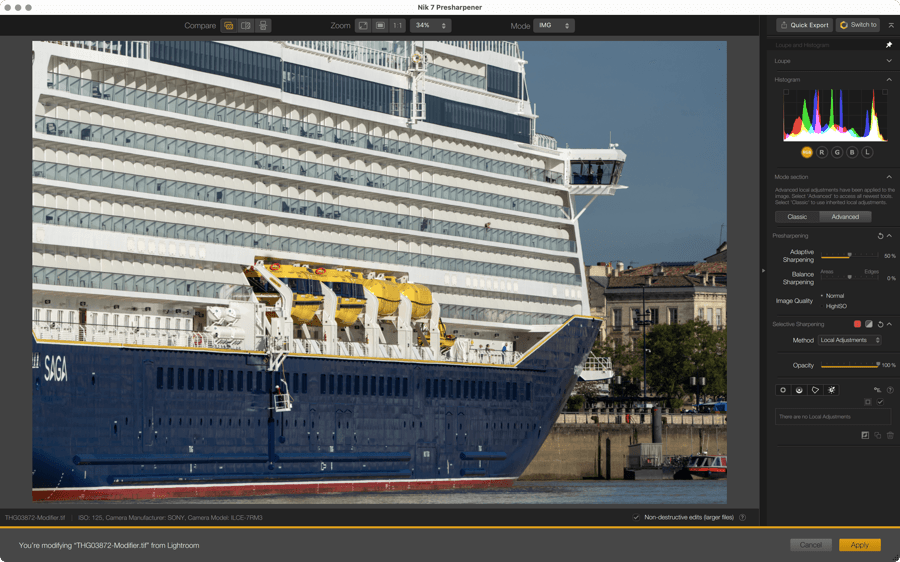
Sharpened image (Nik Presharpener)
The Nik Presharpener module is designed to compensate for the loss of sharpness in your image during capture, due to the presence of a low-pass filter in front of the camera sensor, but it can also be used in a complete sharpening workflow, from capture to creative processing and output (the latter being dealt with by Nik Sharpener Output), when you want to keep full control over this important phase of the workflow. In this case, regardless of the original format of the file to be processed, it is advisable to disable any other sharpening tools, either in the camera or the host application, especially if it is RAW processing software.
- Enhancing overall sharpness
- Sharpening using local adjustments.
- Enhancing sharpness with color ranges
RAW Presharpening
Once your image has been opened in Nik Presharpener, the simplest method, which suits most images, involves increasing overall sharpness using the tools you will find in the right panel, under Presharpening:
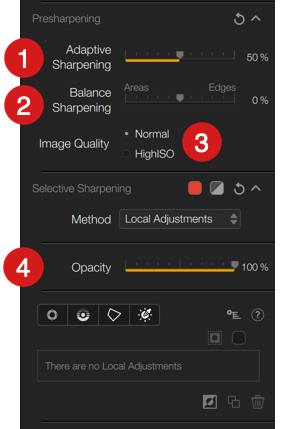
- Adaptive Sharpening: Set by default to 50%, this slider strengthens (to the right) or attenuates (to the left) sharpness based on algorithms capable of taking into account the presence of elements in the image such as outlines, details, and flat areas. The rule here is to sharpen the image decisively but without exaggeration. You can control this by unchecking the Preview* box in the top bar to compare the image after and before sharpening (feel free to zoom in at 100% or compare using the magnifying glass*).
- Balance Sharpening: this slider is centered by default; move it to the left to sharpen areas of the image, or move it to the right to flatten areas and emphasize edges. In general, however, we advise leaving the cursor as it is, and, if you need to emphasize something within the contours, use the selective methods discussed below instead.
- Image Quality: This function is set to Normal by default, the High ISO option (click to toggle) lets you adapt the sharpening algorithms to a higher, therefore noisier, capture sensitivity which is likely to be amplified by any heightened sharpness.
- Opacity slider: This slider, set at 100% by default, acts globally and can be used with selective adjustments.
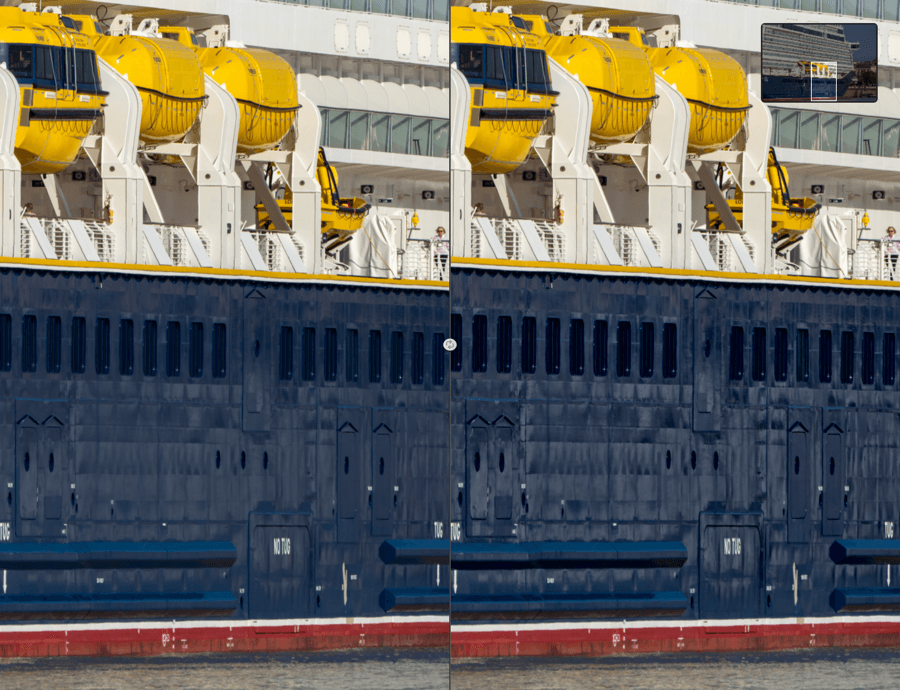
*When sharpening, you can compare the image before and after correction by zooming in on the image, or by using the magnification Loupe, the Preview button, or the different display modes available in the top bar. For more information about these tools, see the Interface and keyboard shortcuts page.
Sharpening using local adjustments
Local adjustments let you sharpen in a very precise manner, on parts of the image rather than its entirety. For example, in a portrait, you may want to sharpen the eyes and mouth but not the skin, and, in a landscape, you may want to sharpen the ground, but not the sky (especially a blue sky where noise could quickly appear).
In the Selective Sharpening section on the right, a menu lets you choose between two metrics, Local Adjustments and Color Ranges.
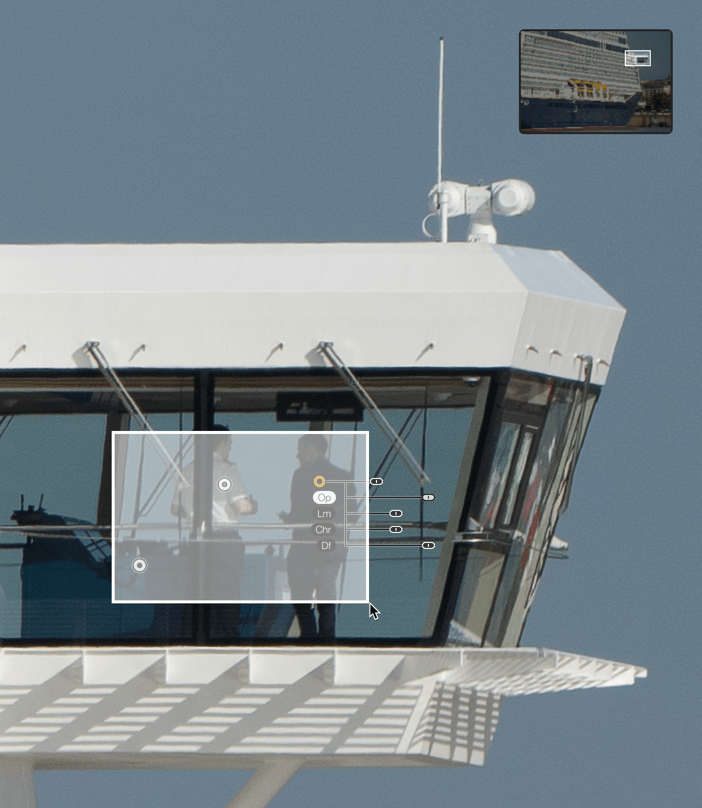
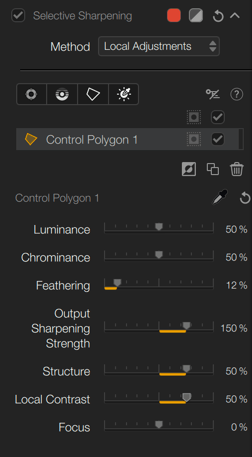
Local adjustment tools have the following sliders:
- Color Selectivity :
- Lm (Luminance).
- Chr (Chrominance).
- Df (Diffusion).
- Sharpening setting:
- Op (Opacity).
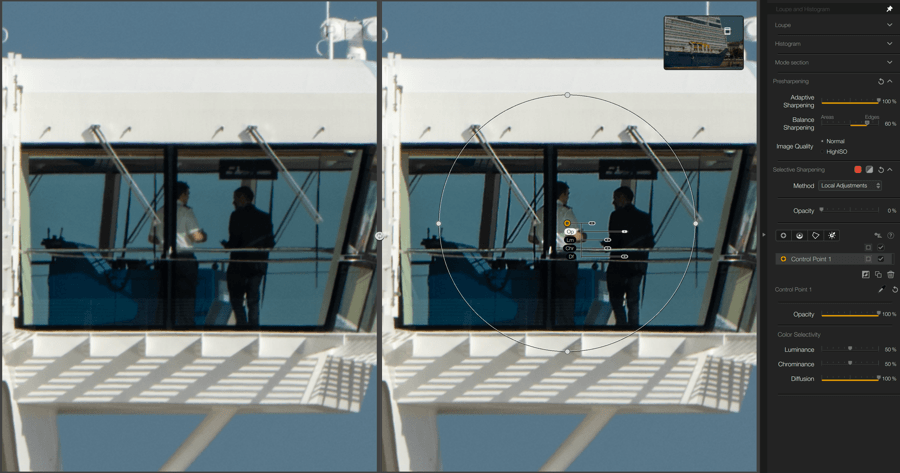
- From the drop-down menu, choose Local Adjustments.
- Click on one of the add local adjustment tool buttons.
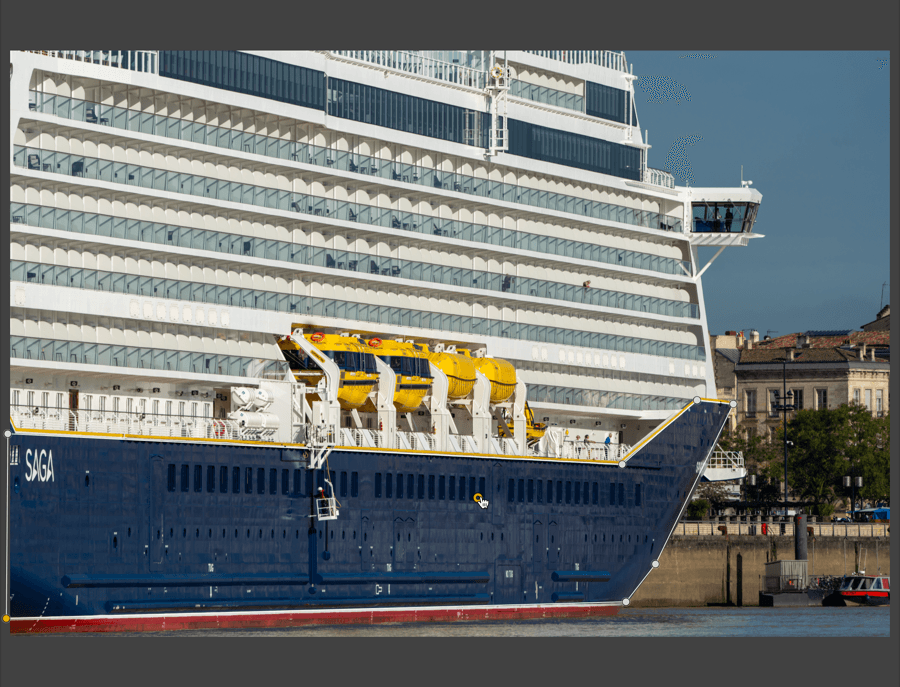
- Click the place in the image where you want the control point, line, polygon or luminosity mask to be applied.
- The Opacity slider in the Presharpening section automatically switches from 100% to 0%.
- Set the size of the control tools or the luminosity range.
- Increase the sharpness with the adaptive sharpening and/or sharpening balance sliders in the RAW presharpening section.
- Adjust the sharpness as you wish using the Opacity slider on the local adjustment tools (defaults to 100%). You can use the 2nd Opacity slider in the Selective sharpening section.
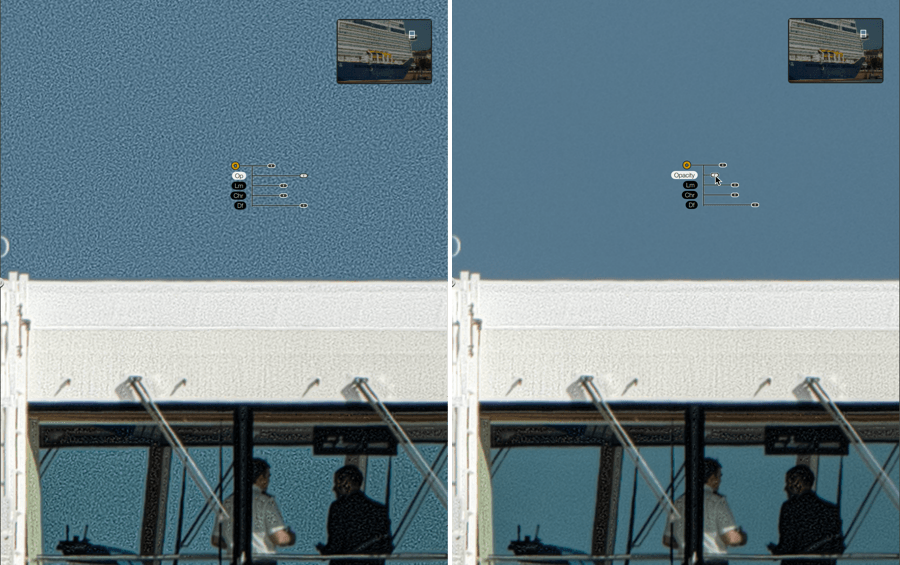
Linking local adjustments and using neutral local adjustments
Nik Presharpener offers a perfect example of the use of local adjustments to apply sharpening to a large area, or to protect a portion of an image from the application of sharpening.
To correct a large area of the image, set additional local adjustment tools and drag a rectangle over several local adjustment dots. In this case, you can simply move one slider to make the emphasis apply equally to all the others.
To protect an area from sharpening, select a local adjustment tool while pressing the Alt/Option key and apply it to the area of your choice. The sliders will be set at their default value and, thus, protect the area from sharpening.
Enhancing sharpness with color ranges
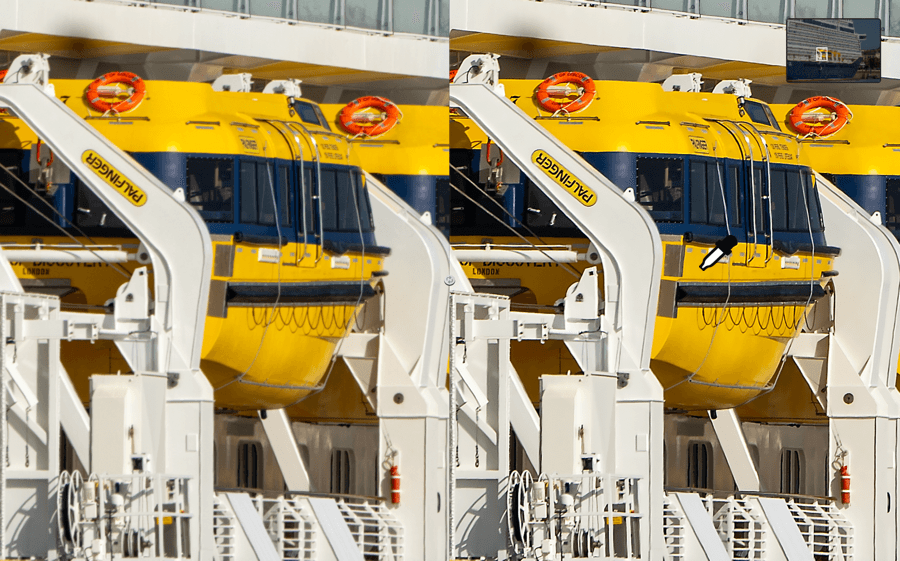
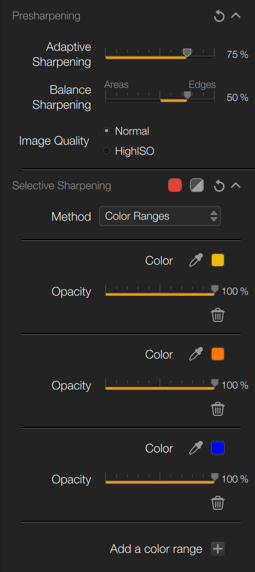
Alternative method of sharpening: by color range, selected in the method menu, in the selective sharpening section. By default, Nik Presharpener offers you three ranges: red, orange, blue, represented by tiles accompanied by an eyedropper, which will allow you to select colors directly in the image.
- Click on an eyedropper to activate it.
- Place it in the image, then click.
- The corresponding color is sampled and indicated in the small tile.
- Increase sharpness with the adaptive sharpening and/or sharpening balance sliders.
- Adjust sharpening with the intensity slider under each color range (defaults to 100%).
- For another color, click on another eyedropper and repeat the previous steps.
To add a color range, click on the “+” button below the list, to display a tile (in pale violet), the eyedropper, and the associated sliders. You can add as many ranges as you wish, and you can remove them individually by clicking on their “-” (minus sign) button.
Note that the local adjustments can be combined with the color ranges.
Final output sharpening (Nik Sharpener Output)
The Nik Sharpener Output plugin allows you to prepare and sharpen your image in a creative way, depending on its destination (electronic publishing, printing, circulation) and on its size and resolution. This last stage of sharpness work comes after the following steps:
- Initial and Creative sharpening in the host application
- Or initial sharpening in Nik Presharpener.
Output Sharpening and Creative Sharpening in Nik Sharpener Output are closely related. Firstly, you use the Output Sharpening tools in response to the type of media you are going to put your image on, and then use the Creative Sharpening tools to enhance the final output. On this page you will find instructions for:
- Output sharpening
- Creative Sharpening
- Selective Sharpening
- Presets
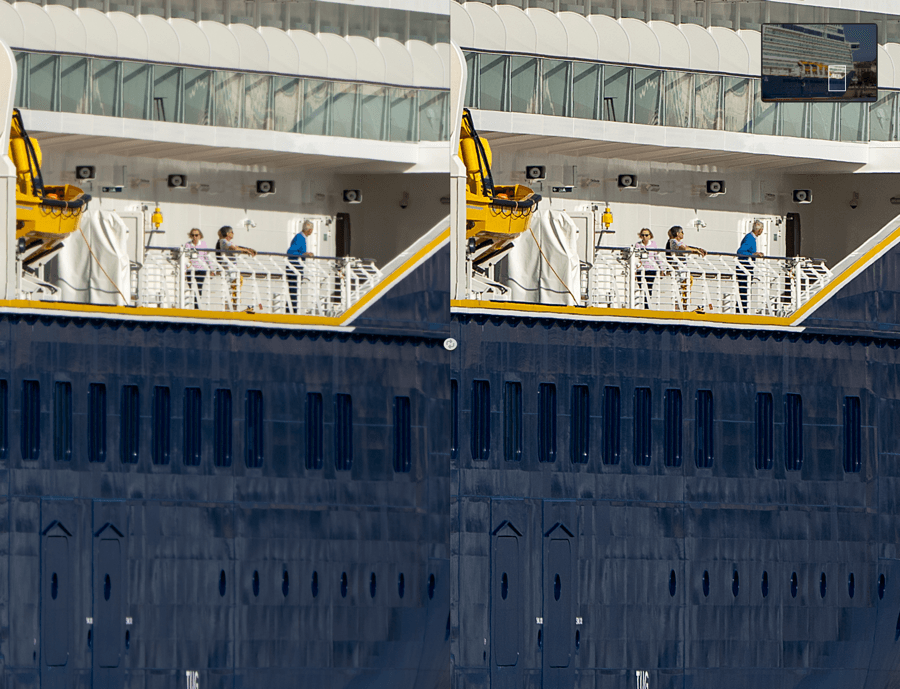
When working on the sharpness of your images, remember to use the comparison and verification display modes, as well as the magnification Loupe and Zoom functions, the latter being essential for checking the sharpness and the possible appearance of artifacts and sharpening halos along the edges. You will find all the essential information on the Interface and keyboard shortcuts page.
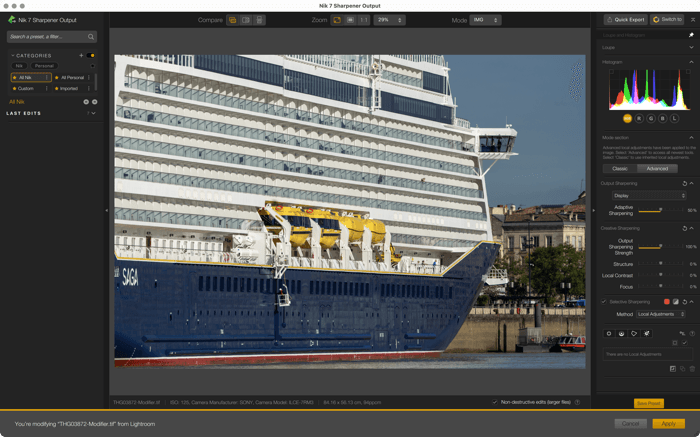
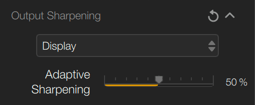
Output sharpening
In this section, you will determine the output media for your image, between on-screen display, which is the default choice, and a number of methods for printing on paper. This is the first step before moving on to creative sharpening, since for the latter you will not use the same settings for a screen and an inkjet printer. To choose the output media, click to scroll down the list (the options depend on the output type, although all types may share some settings in common):
- Display: Sharpens the image for display on a computer screen (electronic publishing, web gallery, etc.).
- Adaptive Sharpening: Set to 50% by default, enhances or reduces overall sharpness (it works similarly to the same slider in Nik Presharpener).
- Inkjet: Enhances the sharpness of an image printed on an inkjet photo printer.
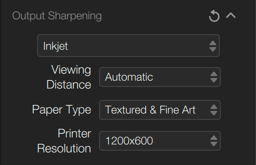
- Viewing Distance: Set to Auto by default, adjusts the sharpness according to the distance from which the viewer will view the print. Five distances are provided; the farther away the observer is, the less detail they will perceive. Auto distance is a conservative approach based on the diagonal size of the image, and we recommend using this option, especially if you do not know how the print will be viewed. If you have chosen the Sharpening Software Proof display option, in the top bar, and you select a distance from the menu, your image will be displayed at a smaller size to simulate the effect of viewing distance.
- Paper Type: This menu offers several choices of paper (matte, glossy, etc.). Sharpness is influenced by the way the ink dots are absorbed by the paper, and by it’s texture.
- Print Resolution: Here you will have to choose the same setting as in the printer driver, and not the “commercial” resolution of your printer. The values are expressed in length x width and in DPI (dots per inch). In the menu at the very bottom, you can enter a value, by going to User Defined, then clicking on Empty to display the input fields.
- Image Width/Image Height: Use these sliders to determine the physical size of the print. Normally, they are not displayed, so you must go to Settings > Output Sharpening Settings > Image Size Sliders > Display.
3. Continuous Tone: Sharpens prints in the photo lab (unless your lab also uses inkjet).
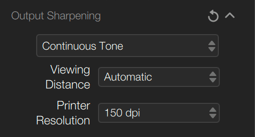
- Viewing Distance*
- Print Resolution: You can choose from several values expressed in DPI (150, 300, etc.), and you can also enter a value in the Empty field.
- Image Width/Image Height*
4. Halftone: Enhances the sharpness of images for print media (newspapers, magazines, etc.).
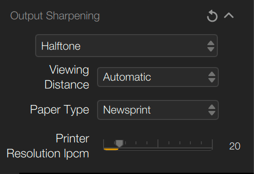
- Viewing Distance*
- Paper Type: Select the type of publication, newspaper, coated paper, glossy paper, etc.
- Print Resolution: The slider lets you set the lpcm (lines per cm) value, according to the guidelines of the publication where your images will be printed.
- Image Width/Image Height*
5. Hybrid Device: You can apply this option if you do not know whether your images will be broadcast (screen) or published (print).
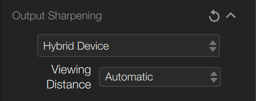
- Viewing Distance*
- Image Width/Image Height*
* For more details, refer to the function description in section 2, Inkjet, above. Inkjet.
Creative Sharpening

Once you have established how to adjust the sharpness of your images because of their destination and output media, it is time to move on to the creative part of the sharpening process, either globally, or with selective tools (local adjustments and color ranges), discussed in the next paragraph, which use the same sliders and algorithms.
The Creative Sharpness section in the right panel offers the following tools:
- Output Sharpening Strength: This overall sharpness slider allows you to modulate all other settings. The default value is 100%; you can de-emphasize the sharpness to the left, and amplify it to the right.
- Structure enhances or attenuates textures, without affecting the sharpness of the edges.
- Local Contrast: By acting on the micro-contrast of details, this slider lets you give your image more impact (towards the right) or, on the contrary, diminish the details (towards the left).
- Focus allows you to restore sharpness to elements of the image that are slightly out of focus by moving the slider to the right. By adjusting the slider to the left, you introduce a blur effect, as if the lens focus had been shifted.
Selective Sharpening
Sharpening using local adjustments
Local adjustment tools let you accurately sharpen just parts of the image rather than all of it. In the selective sharpening section, on the right, a menu lets you choose between two methods, Local Adjustments and Color ranges, the latter of which will be discussed in the next paragraph.
The local adjustments tools have the following sliders:
- Color Selectivity :
- Lm (Luminance).
- Chr (Chrominance).
- Df (Diffusion).
- Sharpening setting:
- Output sharpening strength*.
- Str (Structure)*.
- LC (Local Contrast)*.
- F (focus)*.
- From the drop-down menu, choose Local Adjustments.
- Click on one of the add local adjustment tool buttons.
- Click the place in the image where you want the control point, line, polygon or luminosity mask to be applied.
- Set the size of the control tools or the luminosity range.
- Apply one of the 4 available corrections:
- Output sharpening strength*.
- Str (Structure)*.
- LC (Local Contrast)*.
- F (focus)*.
* These sliders are the same as those in the Creative sharpening section. See the paragraph concerned to learn more about these tools.
Linking local adjustments and using neutral local adjustments
Nik Sharpener Output offers, like Nik Presharpener, a perfect example of the use of local adjustments to apply sharpening to a large area, or to protect a portion of an image from the application of sharpening.
To correct a large area of the image, set additional local adjustment tools and drag a rectangle over several local adjustment dots. In this case, you can simply move one slider to make the emphasis apply equally to all the others.
To protect an area from sharpening, select a local adjustment tool while pressing the Alt/Option key and apply it to the area of your choice. The sliders will be set at their default value and, thus, protect the area from sharpening.
Enhancing sharpness with color ranges
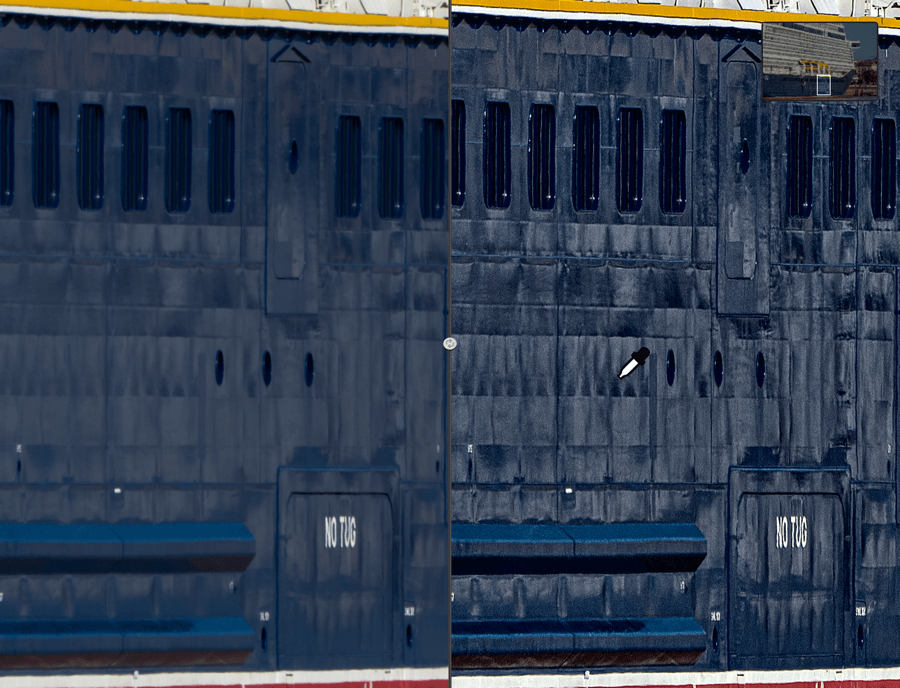
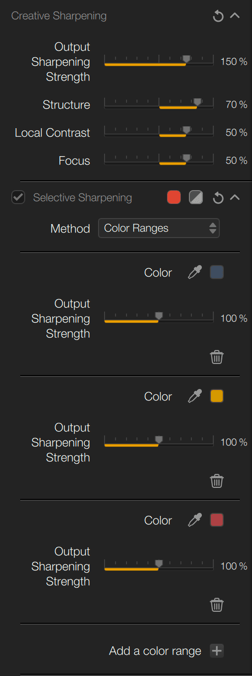
In the Selective sharpening section, from the Method menu, select Color Ranges. By default, Nik Sharpener Output offers you three ranges: red, orange, blue, represented by tiles accompanied by an eyedropper, which will allow you to select colors directly in the image:
- Click on an eyedropper to activate it.
- Place it in the image, then click.
- The corresponding color is sampled and indicated in the small tile.
- Locally accentuate or reduce the output sharpness using the Output Sharpening intensity slider, which will alter the adjustments you do in the Creative Sharpening section. For another color, click on another eyedropper and repeat the previous steps.
- To add a color range, click on the “+” button below the list. This will display the tile (in green), the eyedropper, and the associated sliders. You can add as many ranges as you wish, and you can remove them individually by clicking on their “-” (minus sign) button.
Note that local adjustments can be combined with sharpening by color ranges.