

The Nik Silver Efex plugin lets you discover (or rediscover) black & white photography thanks to numerous presets, global and selective correction tools, copious filters and colorization effects, tone curves, analog film simulations, and finishing tools (with vignetting, burnt edges, and image contours).
Although the carefully designed, ready-to-use renderings might be more than enough to meet your needs, you can modify them as you like or create new renderings from scratch. You can also share them with other Nik Silver Efex users.
IMPORTANT
This page presents Nik Silver Efex’s specific features and tools. All the tools common to the other Nik Collection plug-ins are presented in the Interface and common tools page of this user guide. Here you’ll find information on the following points:
- Preferences.
- Interface.
- Categories, filters and presets management.
- Local adjustments.
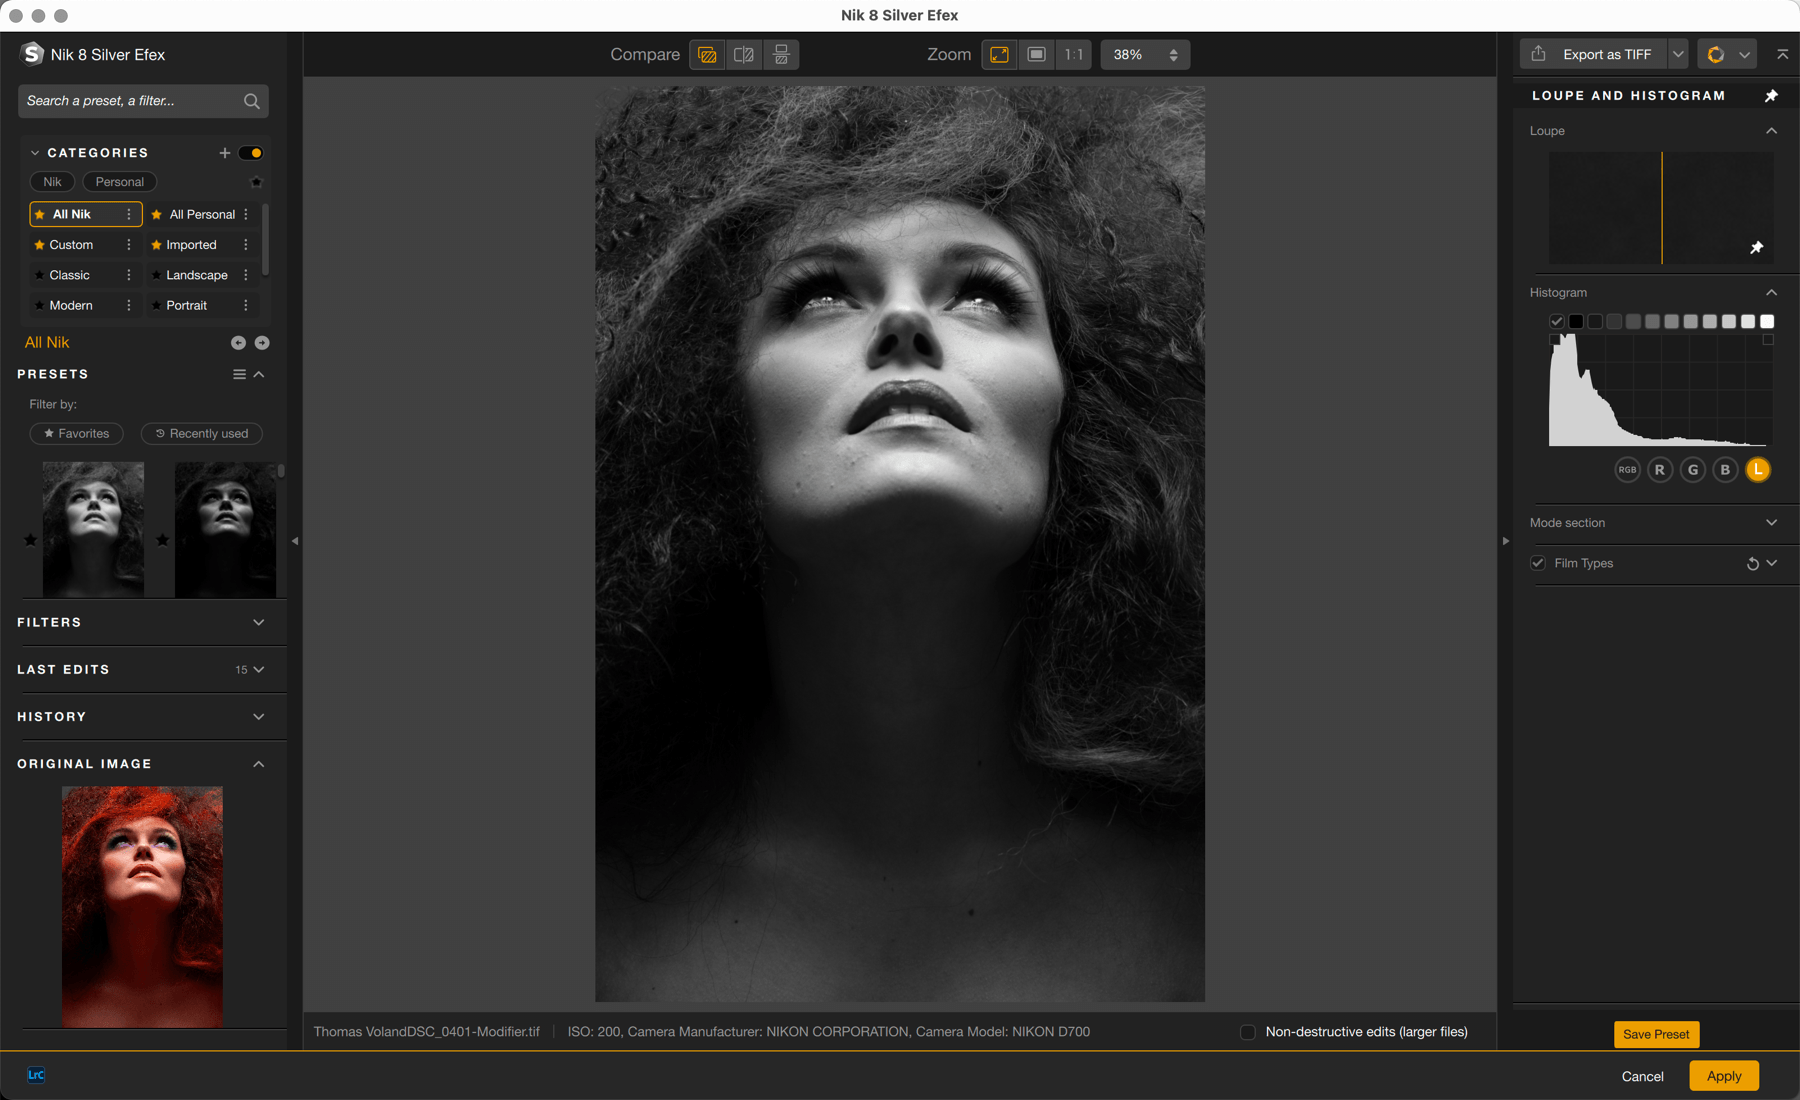
When image opens
When you open an image in Nik Silver Efex, it is converted to black and white with the default preset 000 Neutral, all tools in the right panel will be at their default value of 0, and no film effects are applied.
Original image permanent display
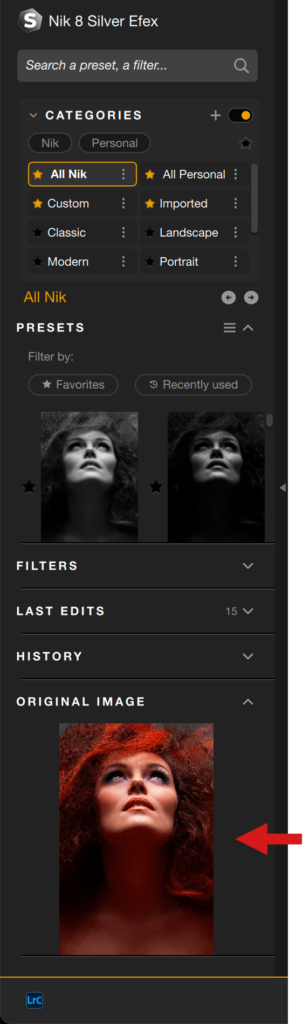
Note that you can always view a thumbnail of the original image, as it appears before the neutral black & white conversion in Nik Silver Efex. This will help you for quick comparisons on the fly, especially when reworking colors, contrasts, tonality. It is particularly helpful for filters like Film type > Sensitivity and Color Filter and for Local adjustments too.
The thumbnail is located in the left-hand pane, at the very bottom, in the Original Image section.
The right panel
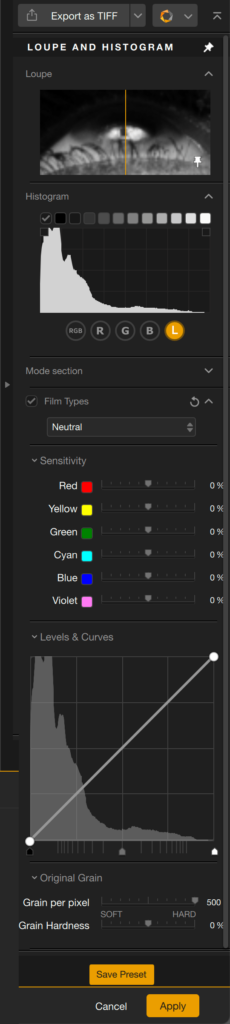
By default, the right panel displays the following tools:
- Loupe.
- Histogram and Zone system.
- Film types filter, which always include:
- simulations of analog films inherited from the Nik Collection (set to Neutral by default).
- Sensitivity: selection of color filters, imitating optical filters (all sliders set to 0 by default).
- Levels & Curves: adjusts the contrast, the blacks, midtones and highlights (curve is set to 45° by default, sliders set to default value: shadows 0, midtones 50 and highlights 100).
- Original grain: applies generic grain (grain per pixel set to max value by default, which is no grain applied, grain hardness set to 0 by default).
- Save Preset button: Save the settings as a custom preset.
The right panel will also display all the tool panels related to each filter, filter look or preset you may select in the left panel.
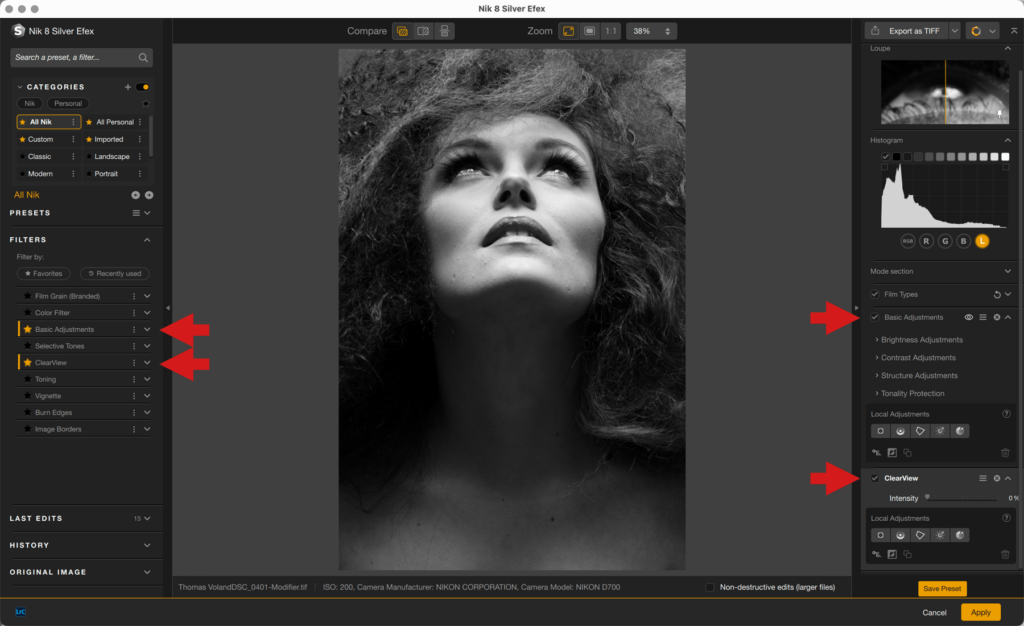
Hide global adjustments icon
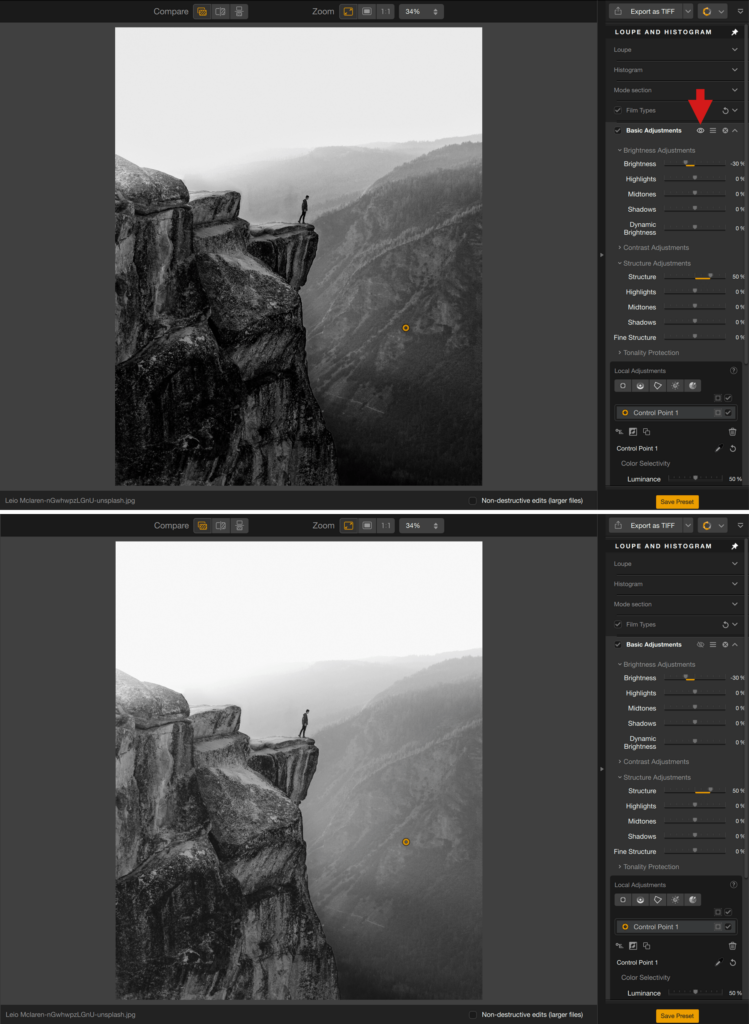
If you use the Basic Adjustments and/or the Selective Tones filters, an eye icon is displayed in the upper part of the panel. By clicking this icon, you will be able to temporarily hide the global adjustments while using local adjustments. It will help you to distinguish what you have done globally and what you have done locally with the same tools.
Presets
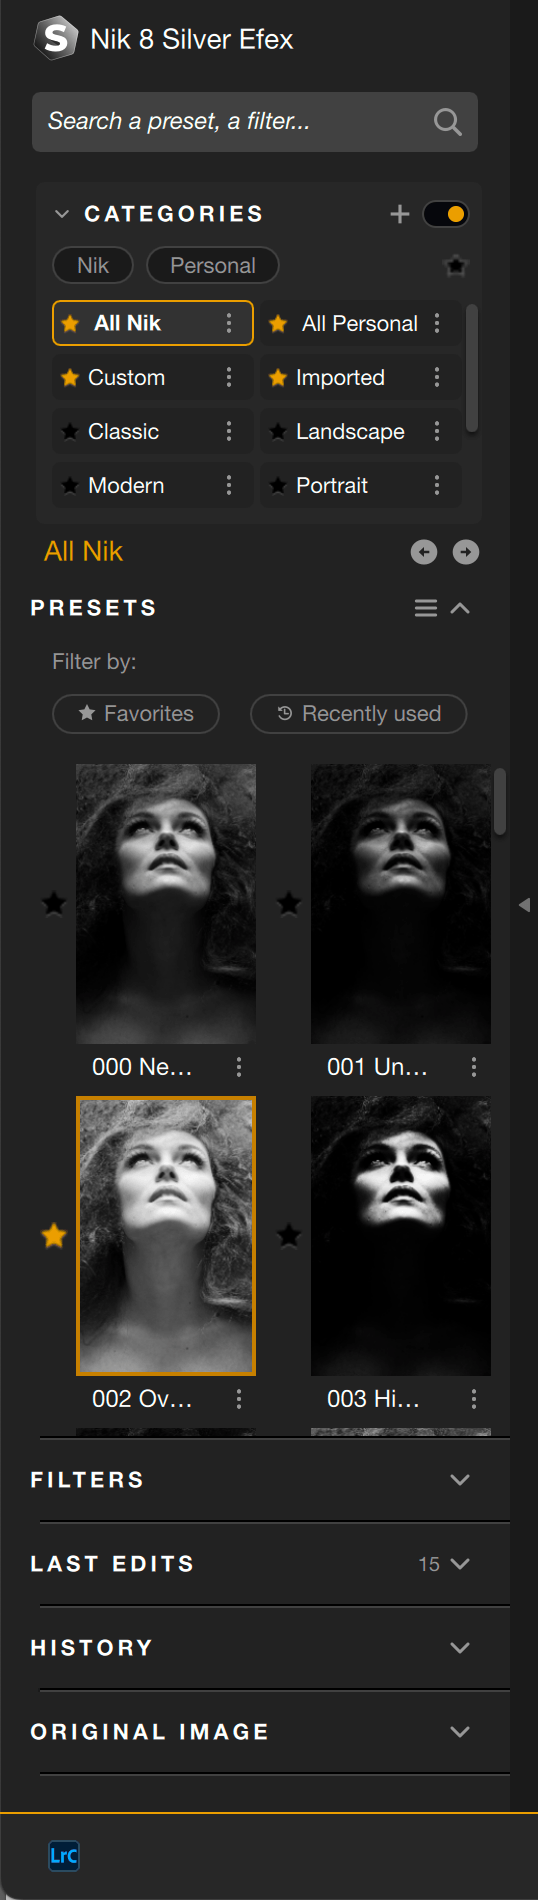
In the left panel, Nik Silver Efex offers 64 different presets, including the Neutral filter, which is the default when opening an image. There are also 9 filters always available with each category. The categories are organized as follows:
- All Nik: if you click this button, the Presets section will display thumbnails of all available presets, for you to scroll through the 64 presets. Note that Personal, Custom and Imported presets are not shown.
- Classic (16 presets)
- Landscape (5 presets)
- Modern (16 presets)
- Portrait (11 presets)
- Street (7 presets)
- Tinted (10 presets)
- Vintage (18 presets)
- All Personal, Custom and Imported categories contain your personal presets.
To apply a Nik Silver Efex preset, click on the thumbnail; the tools in the right panel show the settings of the applied effect.
Filters
The Filters section includes all basic tools, plus the common finishing tools:
- Film Grain (Branded).
- Color Filter.
- Basic Adjustments.
- Selective Tones.
- ClearView.
- Toning.
- Vignette.
- Burn Edges.
- Image Borders.
To apply a Nik Silver Efex filter, click on its name to display the relevant tools in the right panel. And to apply a particular filter look, click on the arrow to open the list of thumbnails and, then, click on one of them to apply the filter look and to display the relevant tools in the right panel.
The filters in detail
In this section, you will find a description of all the tools described in the previous section, both for overall correction of images and local adjustments.
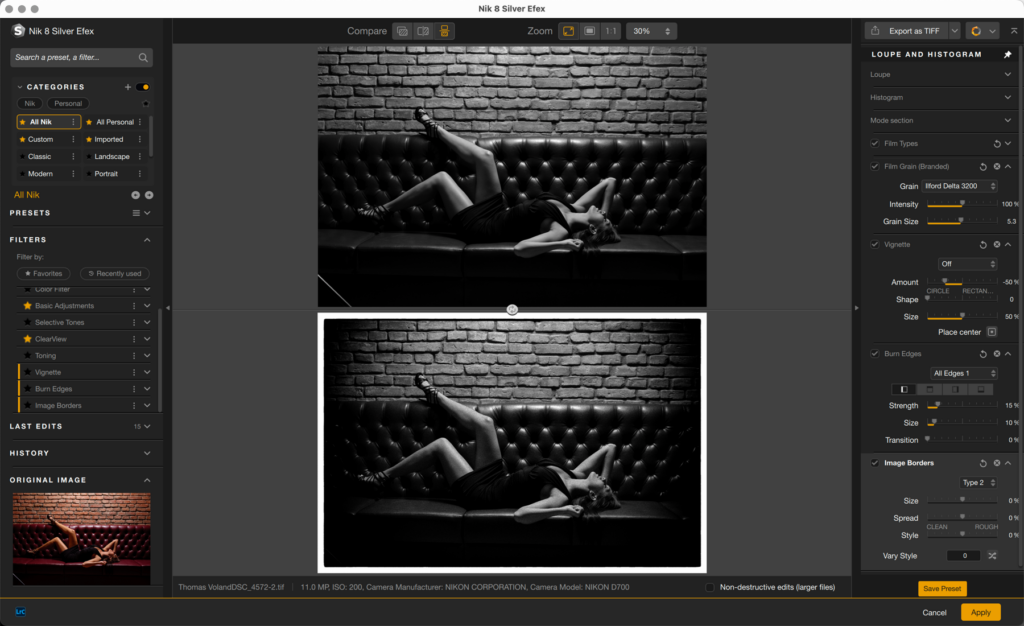
- Film Grain (Branded): You can choose film simulations renowned for their fidelity, behavior, and realistic appearance.
- Grain menu: select a type of film from the list sorted by brand and alphabetical order.
- Intensity: lets you reduce or increase the presence of grain in the image (default value 100%).
- Grain Size: sets the fineness of the grain, finer to the left, coarser to the right (default value 1).
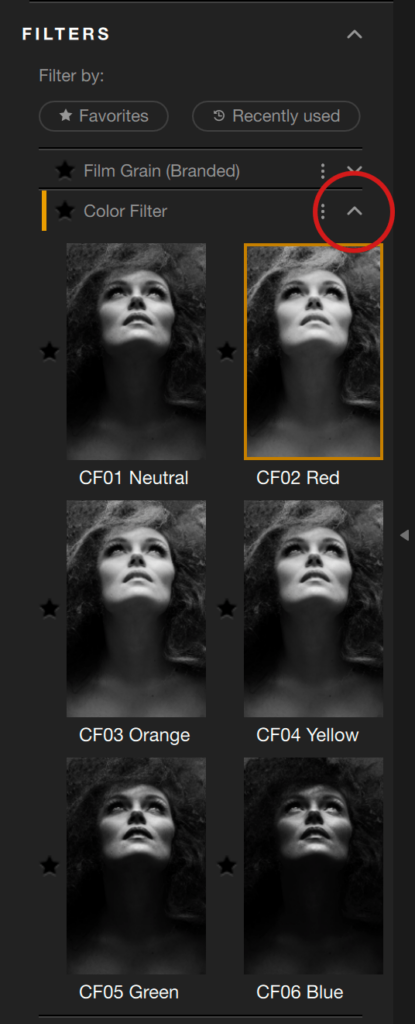
- Color Filter: The Color Filter section allows you to simulate the look of the color filters that photographers used to screw onto the lens to alter the contrast of their black and white film, depending on the subject being photographed (making the sky denser, clouds brighter, skin more radiant, etc.).
- Color Filters: click on one of the color filters (red, orange, yellow, green, blue) to quickly select a simulated color filter to apply when converting to black and white. Each selected filter automatically sets the values for the Hue and Strength (see below). The first filter is neutral (sliders set to 0), so you can freely define its hue and strength.
- Hue: adjusts the color of the simulated filter and controls the relationship of the colors in the image. Objects with the same hue as the selected value will become brighter, while objects with a complementary hue will become darker.
- Strength: slide to the left for less contrast between colors or to the right for more contrast between colors.
- Basic Adjustments: This section lets you correct and adjust image tone, brightness, contrast, detail and texture using the following 4 groups of sliders:
- Brightness Adjustments :
- Brightness: changes the brightness of the image. Moving this slider to the left darkens the image while moving it to the right increases the brightness of the image.
- Highlights: adjusts the brightness of light areas in the image.
- Midtones: adjusts the brightness of midtoned areas of the image.
- Shadows: Adjusts the brightness of dark areas in the image.
- Dynamic Brightness: uses a unique algorithm that automatically adjusts to different areas of the image. This slider allows for finer changes in brightness, ensuring that the image retains a good range of detail, preserves contrast and intelligently applies brightness values to different areas of the image. Move the slider to the left to darken the image while retaining detail in the highlights. Moving the slider to the right will lighten the image while retaining detail in the shadows.
- Contrast Adjustments :
- Contrast: controls the overall contrast of the image, i.e. the difference between the density of the dark areas and the brightness of the light areas.
- Amplify Whites: The slider uses an algorithm that provides unique control over the highlights of the image. By moving this slider to the right, the highlights in each area of the image become brighter. Because of the adaptive nature of the algorithm, each area is treated differently, taking into account its particular characteristics.
- Amplify Blacks: Similar to the Amplify Whites slider, this slider uses a unique algorithm to control the tone of the image. Move this slider to the right to make the darker tones in each area of the image even denser. Because the algorithm is adaptive, each area is treated differently, taking into account its particular characteristics.
- Soft Contrast: the purpose of the slider is to provide a different approach to contrast, less harsh and with much more diffuse transitions.
- Structure Adjustments :
- Structure: controls the overall structure of the image. Increasing the setting emphasizes detail and texture, while decreasing softens fine detail for smoother surfaces.
- Highlights: selectively adjusts the structure of light areas in the image.
- Midtones: selectively adjusts the structure of midtones in the image.
- Shadows: selectively adjusts the structure of darker areas in the image.
Blacks: selectively adjusts the densest areas of the image.- Fine Structure: similar to the Structure slider, adjusts the finest details in the image.
- Tonality Protection: these sliders allow you to recover details in shadows and highlights that were lost during brightness and/or contrast adjustments.
- Shadows : when moved to the right, the slider will only lighten shadows and restore black details in dense areas.
- Highlights: when moved to the right, the slider will darken only the brightest areas and recover the details that have been lost.
- Brightness Adjustments :
- Selective tones: this group of sliders affects the brightness of 4 tone ranges, from the darkest to the brightest.
- Highlights: moved to the left, this slider recovers information and details in the brightest parts of the image, especially those close to the clipping (right end of the histogram). Moved to the right, it allows you to give more brightness to the lightest tones.
- Midtones: this slider makes the midtones (shown in the central section of the histogram) brighter (to the right) or darker (to the left).
- Shadows: this slider allows you to lighten the shadows and dark parts of an image. It can also be used to make them deeper.
- Blacks: moving the slider to the right lets you set the “black point” (left end of the histogram) and thus avoid clipping the darkest parts of the image. Conversely, moving the slider to the left, you will make the darkest areas of the image even more dense.
- ClearView: ClearView allows you to correct the effects of atmospheric haze and fog, which significantly alter the image, especially in distant shots. By restoring black levels, the tool will restore contrast, microcontrast, and saturation to your images. You can also use it to enhance the impact of images taken on a clear day.
- The Intensity slider, set to 0 by default, allows you to adjust the effect of DxO ClearView Plus on a scale of 0 to 100.
The filters described below have a more creative role, to give a finishing touch to your images:
- Toning: the tools in this section (click the arrow on the left to show or hide them all) allow you to tint black and white images, using darkroom toning techniques:
- Toning drop-down menu: set by default to Neutral (no tinting). Hover your mouse over the list to see the effect in real time on your image. To select an effect and apply it, click on it.
- Strength: This slider sets the overall intensity of the tone applied to the image and also affects the setting of the Silver Hue and Paper Hue sliders (see below).
- Silver Hue: sets the replacement shade for the darker tones, represented by the silver grains in the film.
- Silver Toning: sets the intensity of the dark tones.
- Balance: determines the balance in the combination of tints applied to the dark tones (Silver) and the light tones (Paper). When this slider is set to 0%, the Silver and Paper tones are mixed with the midtones in a balanced way, and to the left you give more importance to the tint of the dark tones, and to the right, more importance to the tint of the light tones.
- Paper Hue: determines the replacement shade of the light tones, associated with the white of the paper.
- Paper Toning: defines the intensity of the light tones.
- Vignette: these tools (click the arrow on the left to show or hide them all) let you apply a darkening or lightening effect to the edges of the image to give it a retro effect or to draw attention to the subject.
- Vignette drop-down menu: set to Off by default (no vignetting); mouse through the list to see the effect in real time on your image. To select an effect and apply it, just click on it.
- Amount: controls the intensity of the vignetting. Moving this slider to the left darkens the edges of the image; moving to the right lightens them.
- Shape: controls the general shape of the vignetting, between CIRCLE and RECTANGLE.
- Size: sets the extent of the vignetting effect in the image.
- Place center: click on the button to position an off-center vignetting effect. The mouse pointer will change to a “+” that you then click to place in the image. If you want to change the positioning, click the button again and start over.
- Burn Edges: these tools (click on the arrow on the left to show them all or hide them), also inspired by darkroom techniques, will allow you to create denser image edges than with the tools in the Vignetting section. Unlike the latter, you can work side by side, and even combine the effect with vignetting.
- Burn Edges drop-down menu: Off by default, offers a roll-over preview and the application of 4 possible effects.
- Edge selector: select the edge that you wish to adjust in your image.
- Strength: darkens the burned edge effect on the selected side.
- Size: adjusts the extent of the burned edge.
- Transition: controls the blending of the darkening effect with the image.
- Image Borders: click on the arrow on the left to display or hide all the tools. The borders offered in this section derive from enlarger techniques used in the lab.
- Image Borders drop-down menu: set to <strong>Off</strong> by default, the menu contains a list of borders that you can preview in real time by rolling-over with the mouse, and applying it by clicking.
- Size*: adjusts the thickness of the border added to the image.
- Spread: by moving this slider to the right, the border detail extends further into the image.
- Style: controls the random detail around the image. Moving the slider to the right (from CLEAN to ROUGH) creates more random detail in the border.
- Vary Style: the button lets you create random borders from one image to the next. By clicking the button, a random border number will be created. To recreate the exact same border later, note the number, as well as the settings for size, spread, and clean/coarse finish. To get a similar but different border for each image, use the same values for size, spacing, and roughness, but choose a different border number.
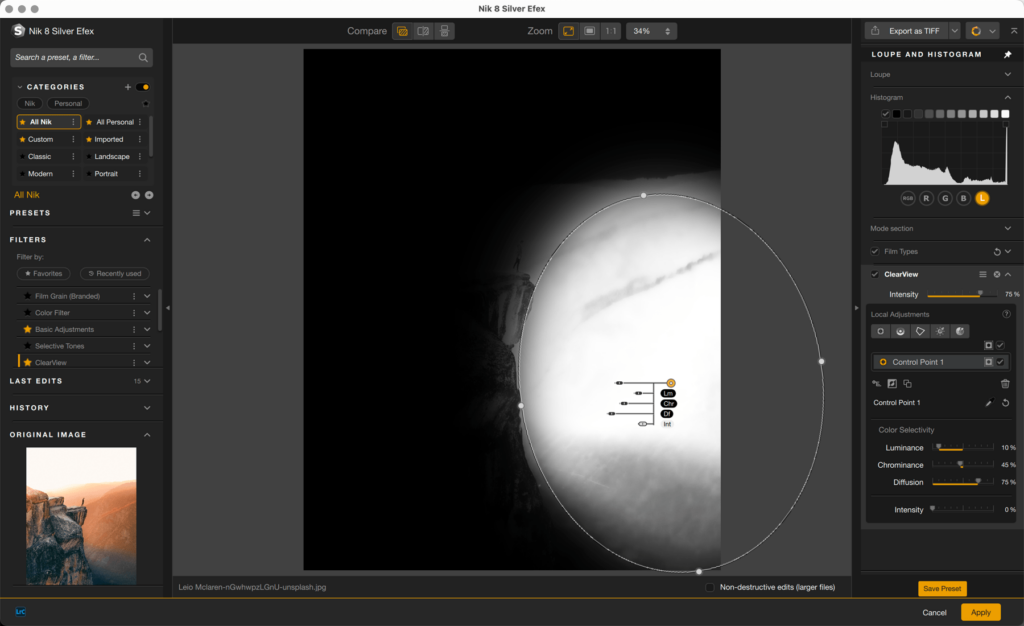
Local adjustments
Local adjustments let you modify certain parts of the image. Add a control point, line polygon or a luminosity mask and, when adjusting the corresponding sliders, only affect subjects or areas covered by the local adjustment tool.
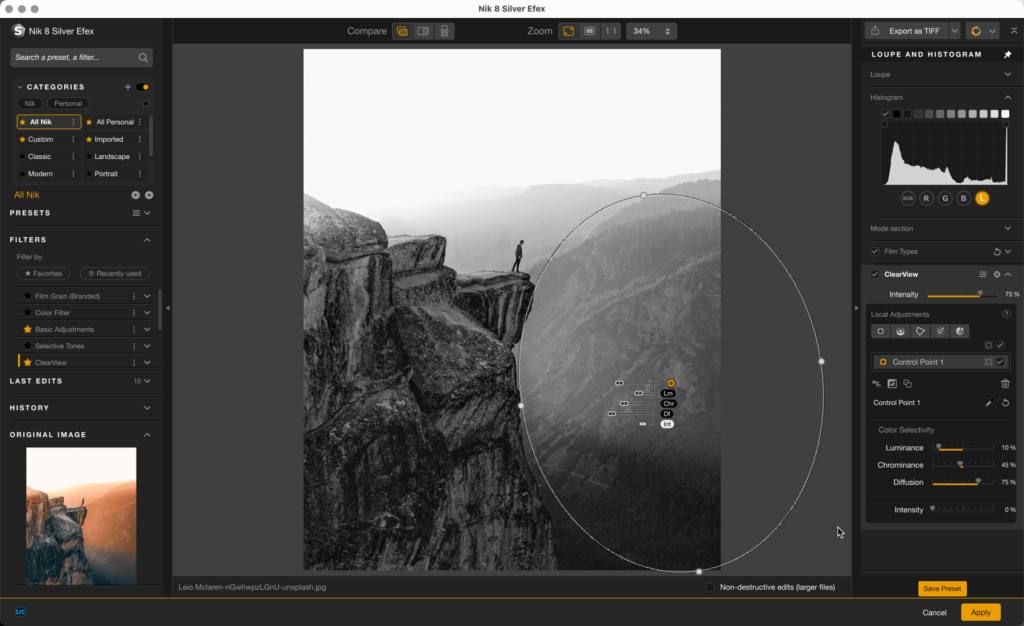
Local adjustment sliders
When using local adjusments, the section displays, under the list of local adjustment tools, the associated sliders. These sliders are also available directly attached to the tool’s dot in the image. When using one of the sliders attached to a dot, the corresponding slider will also be changed in the right panel, and vice versa.
All sliders in the local adjustments section have their equivalents in the global settings, with the exception of Luminance, Chrominance, Diffusion and Selective Colorization.
The local adjustment sliders are organized this way:
- Color Selectivity :
- Lm (Luminance).
- Chr (Chrominance).
- Df (Diffusion).
- Standard selective adjustments sliders:
- Br (Brightness).
- Ct (Contrast).
- Str (Structure).
- AW (Amplify Whites).
- AB (Amplify Blacks).
- FSt (Fine Structure).
- StC (Selective colorization).
- Selective Tones :
- ST HI (Highlights).
- ST Md (Midtones).
- ST Sh (Shadows).
- ST Bl (Blacks).
Selective colorization
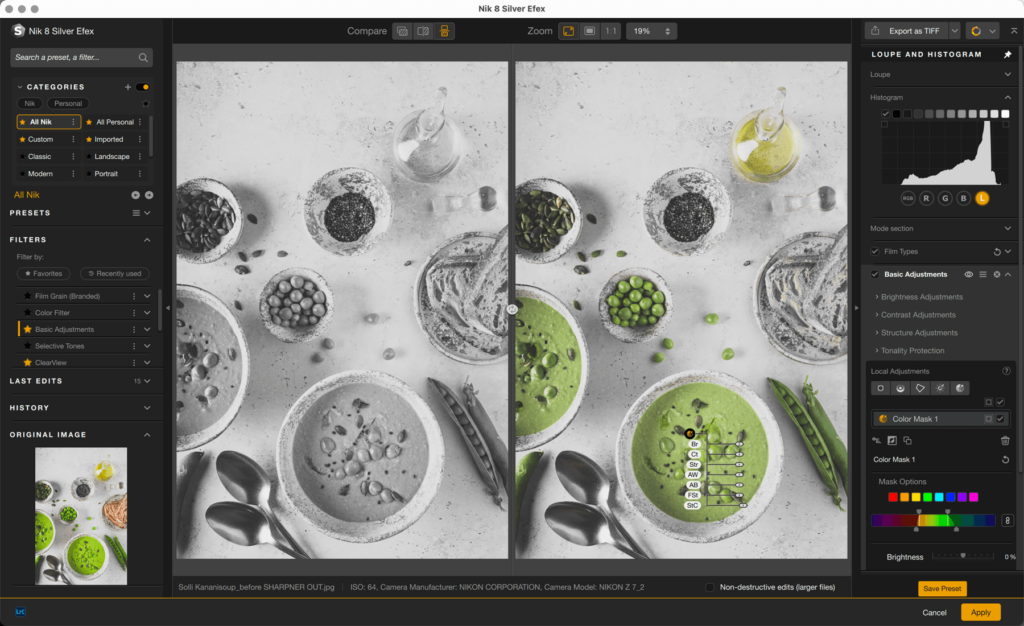
The Selective Colorization slider is a unique feature of Silver Efex. It restores the colors of the portion of the image on which the local adjustment was placed on a black and white image. This allows you, for example, to highlight an element or detail in a photo.
Of course, you can fine tune the effect by combining multiple local adjustment tools, by using the monochrome display mask, and the selective color sliders.