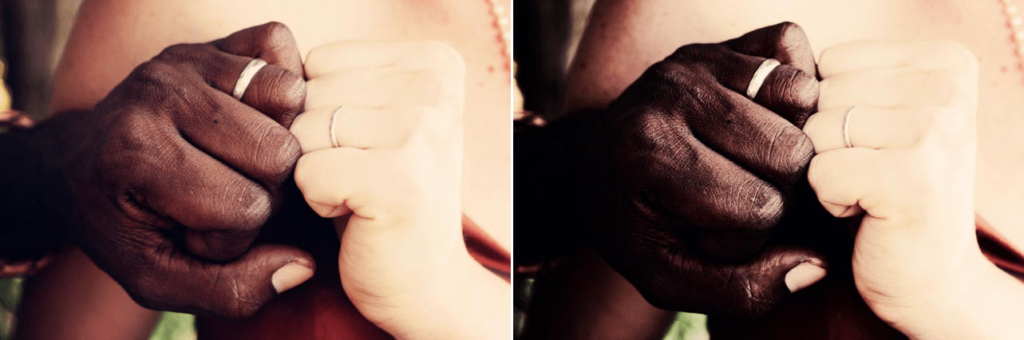
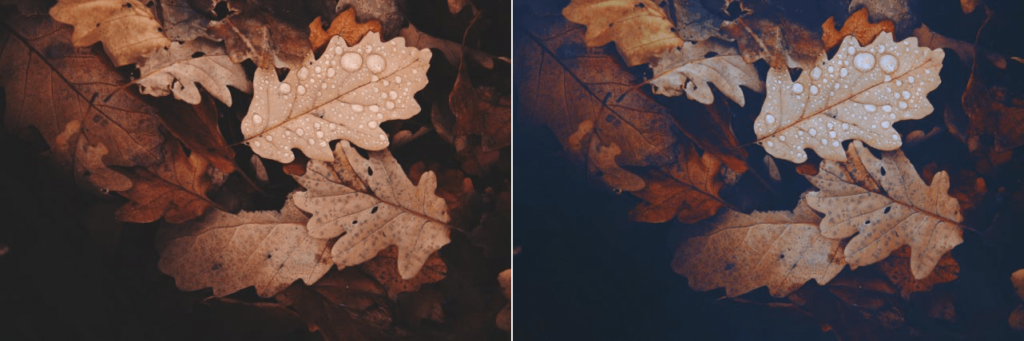
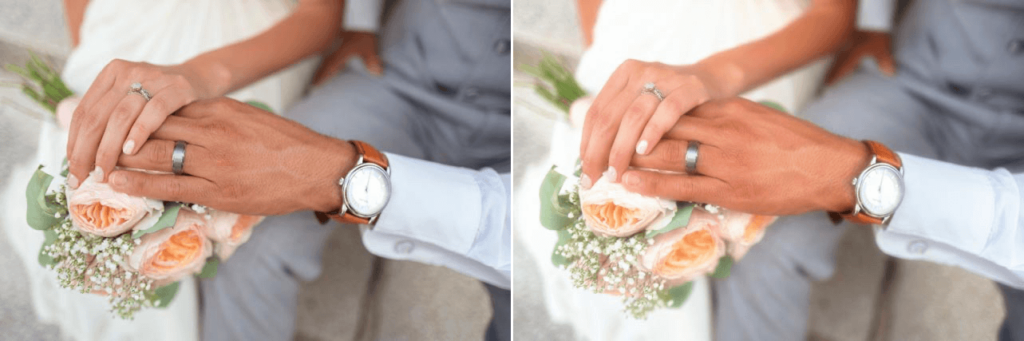
Nik Color Efex is a vast library of creative effect filters that you can use one at a time or in limitless combination; you can also edit the effects using global correction tools and local adjustments.
IMPORTANT
This page presents Nik Color Efex’s specific features and tools. All the tools common to the other Nik Collection plug-ins are presented in the Interface and common tools page of this user guide. Here you’ll find information on the following points:
- Preferences.
- Interface.
- Categories, filters and presets management.
- Local adjustments.
Some of the Viveza tools are also available as filters in Nik Color Efex:
- Global adjustments.
- Selective tone.
- White balance.
When image opens
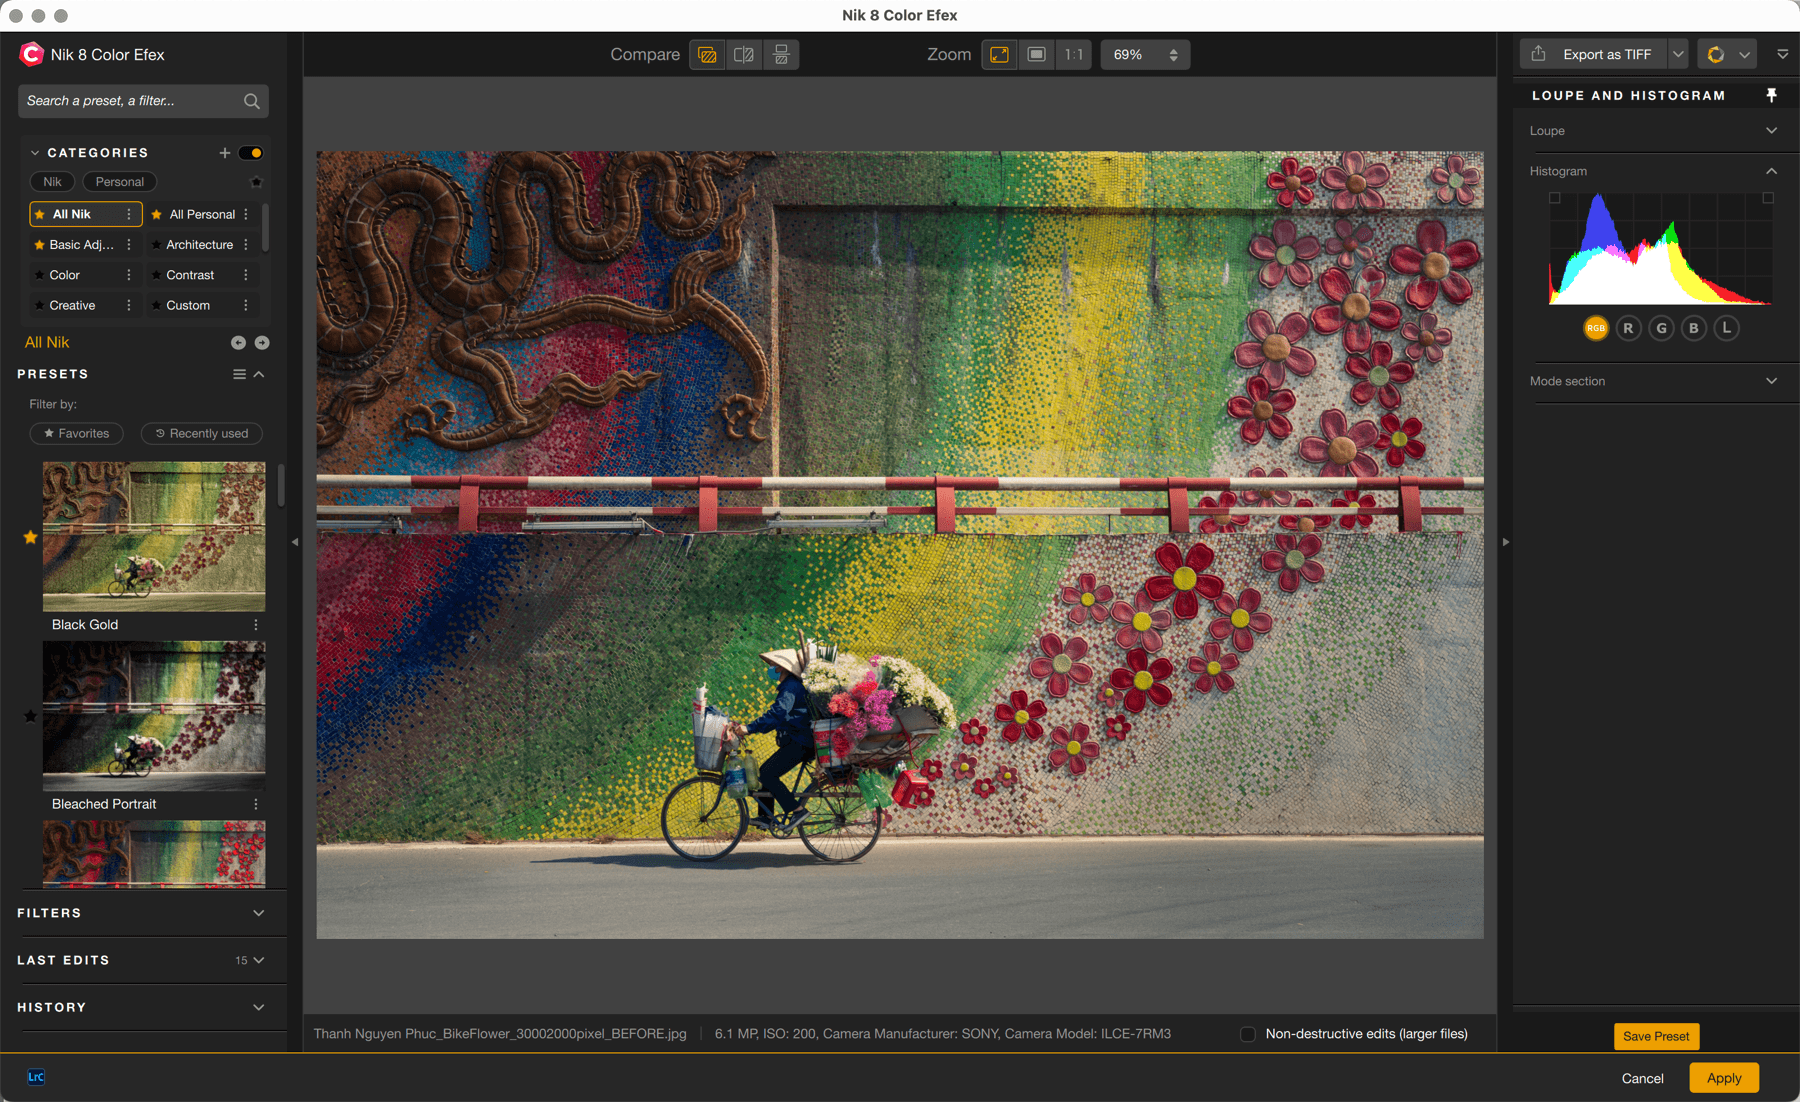
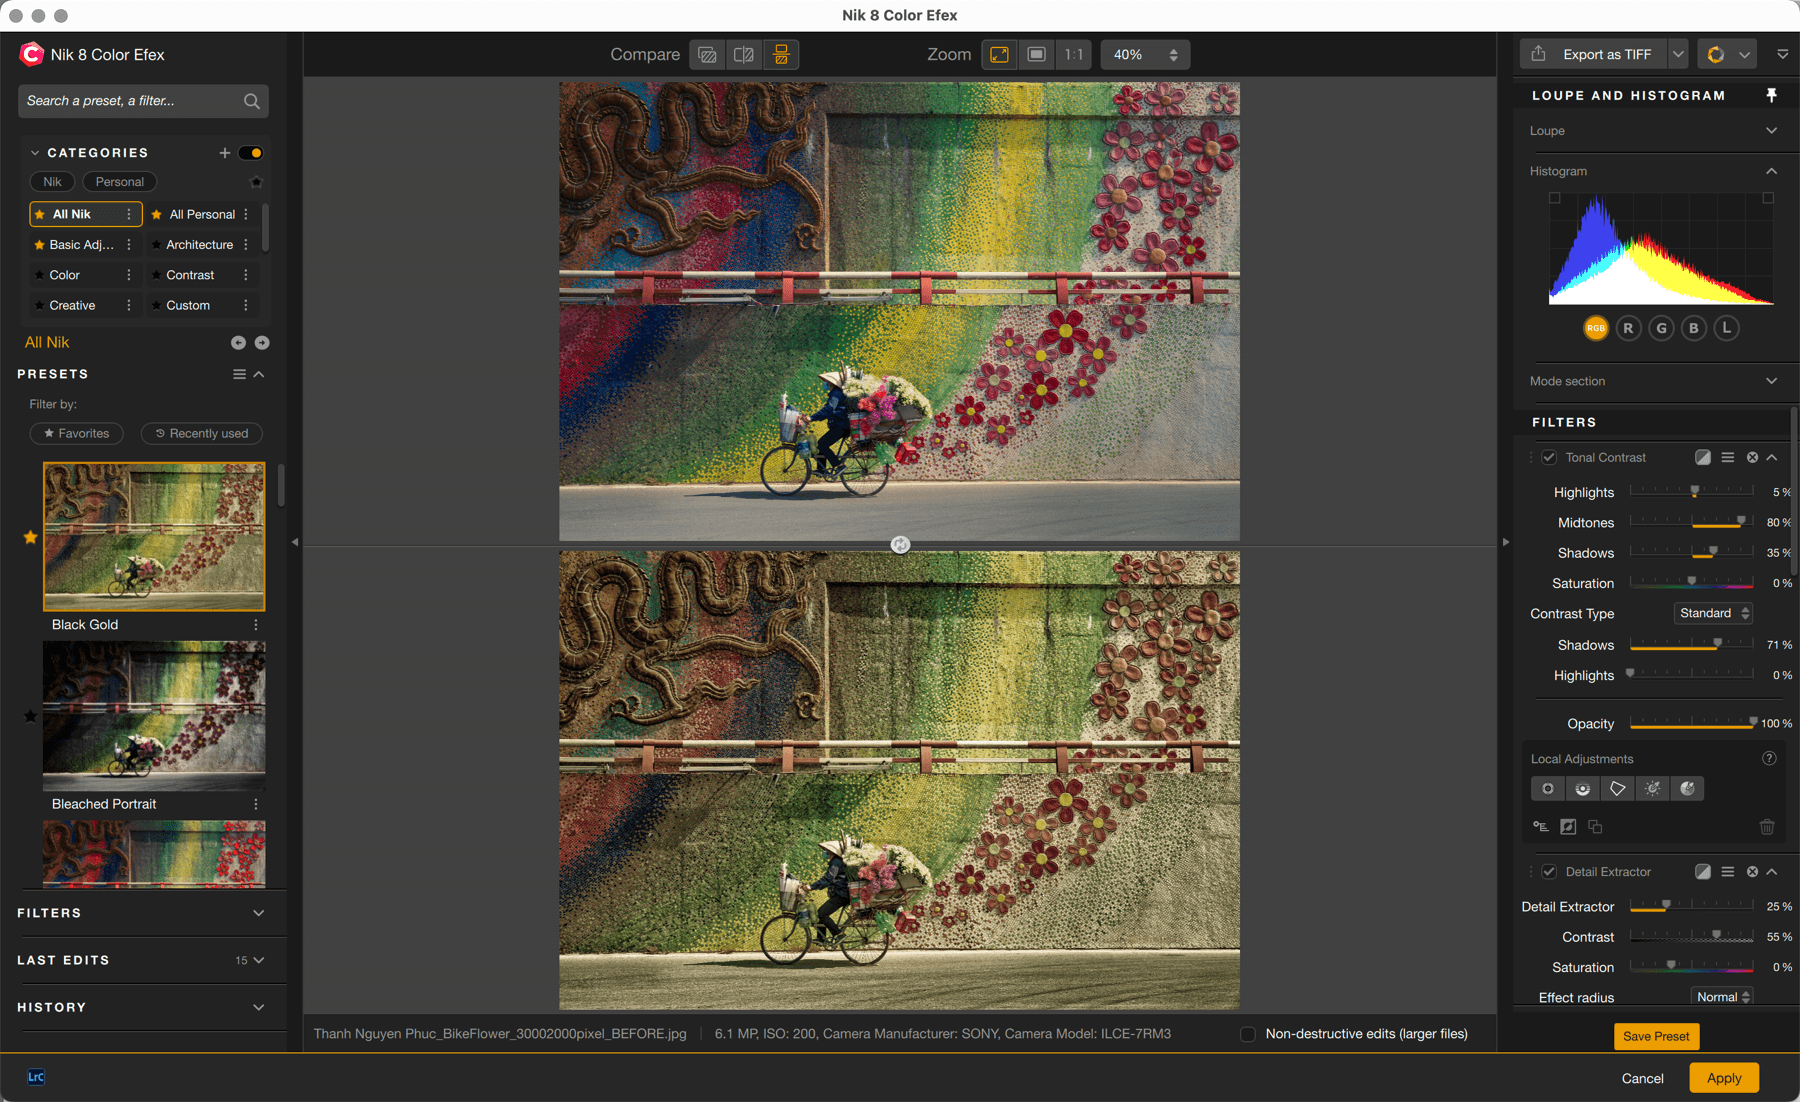
When you open an image in Nik Color Efex, it appears as it is in the host-app or as it is on the hard disk if you are using standalone mode. No corrections, filters or presets are applied at this stage and the right panel shows only the loupe and the histogram.
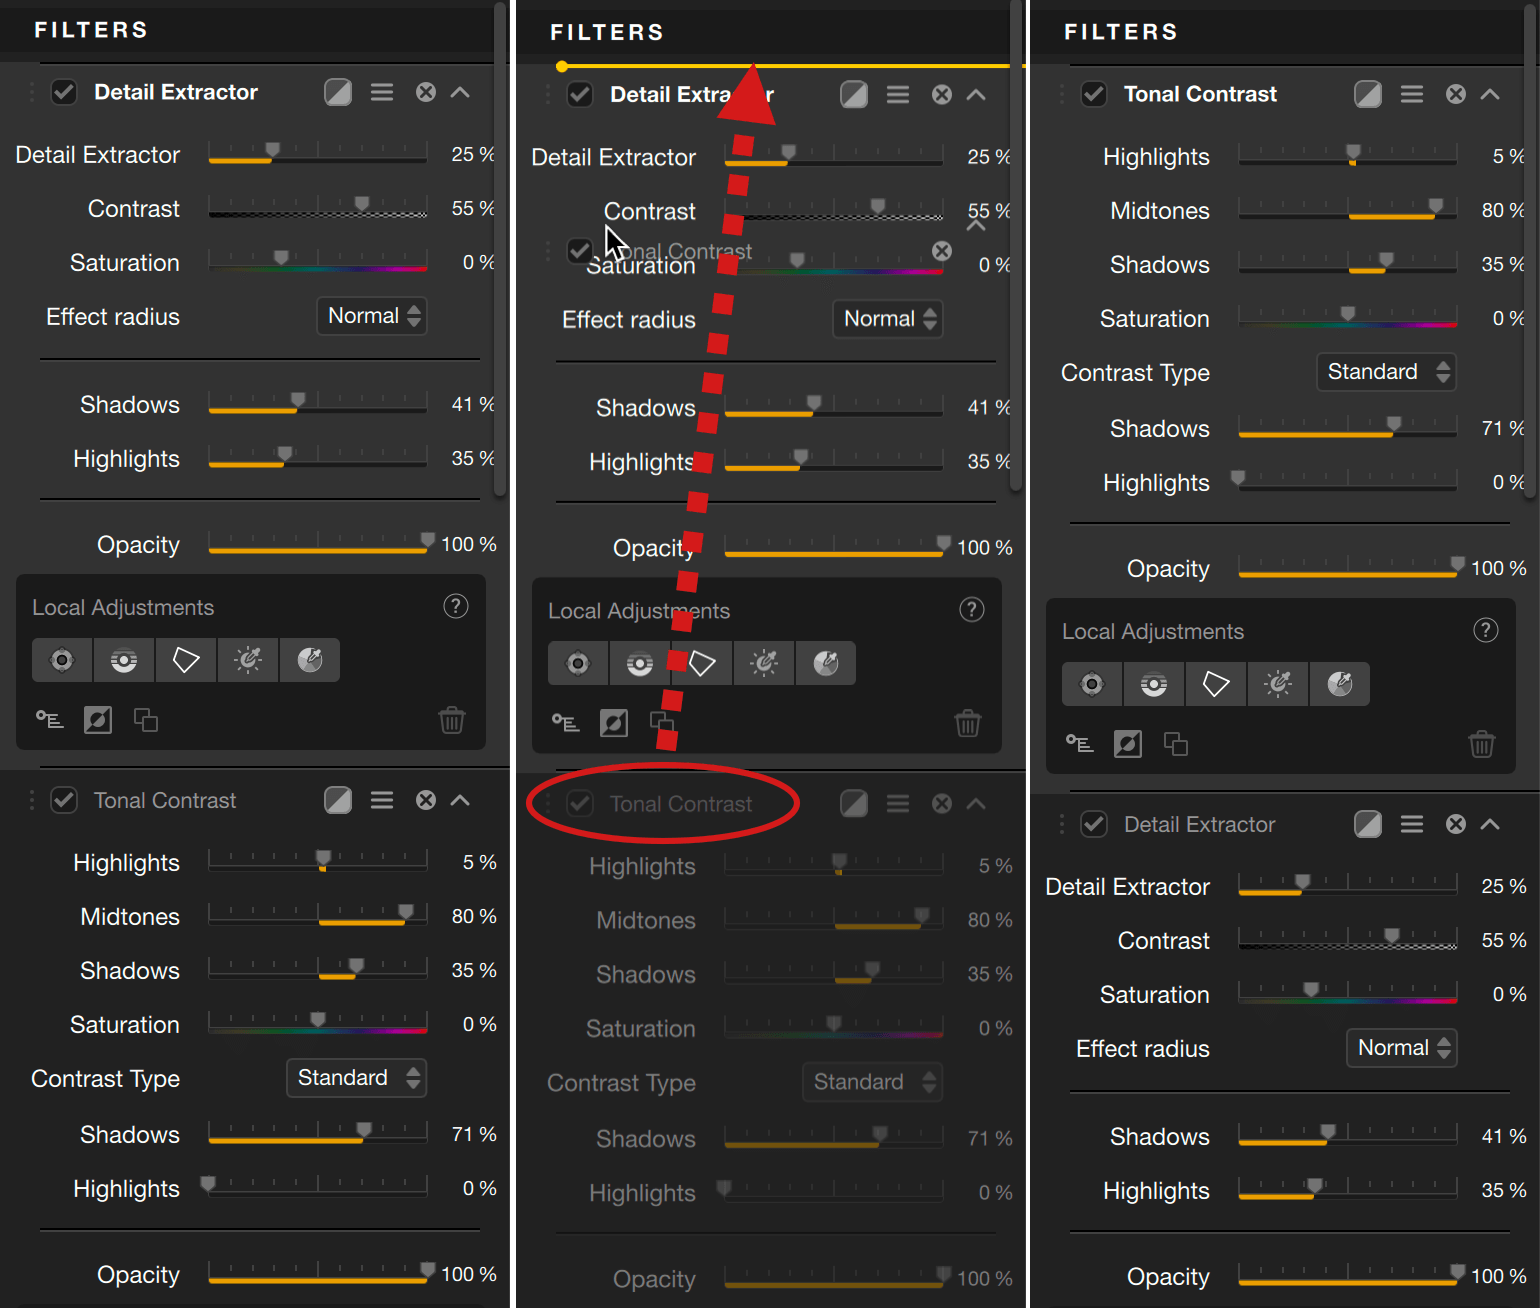
Each time you add a filter or apply a preset, the associated tools will be displayed in the right panel, under the Loupe and the Histogram sections. They will appear in the same order as you select them, from top to bottom, but you can reorder them at will:
- In the right panel, click and hold the click on the filter name.
- Move upwards or downwards, a yellow line shows you where you can drop.
- Drop and release the mouse button.
This feature will help you to prioritize or reorder which filters and which relevant tools you want to use. For example, you may want to work on lightness and contrast before color, or you want to apply basic settings (Viveza filters) before going more creative with other filters.
Nik Color Efex lets you stack up to 15 filters in the right panel. You can also add the same filter as much as you need (in the limit of 15 stacks).
As soon as you try to add more than 15 stacks, a warning box will prompt you to remove some filters before.
Filters
Nik Color Efex offers 61 filters and presets, including ClearView, Grain, HSL and the Viveza filters with Global adjustment, Selective tone and White balance. When you select a category, only the filters in that category will be displayed in the list in the left panel. To display the full list of the presets and filters provided by Color Efex, click on the All Nik category. If you click on All Personal, all your custom presets and filters will be displayed.
There are different versions of each filter, called filter looks: click on the chevron on the right to see them. To apply a Filter, either click on its name or on one of the filter looks thumbnails once you’ve clicked on the chevron. The associated tools will then appear in the right panel. To add a Filter, click on the “+” button.
When you open an image in Color Efex, the default behavior is not to apply any filter, filter look or preset. When you apply a filter look, the first in the list is the default rendering. This is indicated by a small yellow bookmark, visible when you hover the mouse over the thumbnail.
However, for each filter, you can change the default filter look. To do this, simply move the mouse over the thumbnail and click on the hollowed-out bookmark, which turns yellow.
You can add a filter look to your favorites, which are shown by a gold star. To find your favorite or recently used filters, click on the relevant buttons located above the Filters list.
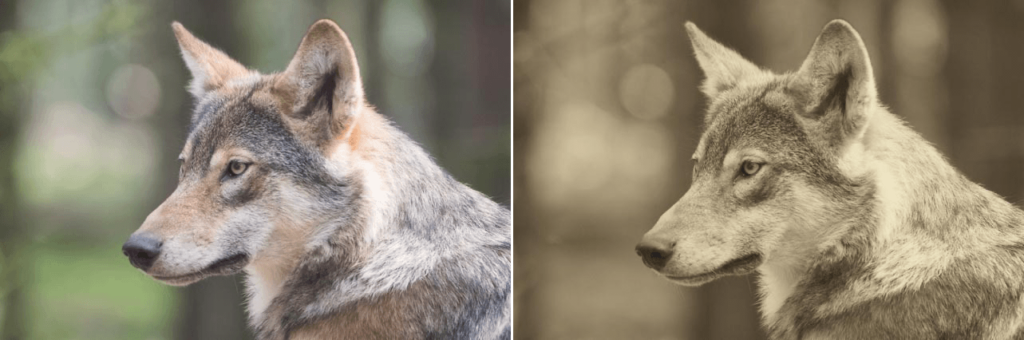
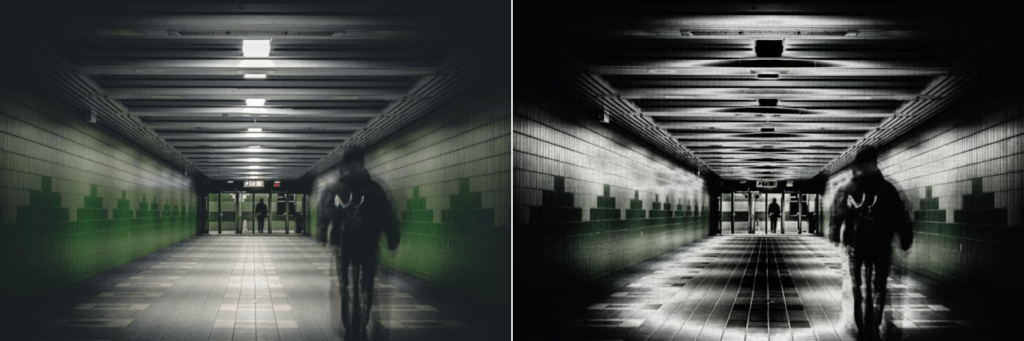
B/W Conversion
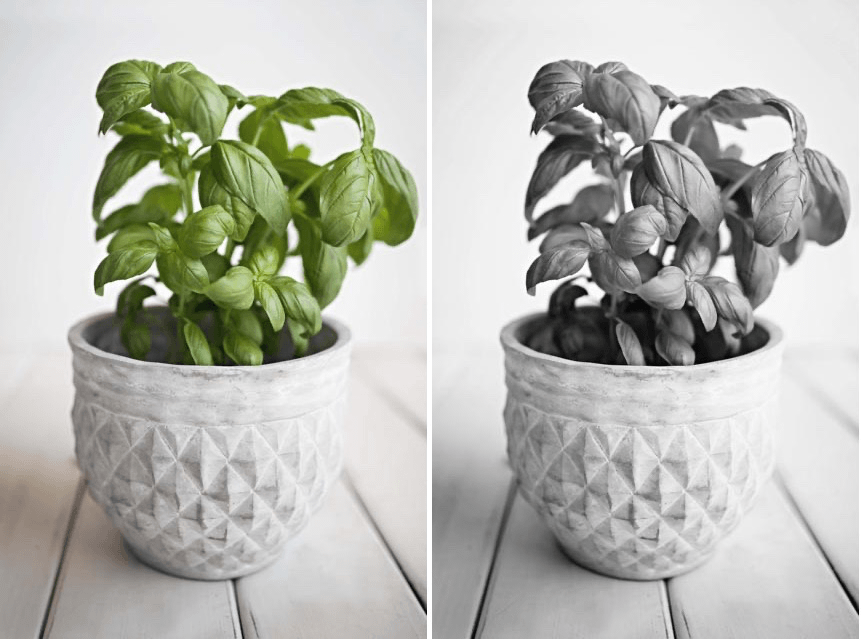
Use this filter to convert a color image into a black and white version, and control shadows, highlights, and relationships between the original colors. Three black and white conversion modes are available in the filter displayed in the right panel:
- B/W Conversion: black and white conversion (default setting).
- Tonal Enhancer: improves the rendering of the different tonal ranges.
- Dynamic Contrast: Creates a stronger and harder contrast effect (brighter highlights, denser shadows).
The tools available vary depending on the conversion mode selected.
| Filter Color | Adjusts the color of the simulated filter and controls the relationship of colors in the image. This filter brightens subjects of the selected color in the image and darkens subjects of the complementary color. |
| Intensity | Drag the slider to the left to decrease the contrast between colors or to the right to increase it. |
| Lightness | Controls the overall brightness of the image. |
| Contrast | Adjusts the overall contrast of the image. (B/W Conversion only) |
| Contrast Enhancer | Also adjusts the overall contrast, but more forcefully than the Contrast slider. (Dynamic contrast only) |
| Method | Offers three options with different types of contrast to bring out shadow detail or create a high-contrast image. (Tonal Enhancer only) |
| Shade | Moved to the right, the slider will lighten only shadows and recover details drowned in the dark areas. |
| Highlights | Moved to the right, the slider will darken only the brightest areas and recover blown-out details. |
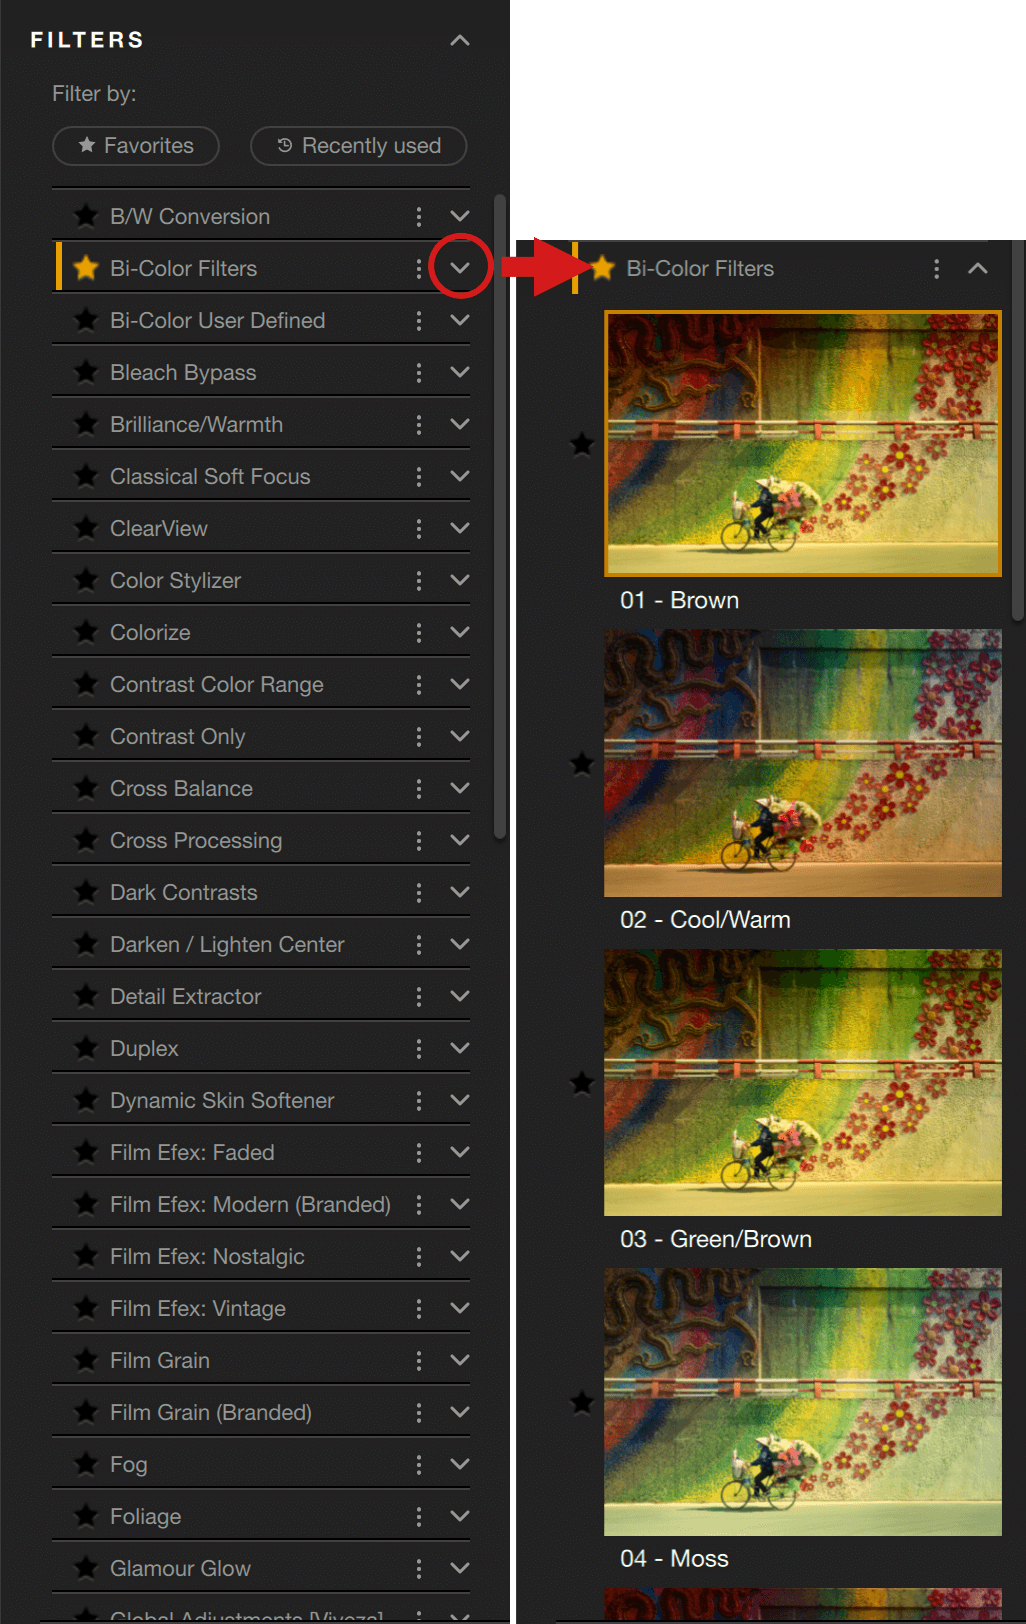
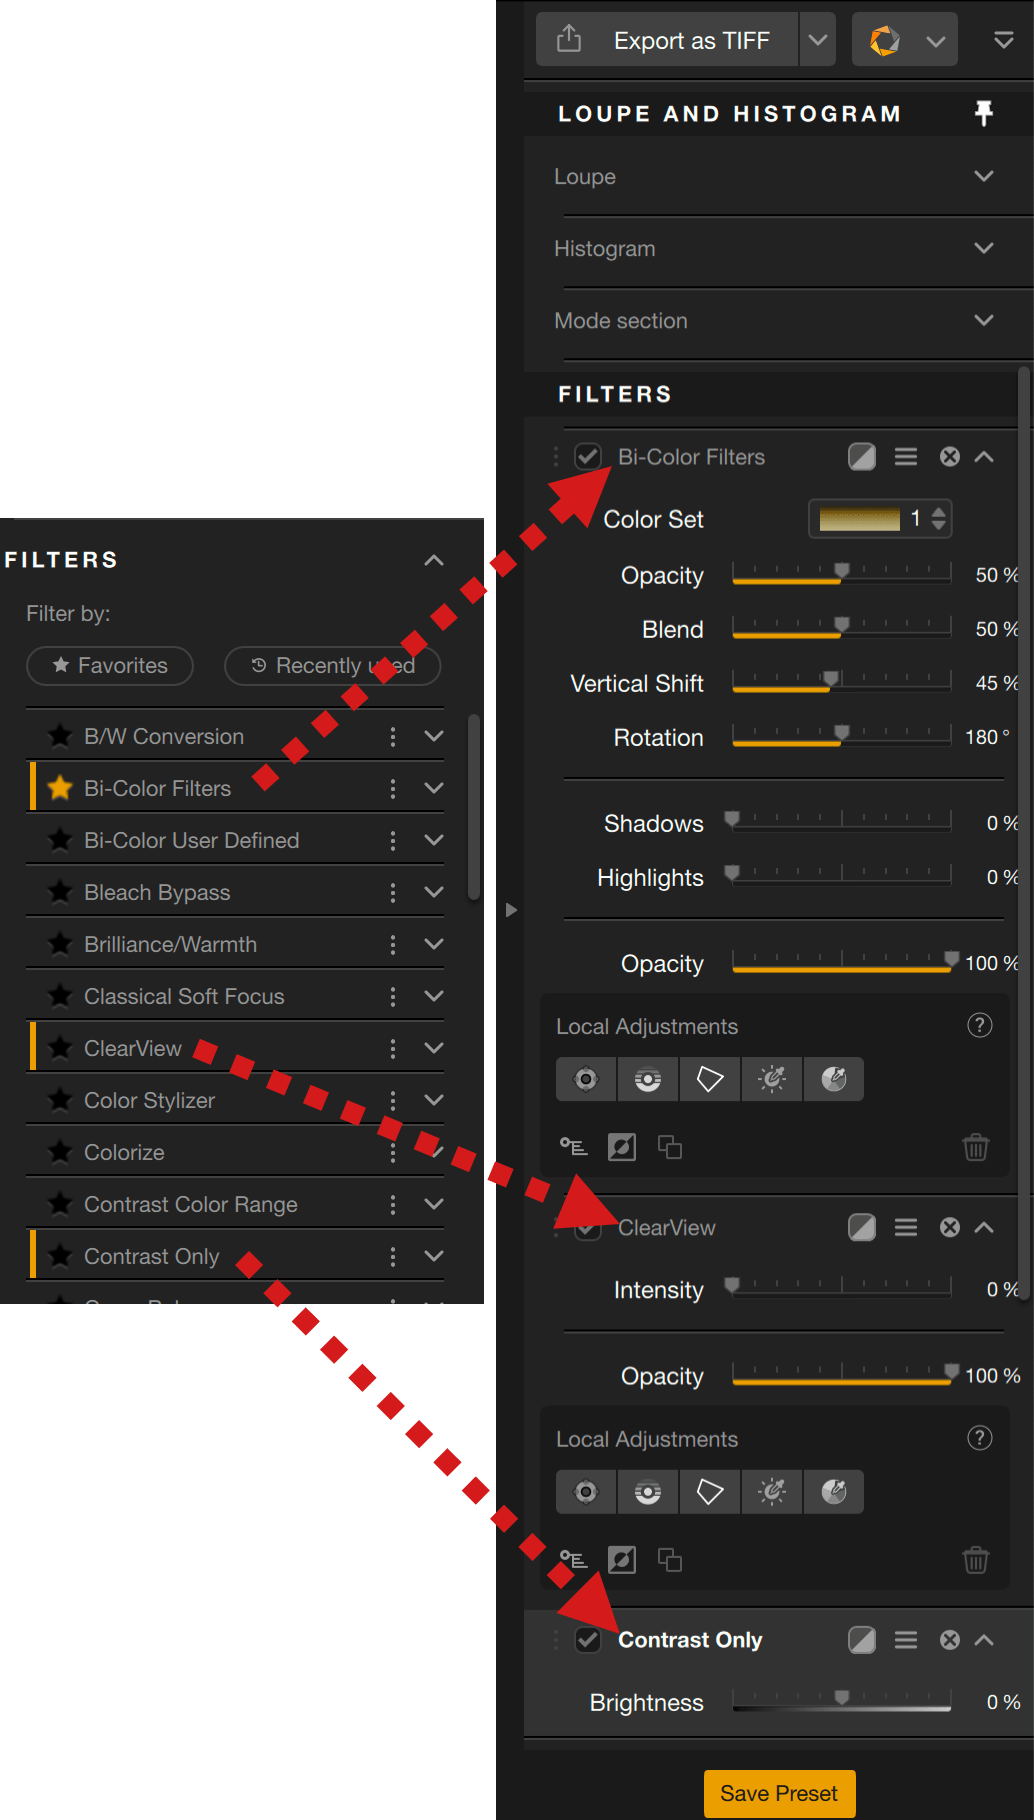
Bi-Color Filters
Simulates a traditional two-color glass filter by mixing two colors and then adding the result to the image. From the drop-down menu, select a predefined color combination, each with four variations.
| Color Set | Select one of the 20 predefined color combinations, grouped in 5 different color sets. |
| Opacity | Controls the overall intensity of the filter. |
| Blend | Controls the transition between the two colors. |
| Vertical Shift | Controls the position of the filter horizon. |
| Rotation | Controls the angle of the filter horizon. |
| Shade | Moved to the right, the slider will lighten only shadows and recover details drowned in the dark areas. |
| Highlights | Moved to the right, the slider will darken only the brightest areas and recover blown-out details. |
Bi-Color User Defined
Simulates a traditional two-color glass filter by mixing two colors and then adding the result to the image. Both colors can be customized.
| Opacity | Controls the overall intensity of the filter. |
| Blend | Controls the transition between the two colors. |
| Vertical Shift | Controls the position of the filter horizon. |
| Rotation | Controls the angle of the filter horizon. |
| Upper Color | Indicates the upper color to be applied to the image. Use the eyedropper to select a color in the image or click the color chart to open the color picker tool. |
| Lower Color | Indicates the lower color to be applied to the image. Use the eyedropper to select a color in the image or click the color chart to open the color picker tool. |
| Shade | Moved to the right, the slider will lighten only shadows and recover details drowned in the dark areas. |
| Highlights | Moved to the right, the slider will darken only the brightest areas and recover blown-out details. |
Bleach Bypass
Simulates the technique used on color films where the bleaching process has been skipped. The result is high contrast and low saturation. Both set photographers and animated filmmakers use this effect to create striking, stylized images.
| Lightness | Controls the overall brightness of the image. |
| Saturation | Controls the overall color intensity by increasing or decreasing the saturation throughout the image. |
| Overall Contrast | Controls the overall contrast of the image. |
| Local Contrast | Uses a custom variation of the Structure slider, found in some other Nik Collection plug-ins, to emphasize fine detail and texture in the image. |
| Shade | Moved to the right, the slider will lighten only shadows and recover details drowned in the dark areas. |
| Highlights | Moved to the right, the slider will darken only the brightest areas and recover blown-out details. |
Brilliance / Warmth
Lets you control the brightness of the color within the photo and give it a warm or cool tone.
| Saturation | Increases or decreases the vividness of the colors in the photo. |
| Warmth | Controls the color temperature of the photo. Move the slider to the left to cool the colors (adding a blue cast) or to the right to warm them up (adding a red cast). |
| Perceptual Saturation | Although it does not directly increase the saturation of colors, this slider alters the hues slightly to increase the perception of saturation of the corresponding colors. To achieve this, the complementary color component is increased in the surrounding colors, which affects the eye’s perception of colors. This process’s operating principle is similar to that of perceptual contrast, where the contrast seems to increase when the image is placed against a black background. |
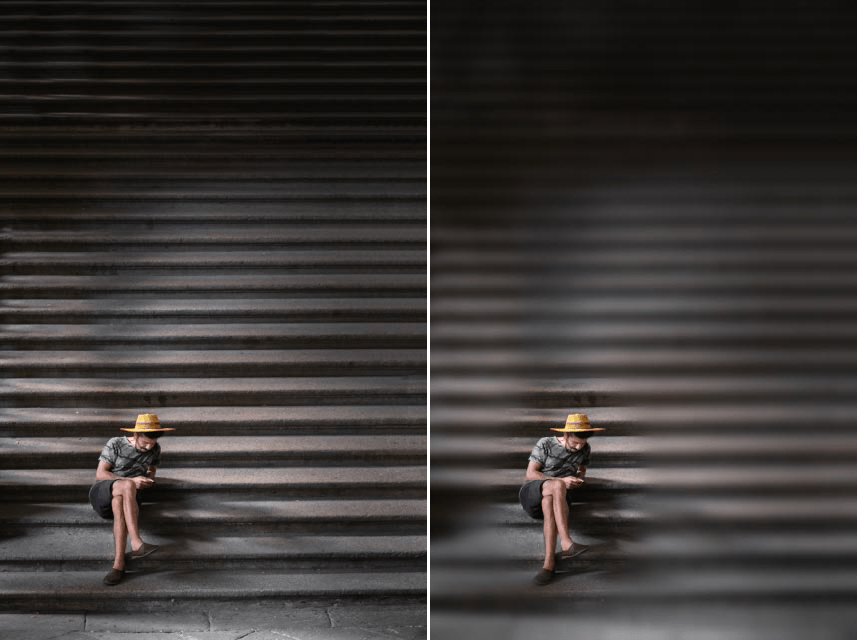
Classical Soft focus
This option simulates blur filters and traditional diffusion techniques.
| Method | Offers 3 different levels for each of the Blur and Diffusion effects. |
| Diffused Detail | Adjusts the density of random details added to the Blur effect. This option helps maintain the appearance of the details and prevents interference. |
| Intensity | Adjusts the level of softening added to the photo. |
| Lightness | Adjusts the overall brightness of the image. |
| Shade | Moved to the right, the slider will lighten only shadows and recover details drowned in the dark areas. |
| Highlights | Moved to the right, the slider will darken only the brightest areas and recover blown-out details. |
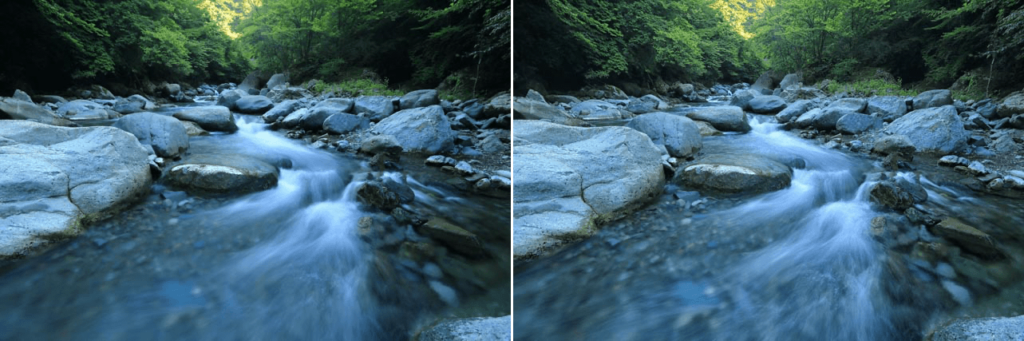
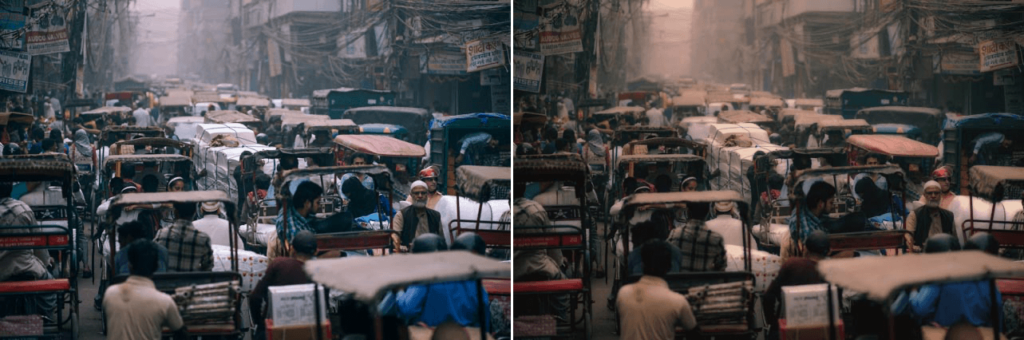
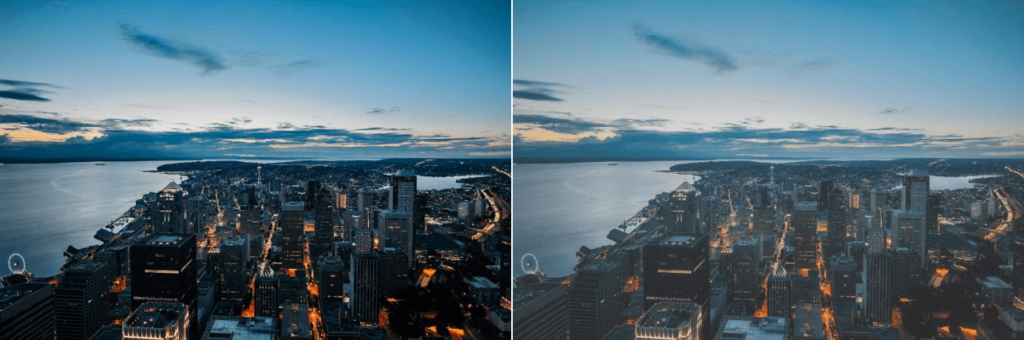
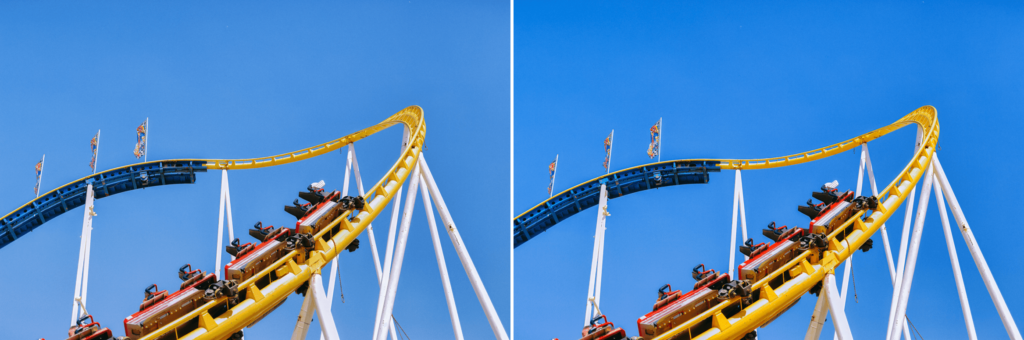
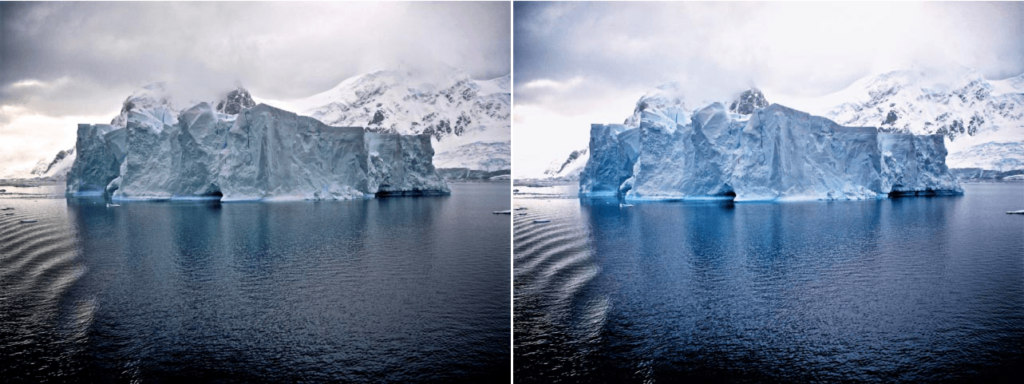
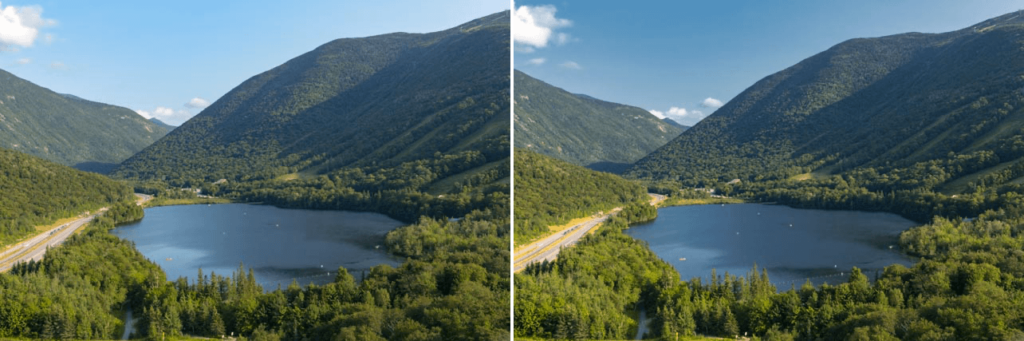
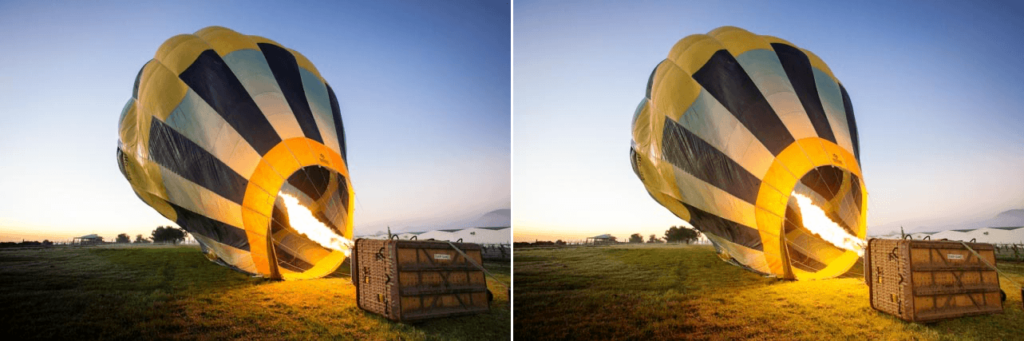
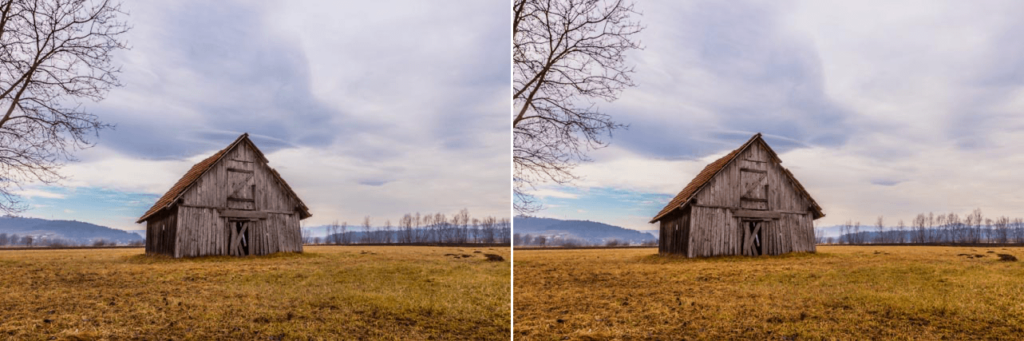
ClearView
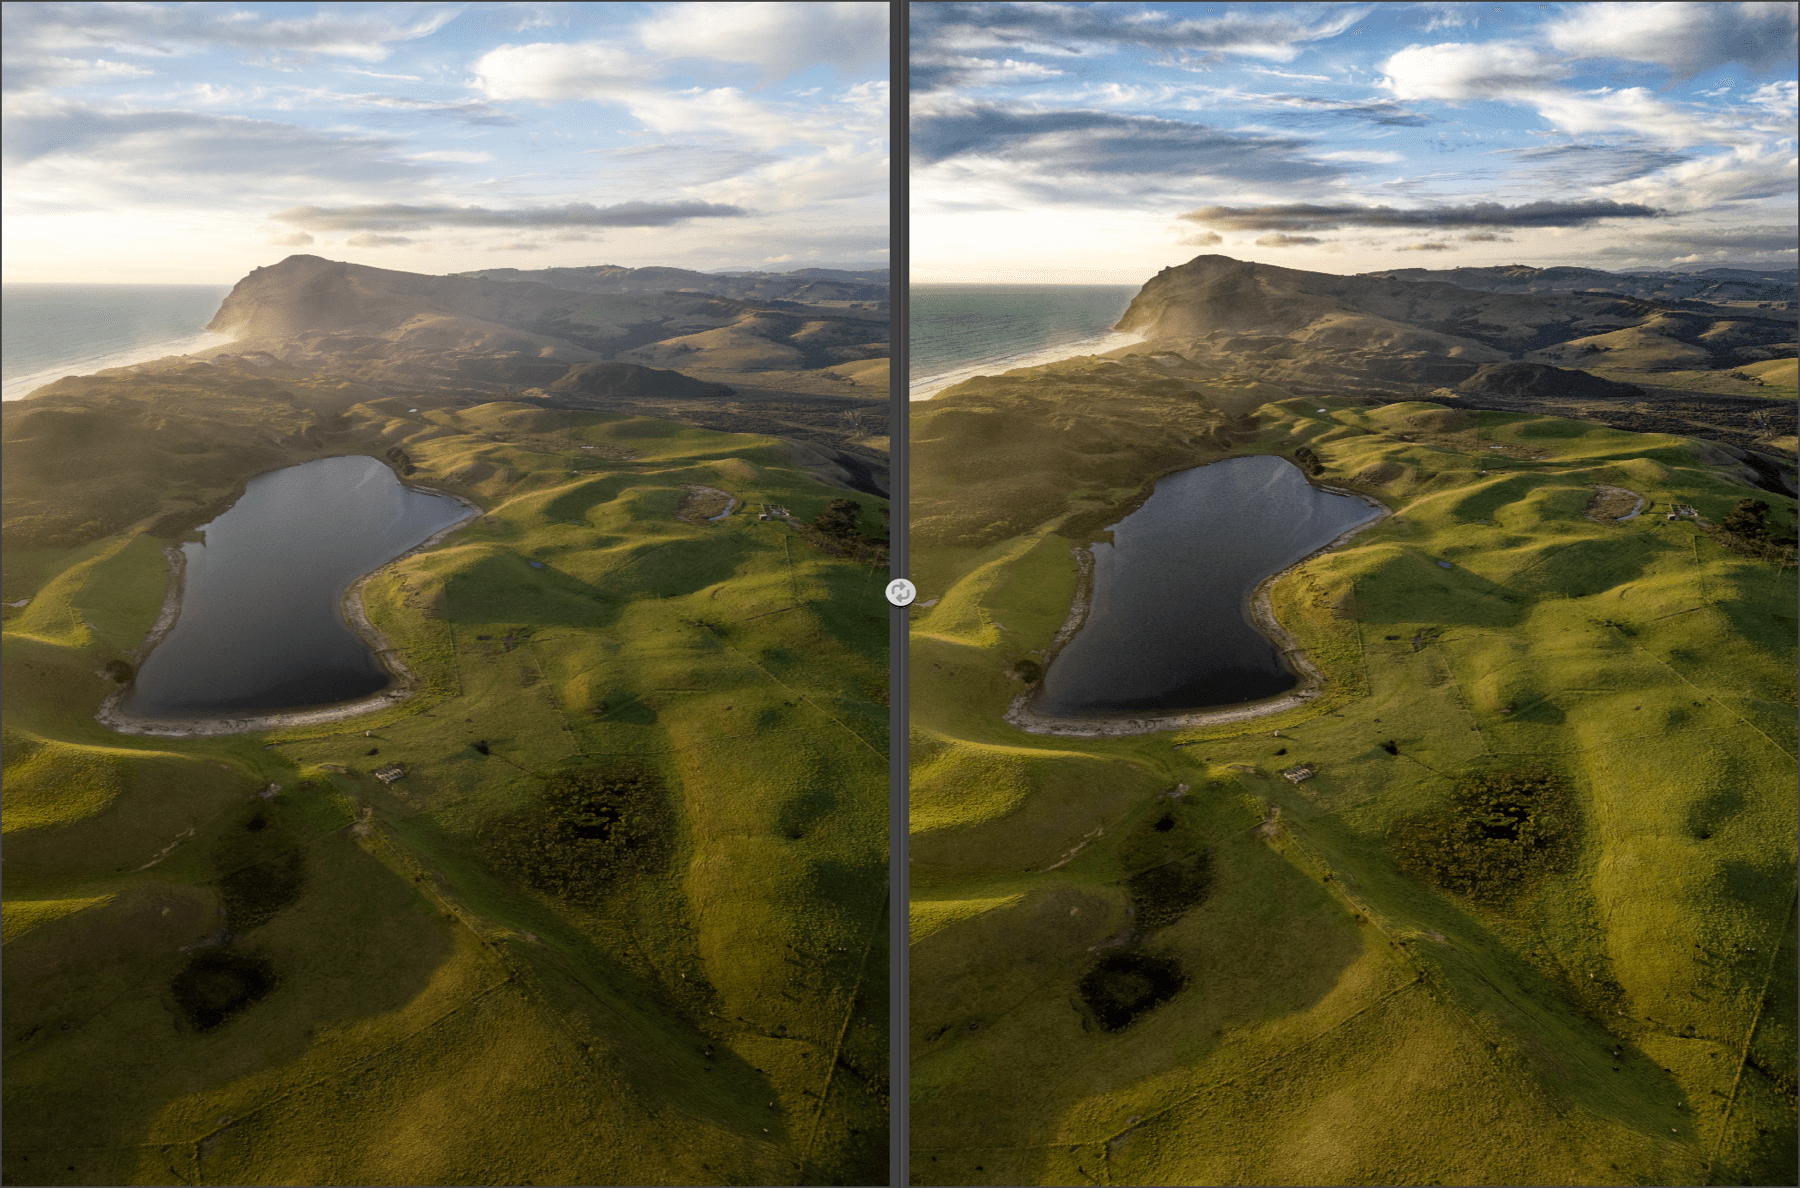

The goal of DxO ClearView is to reduce atmospheric haze. ClearView can also be used to give your images greater impact.
Set to 0 by default, the Intensity slider will recover black tones which improves the perception of details, contrast and color saturation.
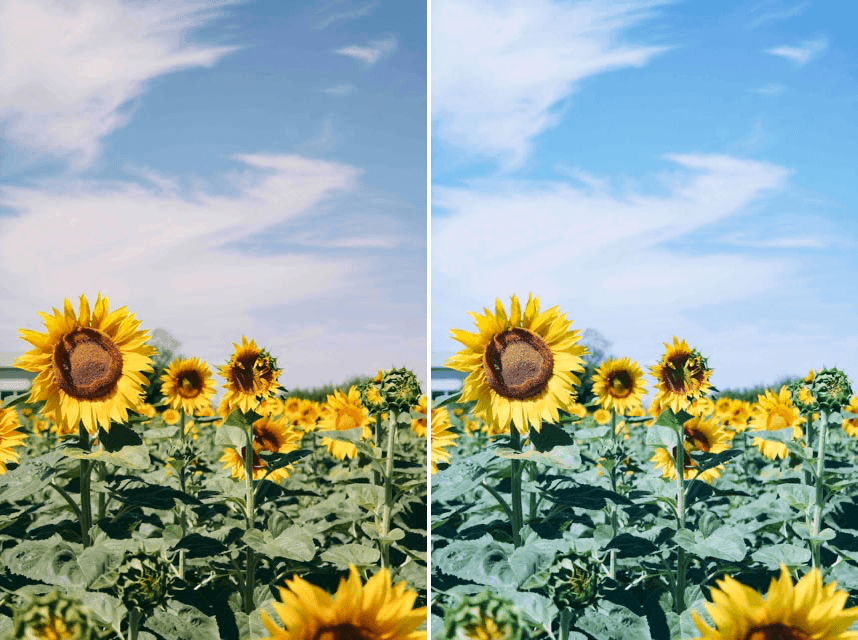
Color Stylizer
Use this filter to overlay a color on the photo, while retaining control of the color saturation of the original image.
| Color | Selects the color to be added to the image. Use the eyedropper to select a color from the photo or click on the color chart to open the color picker tool. |
| Contrast | Controls the overall contrast of the photo. |
| Saturation | Adjusts the vividness of the original colors. Drag the slider to the left to create a monochrome image or to the right to maintain all the colors of the original. |
| Shade | Moved to the right, the slider will lighten only shadows and recover details drowned in the dark areas. |
| Highlights | Moved to the right, the slider will darken only the brightest areas and recover blown-out details. |
Colorize
Inks the image with one color, and offers different color and contrast relationships to stylize the image.
| Method | Offers six different modes for applying color to the image. |
| Color | Selects the color to be added to the image. Use the eyedropper to select a color from the photo or click on the color chart to open the color picker tool. |
| Intensity | Adjusts the degree to which the filter is applied to the photo. |
| Shade | Moved to the right, the slider will lighten only shadows and recover details drowned in the dark areas. |
| Highlights | Moved to the right, the slider will darken only the brightest areas and recover blown-out details. |
Contrast Color Range
Adjusts the contrast between the selected colors in an image.
| Color | Selects the color range to which to apply contrast. Select a color and the subjects in that color will be lightened, while the opposite colors will be darkened. |
| Color Contrast | Adjusts the level of contrast to be added between the selected color and the complementary subject of that color. |
| Lightness | Controls the overall brightness of the image. |
| Contrast | Controls the overall contrast of the photo. |
| Shade | Moved to the right, the slider will lighten only shadows and recover details drowned in the dark areas. |
| Highlights | Moved to the right, the slider will darken only the brightest areas and recover blown-out details. |
Contrast Only
This filter provides various controls for contrast, including the “Contrast Only” method, which adjusts contrast without changing the color of the objects in the photo.
| Lightness | Controls the overall contrast of the photo. |
| Contrast | Applies standard contrast to images, similar to the contrast provided in your image editing application. |
| Contrast Only | Applies contrast without changing colors. |
| Soft Contrast | Provides a softer alternative to the usual contrast. Move this slider to the right to create a contrast that gives character to the image, with smooth transitions between areas. |
| Saturation | Controls the overall intensity of colors in the photo. |
| Shade | Moved to the right, the slider will lighten only shadows and recover details drowned in the dark areas. |
| Highlights | Moved to the right, the slider will darken only the brightest areas and recover blown-out details. |
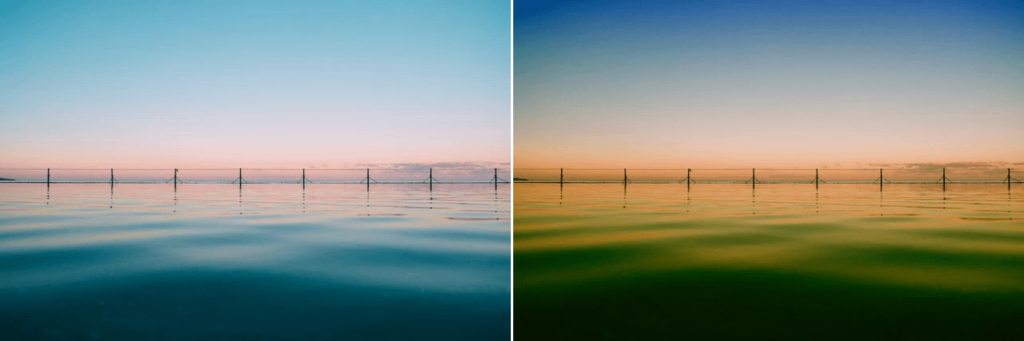
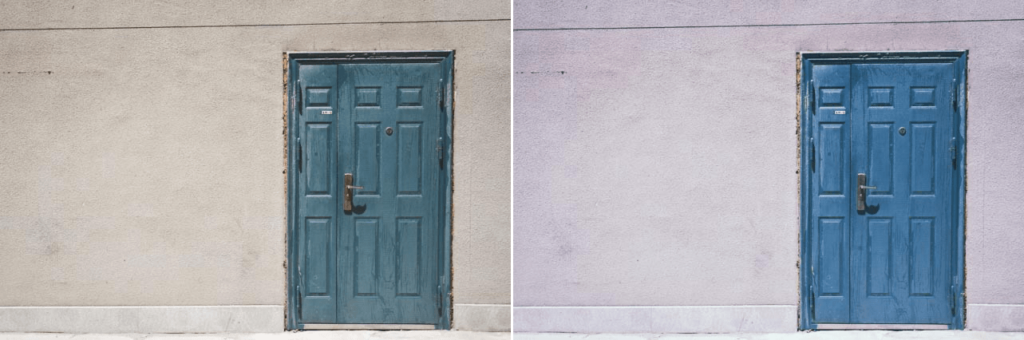
Cross Balance
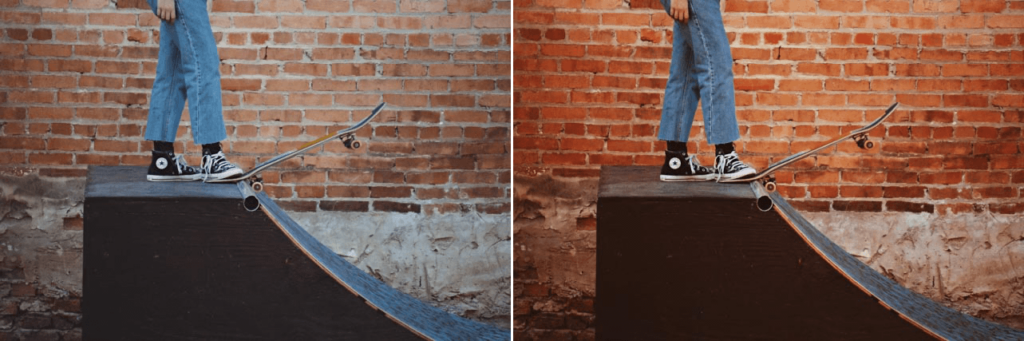
Simulates the use of a daylight film under artificial tungsten-type light, or a tungsten color film in daylight. Use this filter to warm up your photos with an orange color or cool them down with a bluish effect.
| Method | Select one of the 6 available options to get a daylight-to-tungsten or tungsten-to-daylight effect. Each option gives a more accentuated effect than the previous one. |
| Intensity | Adjusts the degree to which the filter is applied to the photo. |
Cross Processing
Provides a variety of different options for C41 to E6 processing (color negative film processing in slide film chemicals) and E6 to C41 processing (slide film processing in color negative film chemicals).
| Method | Use this drop-down menu to select one of the predefined processing methods. |
| Intensity | Controls the degree to which the filter is applied to your photo. |
| Shade | Moved to the right, the slider will lighten only shadows and recover details drowned in the dark areas. |
| Highlights | Moved to the right, the slider will darken only the brightest areas and recover blown-out details. |
Dark Contrasts
Uses an exclusive technique to amplify details and textures throughout the photo, with a denser and more striking rendering.
| Detail Extractor | Lets you control how much detail is accentuated. Increase the value of this slider to amplify details while lightening shadows and tamping down highlights. As a result, the tone is distributed more evenly throughout the photo. |
| Lightness | Controls the overall brightness of the image. |
| Contrast | Controls the overall contrast of the photo. |
| Saturation | Controls the intensity of the colors in the photo. |
| Shade | Moved to the right, the slider will lighten only shadows and recover details drowned in the dark areas. |
| Highlights | Moved to the right, the slider will darken only the brightest areas and recover blown-out details. |
Darken / Lighten Center
Draws the eye towards the center of the photo or away from it. A light center and dark edges draw the eye toward the center of the image, while a dark center and light edges draw the eye toward the edges.
| Method | Controls the shape of the effect. You can choose between an oval or circular shape. |
| Center Luminosity | Controls the brightness at the center of the photo. |
| Border Luminosity | Controls the brightness at the edges of the photo. |
| Center Size | Controls the size of the effect. |
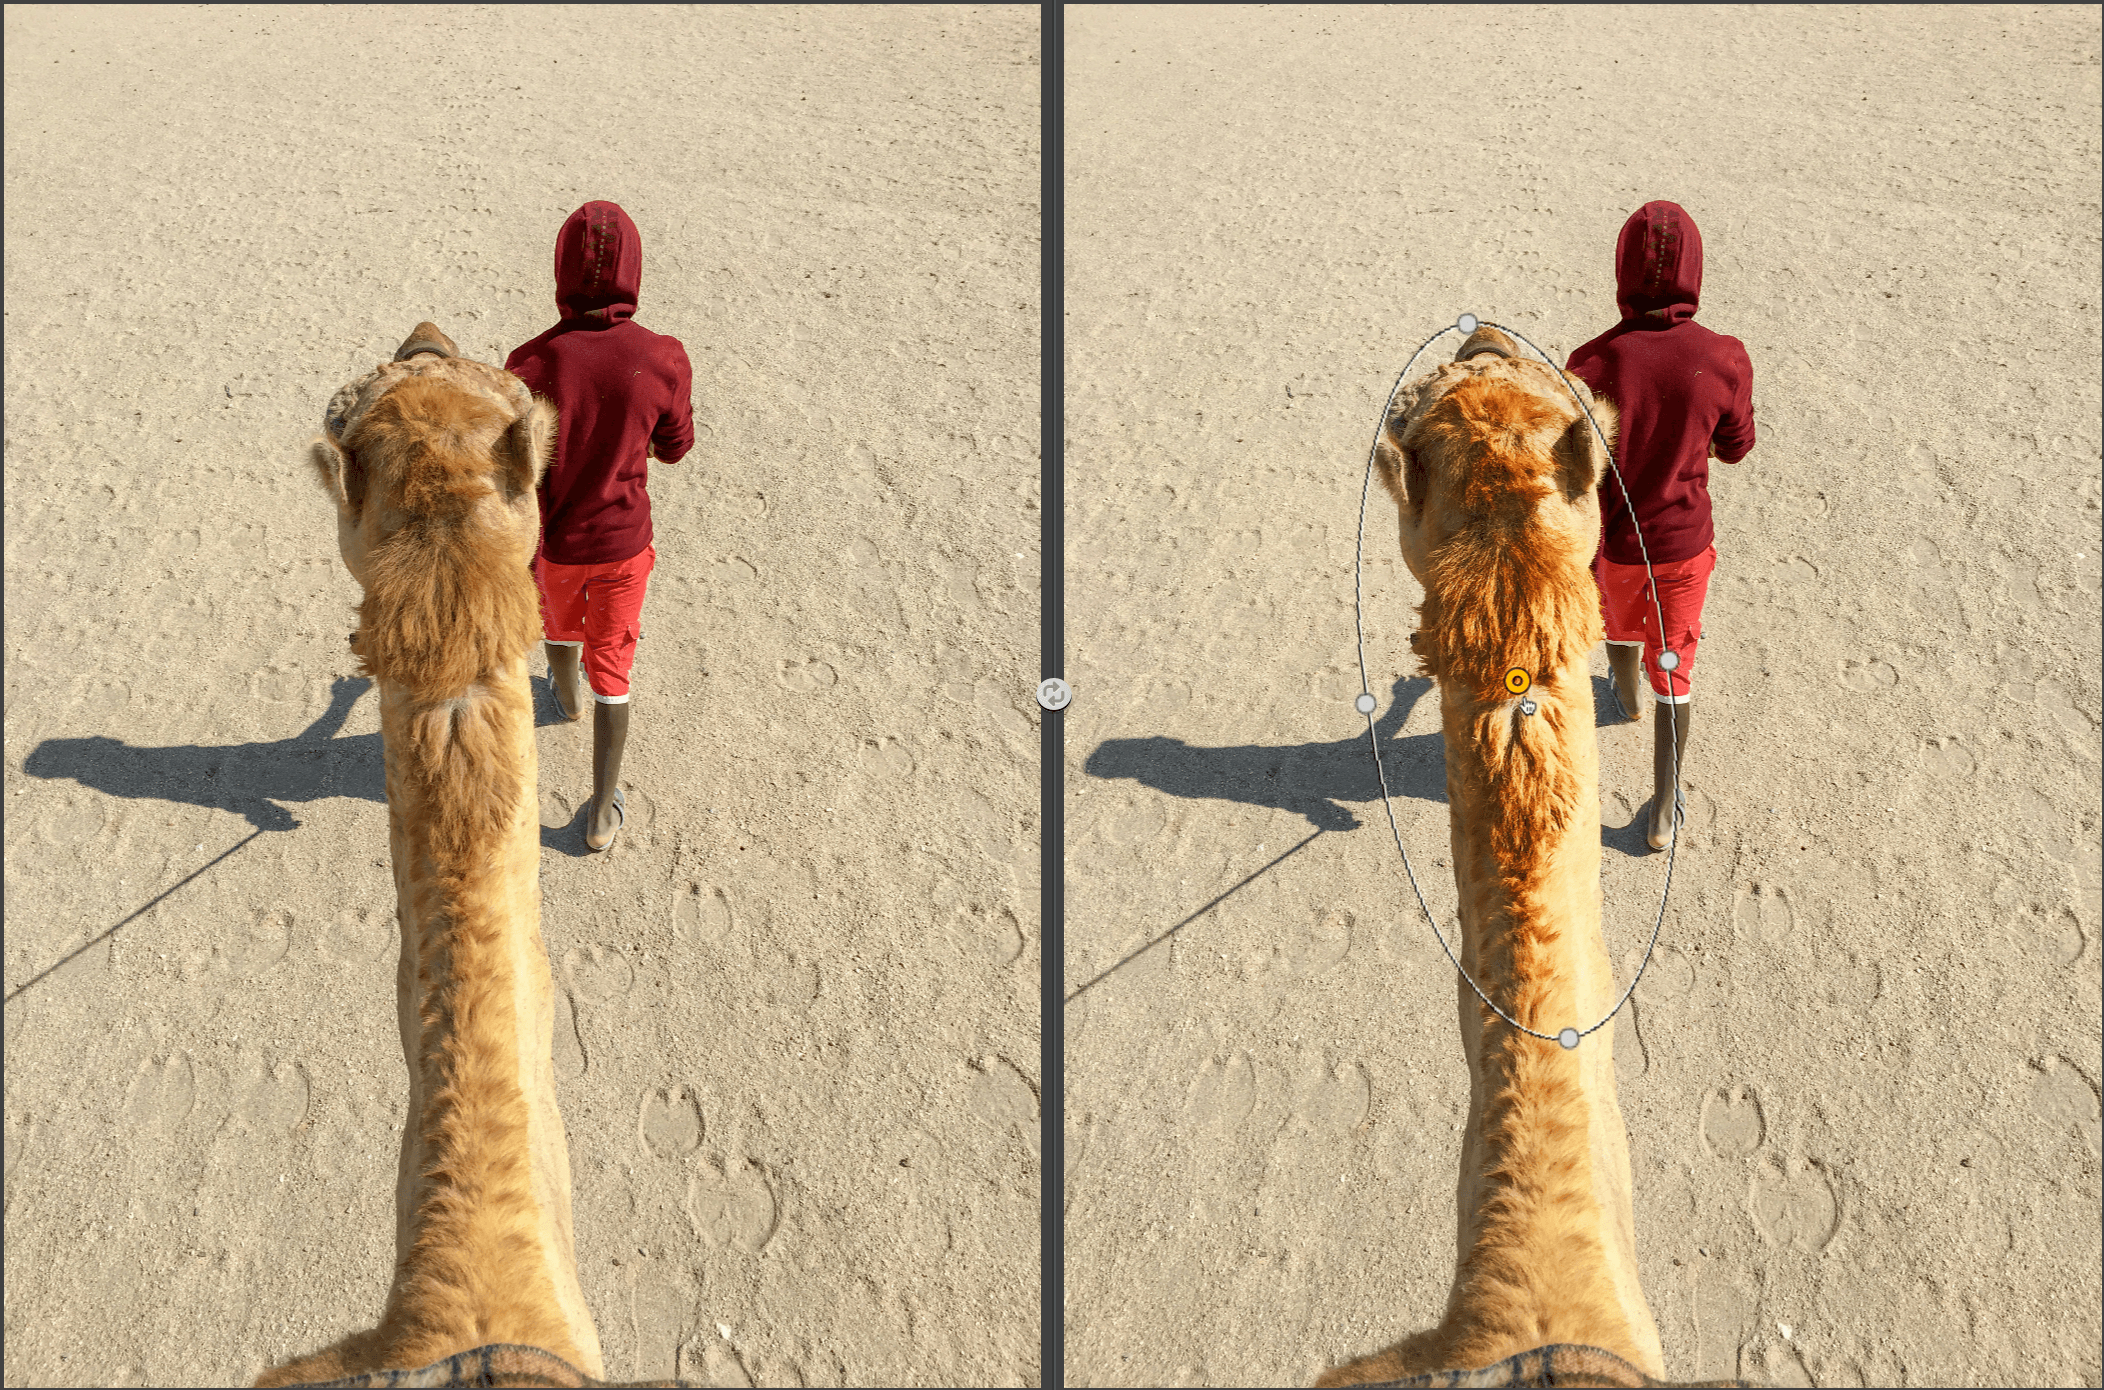
| Place Center | Click on the “Place Center” icon and then click in the area of the photo you want to use as the center of the effect. |
Detail Extractor
Uses a unique new technique to exaggerate details to create oustanding stylish photos. Use this filter to balance light and tone, and extract detail throughout the photo.
| Detail Extractor | This is the main control for this filter. Drag the slider to the right to lighten shadows and darken highlights while accentuating details throughout the photo. |
| Contrast | Controls the overall contrast of the photo. |
| Saturation | Controls the overall intensity of colors in the photo. |
| Effect radius | Controls how the Detail Extractor function brings out details. Select “Fine” to emphasize small subjects, which gives the image more texture. Or select “Large” to highlight large subjects. |
| Shade | Moved to the right, the slider will lighten only shadows and recover details drowned in the dark areas. |
| Highlights | Moved to the right, the slider will darken only the brightest areas and recover blown-out details. |
Duplex
Creates a two-color effect and offers different options for color, blur and saturation.
| Color | Adds a color to the image. To choose a color for this command, use the eyedropper to select a color from the photo or click on the color chart to open the color picker tool. |
| Intensity | Adjusts the degree to which the filter is applied to the photo. |
| Diffuse | Controls the amount of blur added to give style to the image. |
| Saturation | Controls the intensity of the colors in the photo. |
| Contrast | Controls the overall contrast of the photo. |
| Shade | Moved to the right, the slider will lighten only shadows and recover details drowned in the dark areas. |
| Highlights | Moved to the right, the slider will darken only the brightest areas and recover blown-out details. |
Dynamic Skin Softener
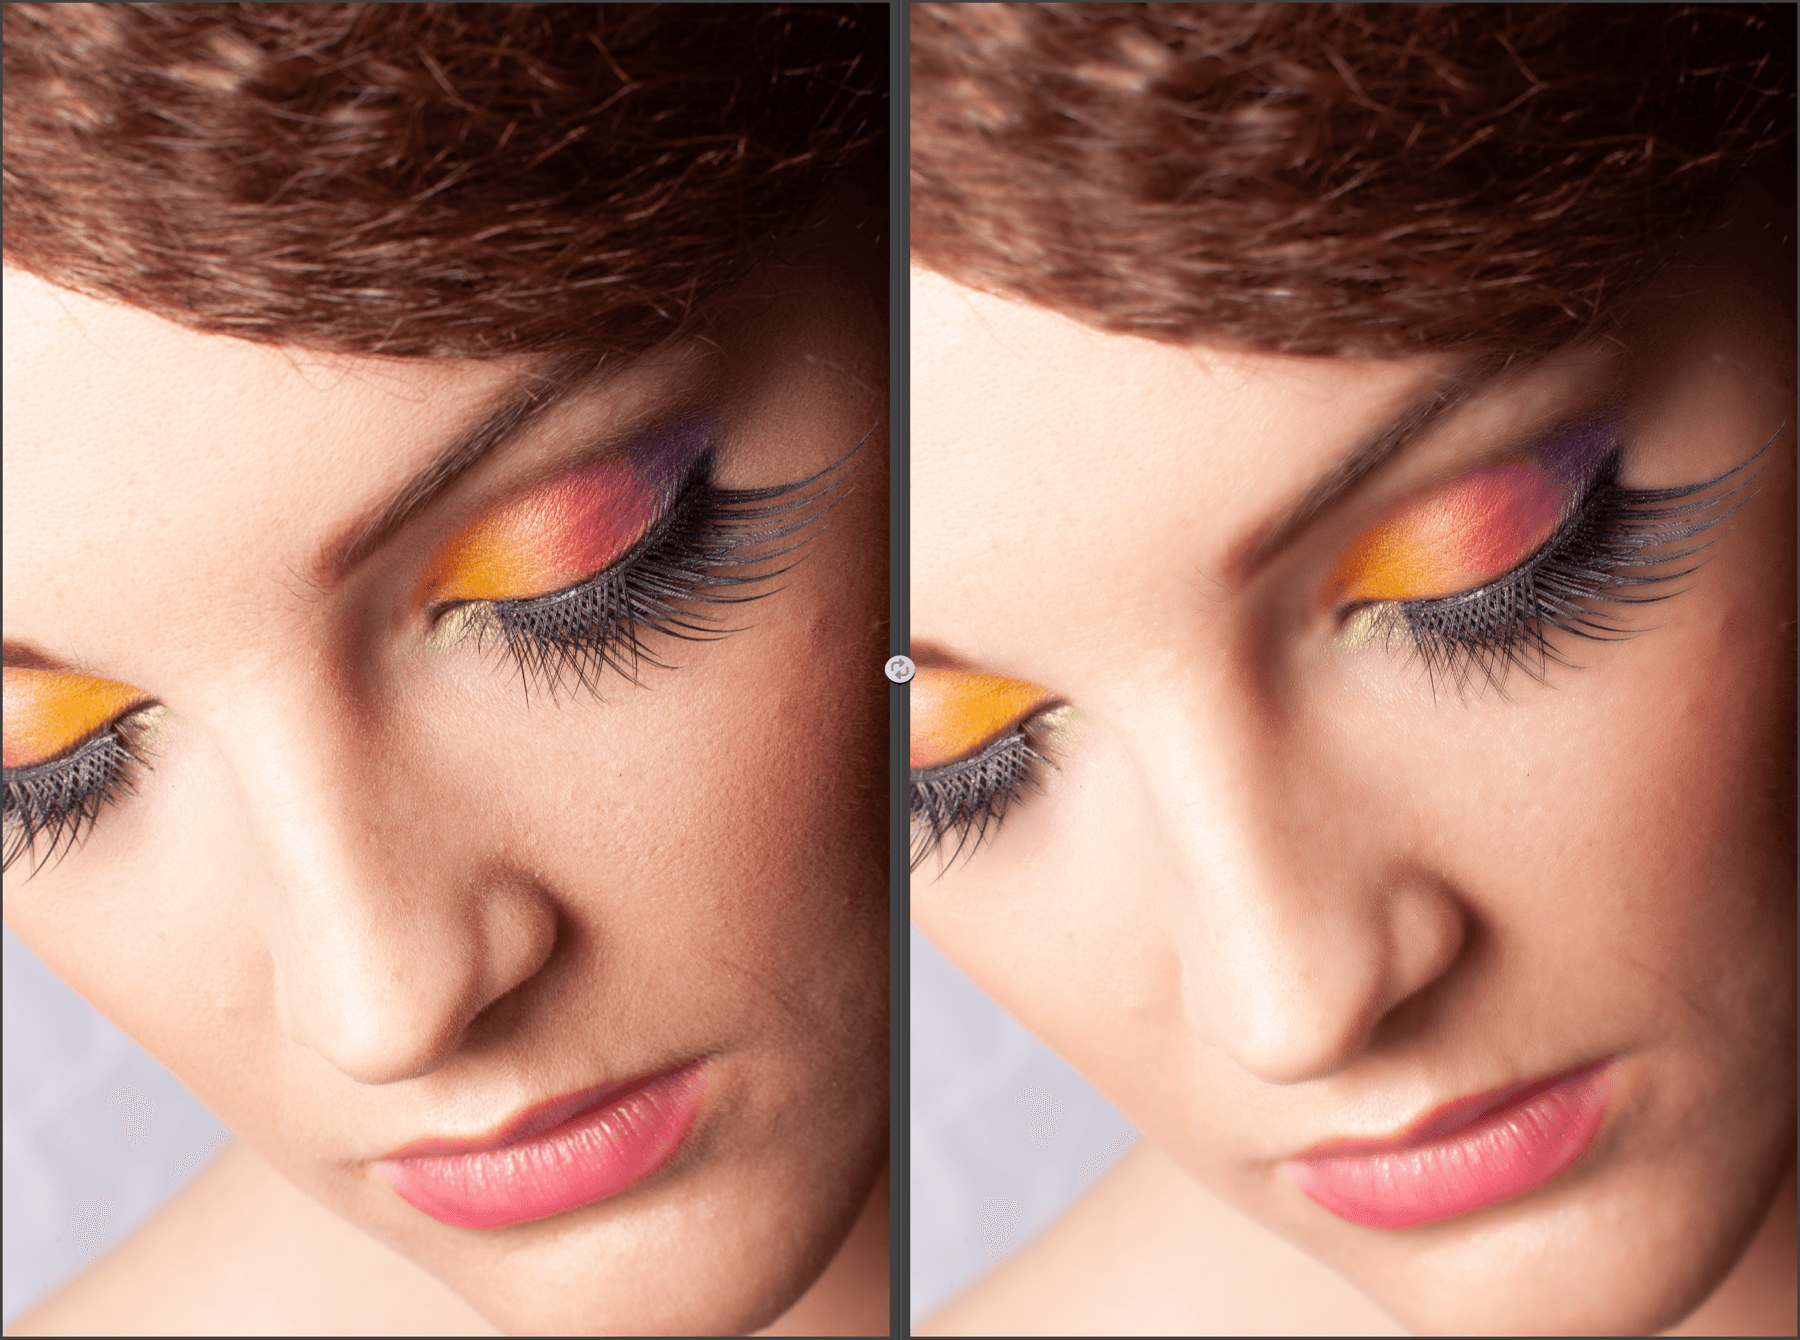
Creates soft, shiny skin without altering other objects in the image. You can also use this filter in photos that do not show a person if you want to apply the softening effect to other subjects.
| Skin Color | To select the skin color, use the eyedropper to choose a color from the photo or click on the color chart to open the color picker tool. |
| Color Reach | Lets you control the range of colors involved. Drag the slider to the left to narrow the color range or to the right to widen it. If you select 100%, the softening effect applies to all colors and objects in the photo. |
| Small Details | Controls the amount of softening applied to small details in the photo. |
| Medium Details | Controls the amount of softening applied to medium details in the photo. |
| Large Details | Controls the amount of softening applied to large details in the photo. |
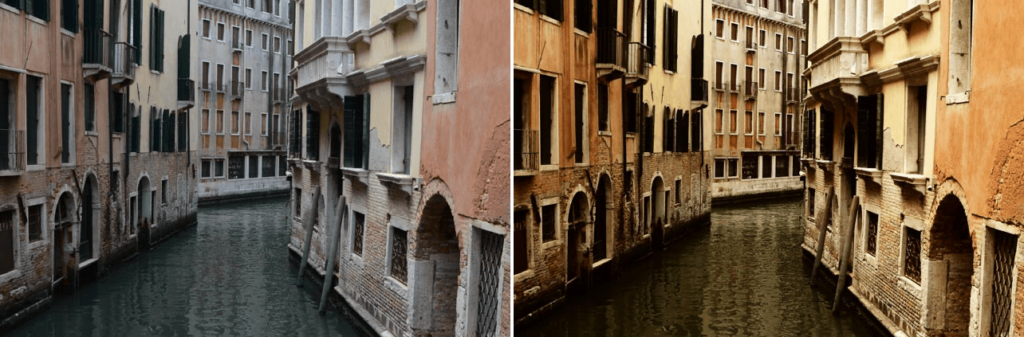
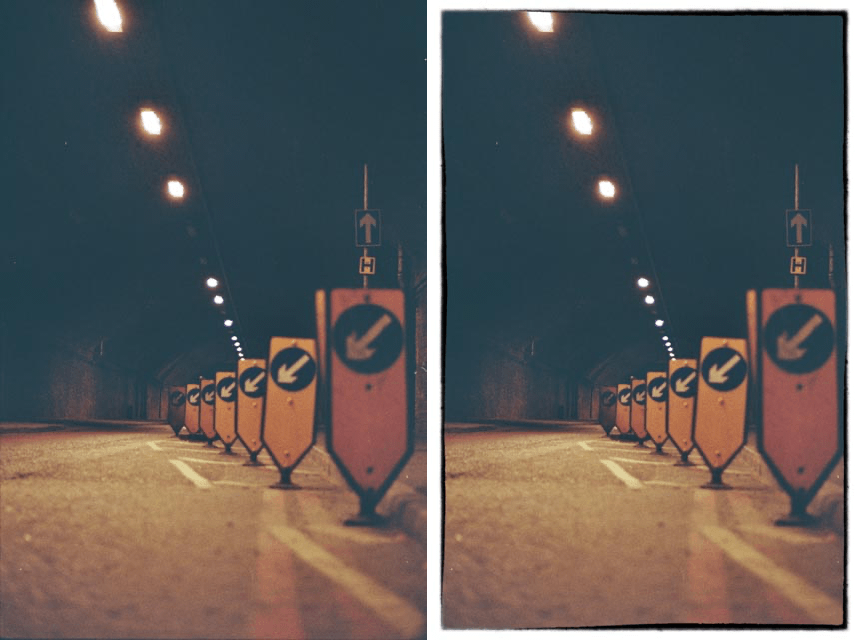
Film Efex: Faded
The Film Efex Series “Faded” filter applies a unique style to the image, giving the impression that the photo has been aged.
| Lightness | Controls the overall brightness of the image. |
| Contrast | Controls the overall contrast of the photo. |
| Saturation | Controls the intensity of the colors in the photo. |
| Blur | Gives a diffuse effect to the image, reducing contrast and softening details. |
| Vignetting | Darkens the edges of the image in a circular shape. |
| Grain per pixel | Based on Nik’s unique grain engine, this slider lets you add realistic grain to the photo. Moving the slider to the left reduces the number of grain elements applied per pixel, increasing the size and visibility of the grain throughout the photo. If you don’t want to apply any grain to your photo, move the slider all the way to the right. |
| Film Strength | Controls the intensity of the unique stylization applied to the film. To maintain the original colors of the photo, set the slider to 0 %. |
| Film Type | Select one of the available film types. Each is designed to give the image a different appearance. |
| Shade | Moved to the right, the slider will lighten only shadows and recover details drowned in the dark areas. |
| Highlights | Moved to the right, the slider will darken only the brightest areas and recover blown-out details. |
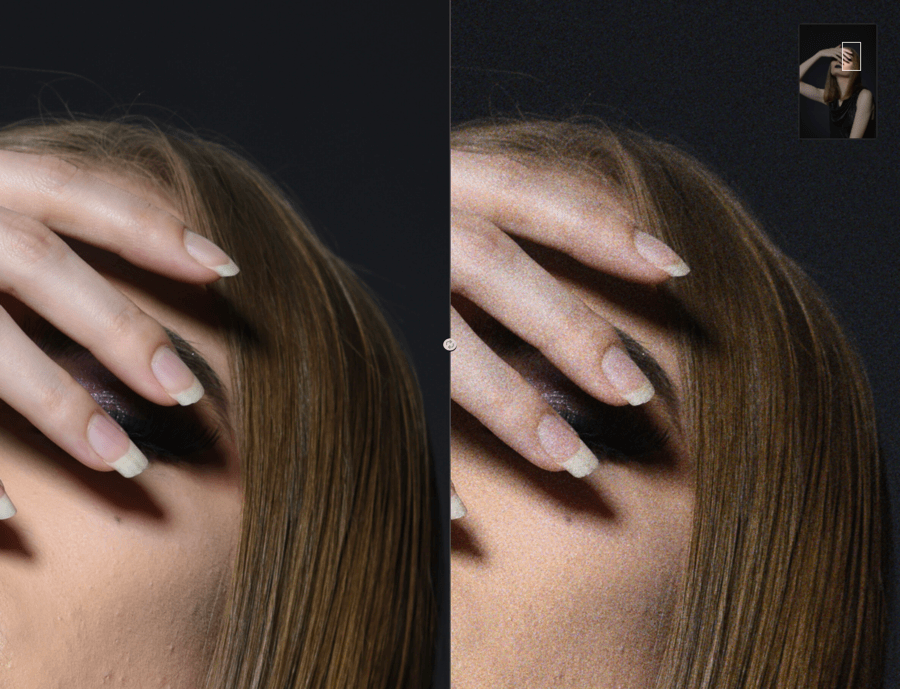
Film Efex: Modern (Branded)
The “Modern” filter from the Film Efex series is used to simulate the appearance of color films, negatives and slides, including grain. Using the advanced sliders in the “Film Details” section, you can even define your own film types to create never-before-seen imaginary films.
| Film Type | Select one of the available films. For each type, multiple films were printed, scanned, and analyzed to create the most authentic film emulation possible. |
| Lightness | Controls the overall brightness of the image. |
| Contrast | Controls the overall contrast of the photo. |
| Sensitivity | Each slider can be used to control the brightness of a specific color in the photo. |
| Saturation | Each slider can be used to adjust the intensity of a specific color in the photo. |
| Tone Curve | This tool lets you adjust the contrast of the film type, and change the tone and contrast of red, green, and blue separately. |
| Grain | These sliders let you add realistic grain to your photo using Nik Software’s unique grain engine. Move the Grain per Pixel slider to the left to reduce the number of grainy elements applied per pixel, increasing the size and visibility of the grain throughout the photo. If you don’t want to apply any grain to your photo, move the slider all the way to the right. The “Grain Hardness” slider lets you control the intensity of the grain. When the grain is coarse, the image will appear more detailed and sharp. When the grain is finer, the image feels more natural. |
| Shade | Moved to the right, the slider will lighten only shadows and recover details drowned in the dark areas. |
| Highlights | Moved to the right, the slider will darken only the brightest areas and recover blown-out details. |
Film Efex: Nostalgic
The “Nostalgic” filter in the Film Efex series creates effects based on imaginary film types. Use this filter to create special and interesting interpretations of your photo, with vivid colors, and give the feeling that it was taken by a toy camera.
| Lightness | Controls the overall brightness of the image. |
| Perceptual Saturation | Although it does not directly increase the saturation of colors, this slider alters the hues slightly to increase the perception of saturation of the corresponding colors. To achieve this, the complementary color component is increased in the surrounding colors, which affects the eye’s perception of colors. This process’s operating principle is similar to that of perceptual contrast, where the contrast seems to increase when the image is placed against a black background. |
| Glow | Adds a small amount of glow around bright subjects. |
| Vignetting | Darkens the edges of the image in a circular shape. |
| Grain per pixel | Based on Nik’s unique grain engine, this slider is used to add realistic grain to the photo. Moving the slider to the left reduces the number of grain elements applied per pixel, increasing the size and visibility of the grain throughout the photo. If you don’t want to apply any grain to your photo, move the slider all the way to the right. |
| Film Strength | Controls the intensity of the unique stylization applied to the film. To maintain the original colors of the photo, set the slider to 0 %. |
| Film Type | Select one of the available film types. Each is designed to give the image a different appearance. |
| Shade | Moved to the right, the slider will lighten only shadows and recover details drowned in the dark areas. |
| Highlights | Moved to the right, the slider will darken only the brightest areas and recover blown-out details. |
Film Efex: Vintage
The Vintage filter in the Film Efex series creates photos that feel like they have been taken with the very earliest types of color film.
| Saturation | Controls the overall intensity of colors in the photo. |
| Warmth | Controls the color temperature of the photo. Move the slider to the left to cool the colors (adding blue tones) or to the right to warm them (adding red tones). |
| Vignetting | Darkens the edges of the image in a circular shape. |
| Lightness | Controls the overall brightness of the image. |
| Grain per pixel | Based on Nik’s unique grain engine, this slider is used to add realistic grain to the photo. Moving the slider to the left reduces the number of grain elements applied per pixel, increasing the size and visibility of the grain throughout the photo. If you don’t want to apply any grain to your photo, move the slider all the way to the right. |
| Film Strength | Controls the intensity of the unique stylization applied to the film. To maintain the original colors of the photo, set the slider to 0 %. |
| Film Type | Select one of the available film types. Each is designed to give the image a different appearance. |
Film Grain
Adds a realistic film grain to images.
| Grain per pixel | Based on Nik’s unique grain engine, this slider is used to add realistic grain to the photo. Moving the slider to the left reduces the number of grain elements applied per pixel, increasing the size and visibility of the grain throughout the photo. If you don’t want to apply any grain to your photo, move the slider all the way to the right. |
| Grain Hardness | This slider lets you control the intensity of the grain. When the grain is coarse, the image will appear more detailed and sharp. When the grain is finer, the image feels more natural. |
| Film Contrast | Adds a natural S-curve to the image, similar to that of film. |
| Shade | Moved to the right, the slider will lighten only shadows and recover details drowned in the dark areas. |
| Highlights | Moved to the right, the slider will darken only the brightest areas and recover blown-out details. |
Fog
Simulates a traditional fog effect: a pronounced blur that gives this look to the image.
| Method | Allows you to choose from 4 artistic blur ranges. |
| Intensity | Controls how intensely the filter will be applied. |
| Shade | Moved to the right, the slider will lighten only shadows and recover details drowned in the dark areas. |
| Highlights | Moved to the right, the slider will darken only the brightest areas and recover blown-out details. |
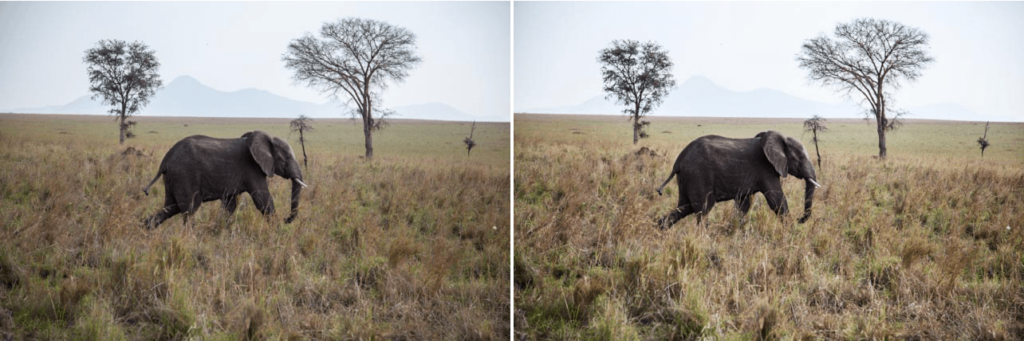
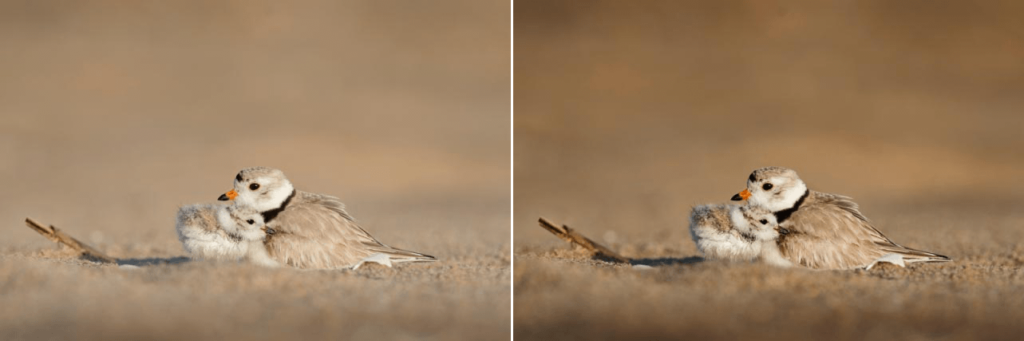
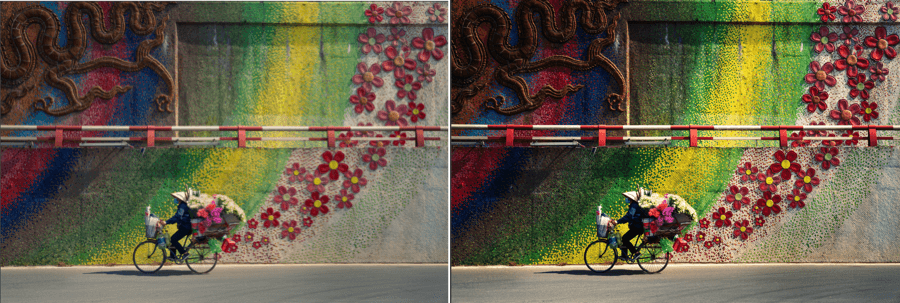
Foliage
Identifies foliage and greenery in an image, and enhances or stylizes these objects.
| Method | Controls the color of the foliage visible in the photo. |
| Enhance Foliage | Controls how intensely the filter will be applied. |
Glamour Glow
Provides portrait photographers with a powerful tool to stylize images with soft and dreamlike effects.
| Glow | Lets you control to what extent the filter’s softening technique is applied. |
| Saturation | Adjusts the overall vividness of the colors (to the right) and gradually fades the colors (to the left). |
| Glow Warmth | Controls the temperature of the effect added to the image. Move the slider to the left to cool the image with blue tones or to the right to warm the image with red-orange tones. |
| Shade | Moved to the right, the slider will lighten only shadows and recover details drowned in the dark areas. |
| Highlights | Moved to the right, the slider will darken only the brightest areas and recover blown-out details. |
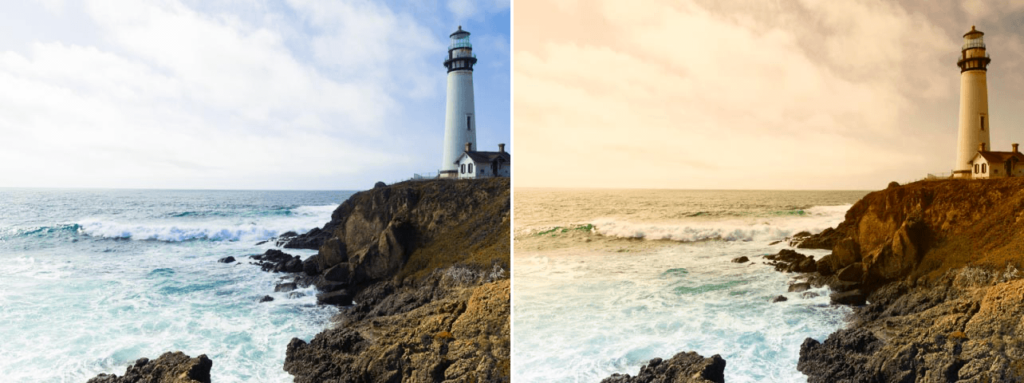
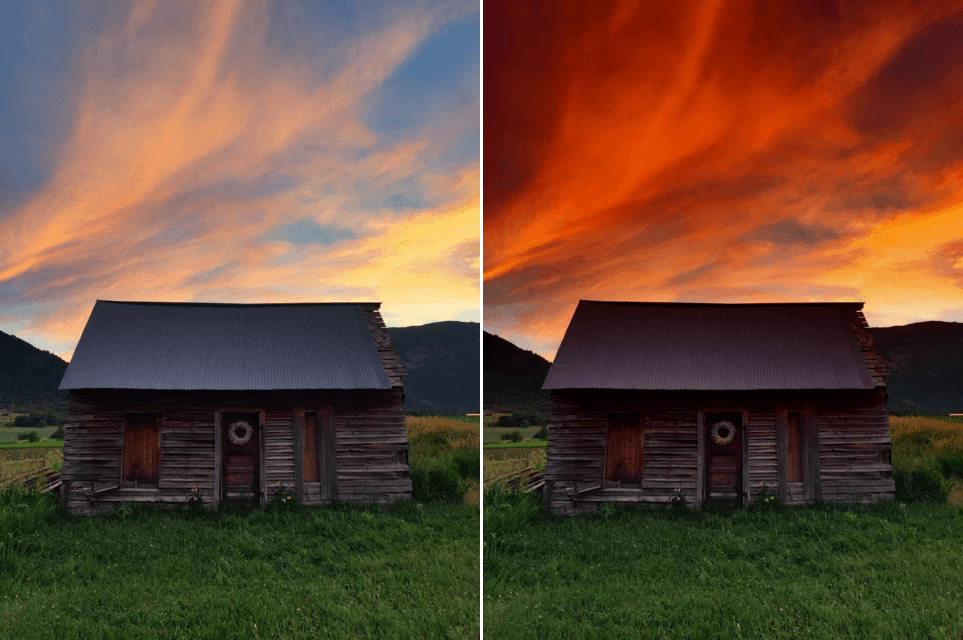
Global Adjustments (Viveza)
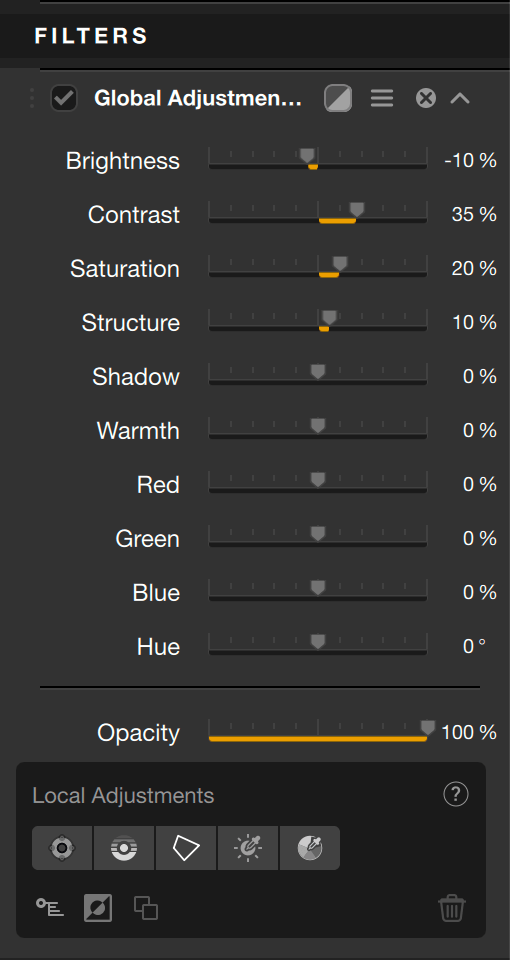
The sliders provide all the tools for basic tonal and color corrections:
- Brightness: adjusts the brightness, darker on the left, lighter on the right.
- Contrast: adjusts the contrast — that is, the difference in luminosity between the dark and light parts of the image. Towards the left, the image will be flatter and less saturated, towards the right, the image will be more punchy and more saturated.
- Saturation: acts on the brilliance of the colors, more vivid towards the right, and less and less saturated towards the left, until obtaining a completely gray image.
- Structure: reinforces the details and gives more spiciness to the image. Set to the left, the slider softens the details.
- Shadows: adjusts the brightness of dark areas in the image.
- Warmth: set to the left, cools the colors (towards blue), set to the right, warms the colors (towards yellow/orange).
- Red: lets you mitigate a dominant color (more cyan on the left, more red on the right).
- Green: lets you mitigate a dominant color (more magenta on the left, more green on the right).
- Blue: lets you mitigate a dominant color (more yellow on the left, more blue on the right).
- Hue: shifts the set of colors towards their opposing hues (for example, the blue of the sky turns magenta to the right, or green to the left).
Graduated Filters
Simulates the use of a traditional glass graduated filter that fuses a color in one half of the photo.
| Color Set | Select one of 16 predefined color combinations, grouped into four different color sets. |
| Opacity | Controls the overall intensity of the filter. |
| Blend | Controls the transition between the filter and the original photo. |
| Vertical Shift | Controls the position of the filter horizon. |
| Rotation | Controls the angle of the filter horizon. |
| Shade | Moved to the right, the slider will lighten only shadows and recover details drowned in the dark areas. |
| Highlights | Moved to the right, the slider will darken only the brightest areas and recover blown-out details. |
Graduated Fog

Simulates a traditional glass filter and lets you add an accentuated softening effect to one half of the photo.
| Fog Method | Provides a range of different soft focus effects. |
| Opacity | Controls the overall intensity of the filter. |
| Blend | Controls the transition between the filter and the original photo. |
| Vertical Shift | Controls the position of the filter horizon. |
| Rotation | Controls the angle of the filter horizon. |
| Shade | Moved to the right, the slider will lighten only shadows and recover details drowned in the dark areas. |
| Highlights | Moved to the right, the slider will darken only the brightest areas and recover blown-out details. |
Graduated Neutral Density
Darkens or brightens part of an image while preserving its color. Use this filter to correct the tonality of an image that is too high in contrast.
| Upper Tonality | Controls the brightness of the upper part of the filter. |
| Lower Tonality | Controls the brightness of the lower part of the filter. |
| Blend | Controls the size of the transition between the fog effect and the details in the original image. |
| Vertical Shift | Controls the position of the filter horizon. |
| Rotation | Controls the angle of the filter horizon. |
| Shade | Moved to the right, the slider will lighten only shadows and recover details drowned in the dark areas. |
| Highlights | Moved to the right, the slider will darken only the brightest areas and recover blown-out details. |
Graduated User Defined
Simulates the use of a traditional graduated glass filter and lets you select any color to merge it into one half of the photo.
| Color | Indicates the color to be applied to one half of the photo. Use the eyedropper to select a color in the image or click the color chart to open the color picker tool. |
| Opacity | Controls the overall intensity of the filter. |
| Blend | Controls the size of the transition between the selected color and the details in the original image. |
| Vertical Shift | Controls the position of the filter horizon. |
| Rotation | Controls the angle of the filter horizon. |
| Shade | Moved to the right, the slider will lighten only shadows and recover details drowned in the dark areas. |
| Highlights | Moved to the right, the slider will darken only the brightest areas and recover blown-out details. |
Grain
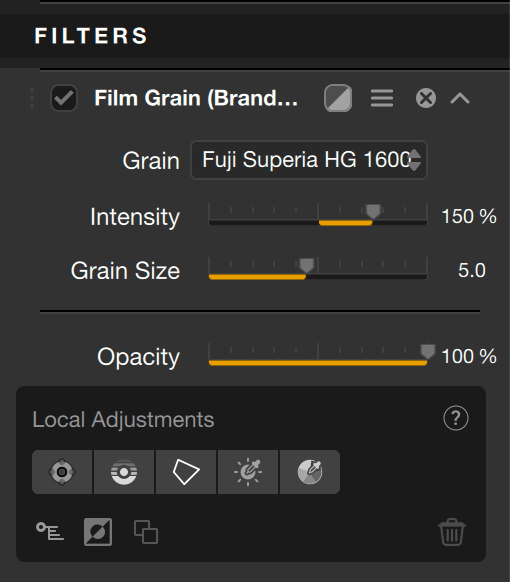
The Grain filter simulates film grain*, based on different real brands and types of color negatives and slides, analyzed by DxO Labs, to the contrary of Color Efex legacy filters like Film Efex and Film grain, which simulates a generic grain.
The Grain filter simulates grain only, and not the color and contrast rendering of the different color films provided here. It is up to you to create a rendering that follows your taste, by using the Nik Color Efex tools.
The drop-down Grain menu, set to Original by default (no grain applied) shows the list of silver emulsion films. Hover the mouse over the list to see a preview of the effect on the image.
Once you have made your choice, you can use the sliders to adjust the intensity of the grain and its size:
- Intensity: set at 100 by default, the slider strengthen or reduce the presence of grain, making it more or less visible in your edit. Zoom in the image for finer control.
- Grain Size: set to a low value by default (1.0), you may want to increase the value and zoom in on the photo to see the effect.
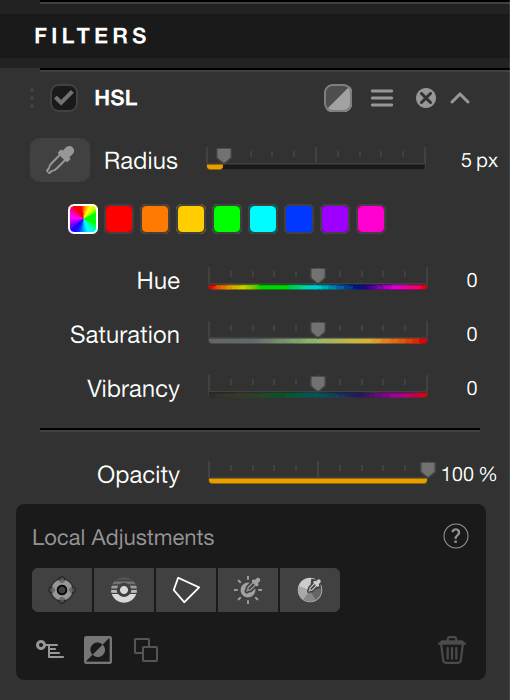
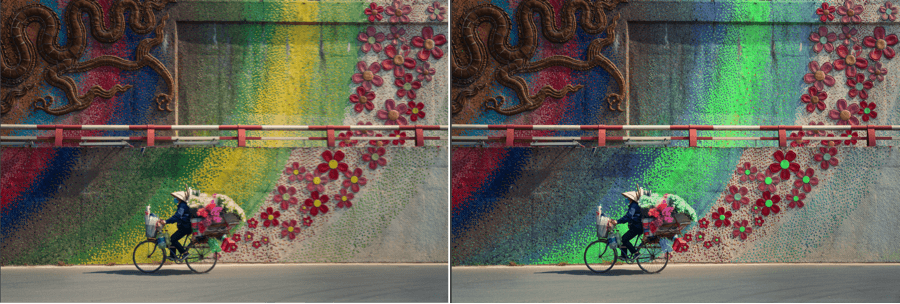
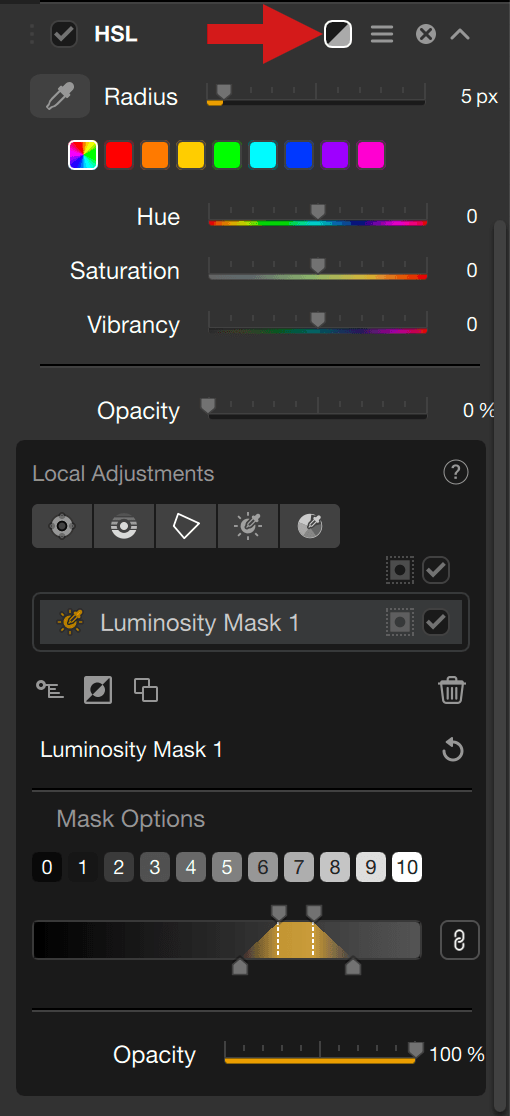
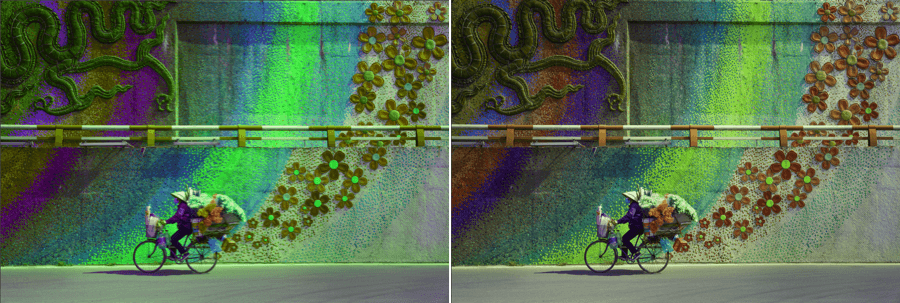
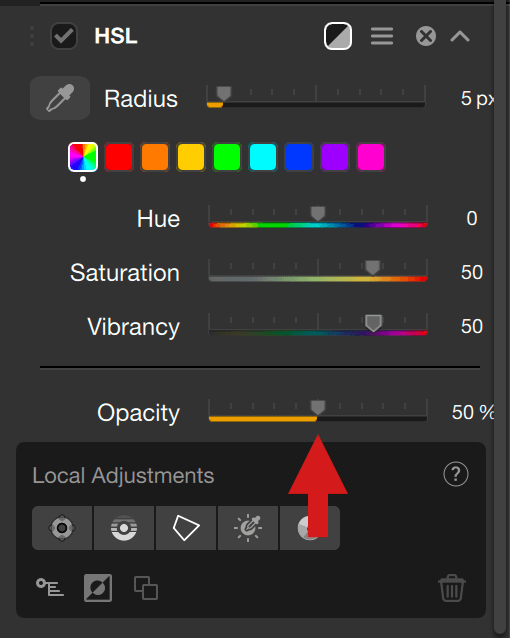
HSL
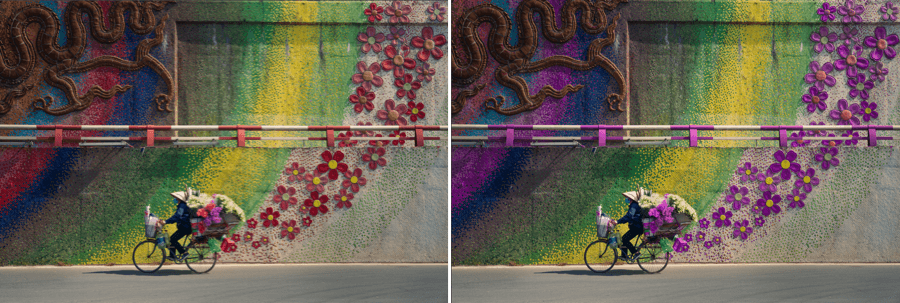
The Hue/Saturation/Luminance (HSL) filter lets you selectively correct colors using:
- 8 color channels,
- a global channel,
- 4 sliders that alter color hue, saturation, luminance and uniformity,
- a vibrancy slider (global channel only),
- a HSL color picker and a color scale (except for the global channel).
This tool also allows you to:
- strengthen or reduce colors,
- modify or even replace colors,
- standardize hue variations for a color.
At the top of the section, colored clickable tiles indicate the color channels to select (left to right):
- Global channel (multicolor tile)
- Red
- Orange
- Yellow
- Green
- Cyan
- Blue
- Purple
- Magenta
Working with the color channels
This section applies to the individual color channels, and not the global channel
The selected channel tile will have a white border. Should a hue, saturation, luminance or uniformity adjustment be made, a white dot appears under the tile of the corresponding channel or channels.
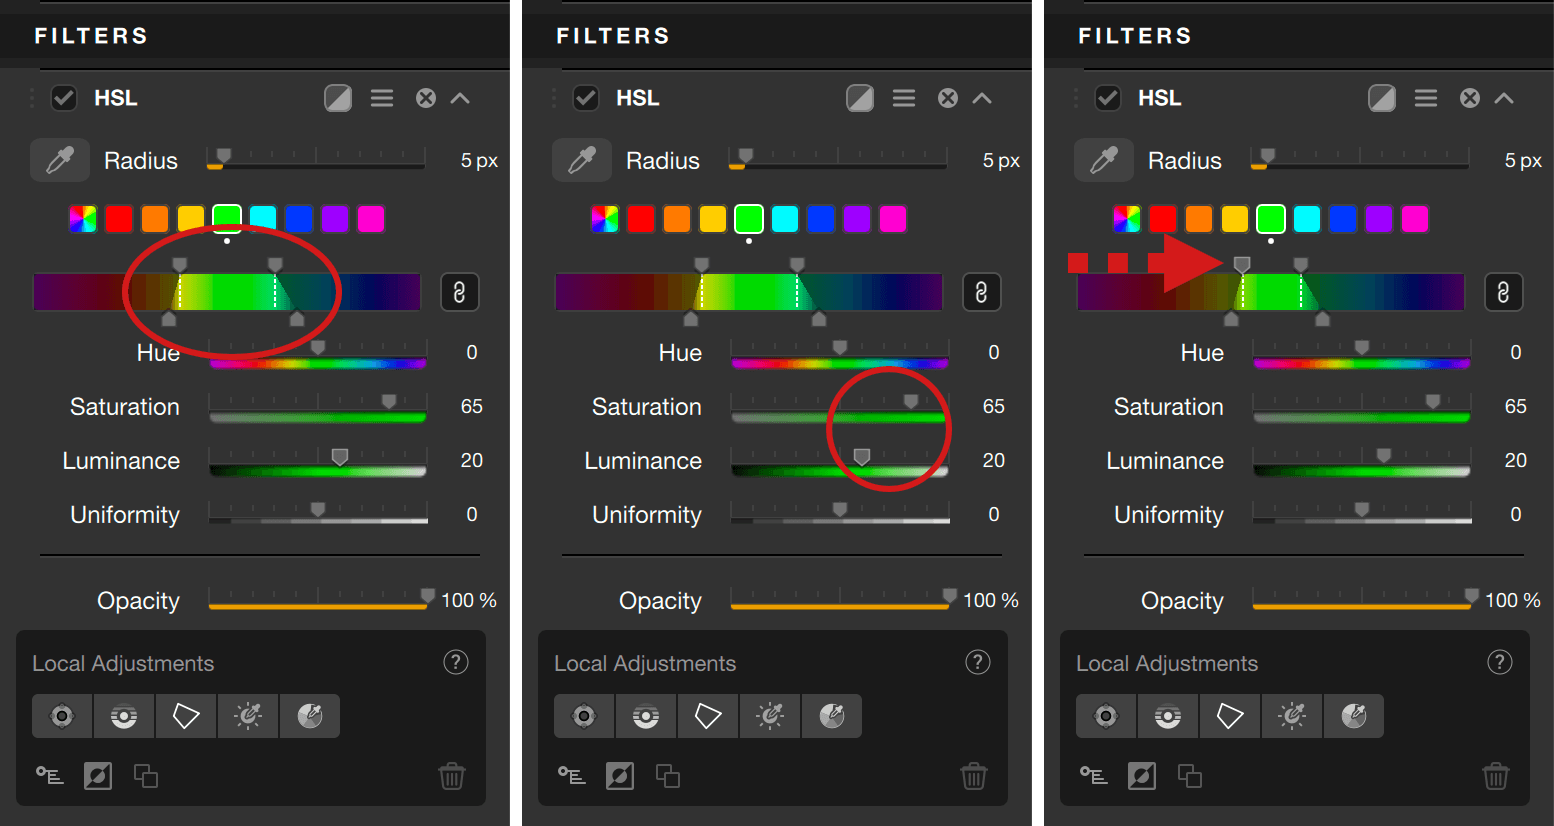
The sliders enable the following corrections:
- Hue: Changes the color of the selected channel. If the global channel is selected, all colors will be modified by the respective opposite hues, according to the chromatic wheel principle.
- Saturation: reduces or reinforces the active hue; when moved to the left the hue gradually desaturates towards gray, moved to the right the hue becomes more saturated. If the global channel (white channel) is selected, the slider effect will apply to all hues.
- Luminance : applies to the brightness of the active hue. Moving it to the left dims the hue and, to the right makes it brighter, while preserving saturation. This slider is not available when the global channel (white tile) is active.
- Uniformity: applies to the homogeneity of the hues of the active channel. Increasing the value (to the right) will reduce the shade variations of the target hue. By reducing its value (to the left), the color variation of the active channel is accentuated. This slider is not available when the global channel (white tile) is active.
- Color range scale: gives you a higher control and precision on hue selection, transition with adjacent hues and fall off. Please see the Using the HSL color picker and the color range scale paragraph for more information.
When a channel is selected, the Saturation and Luminance slider bars turn that color (e.g. if the green channel is active, the bars are green). This does not apply if the global channel (multicolor tile) is active.
You can work on several channels in the same image, including the global channel. To do this, simply click on the tile you want, whether it is active or not.
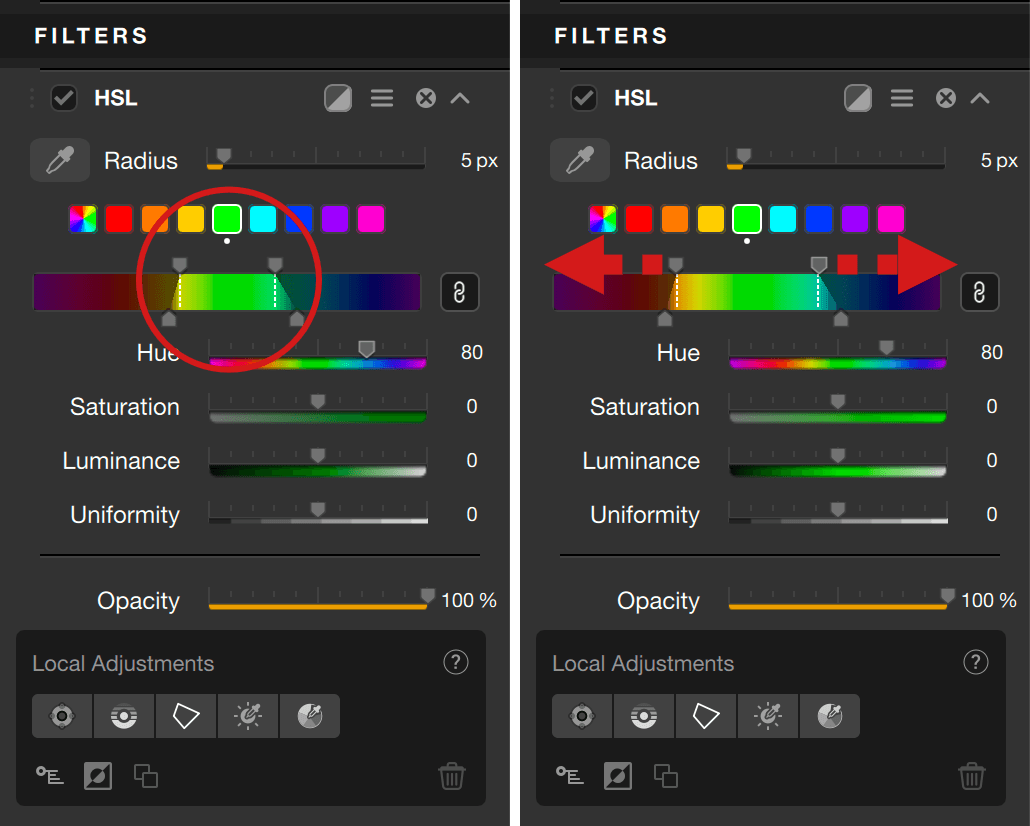
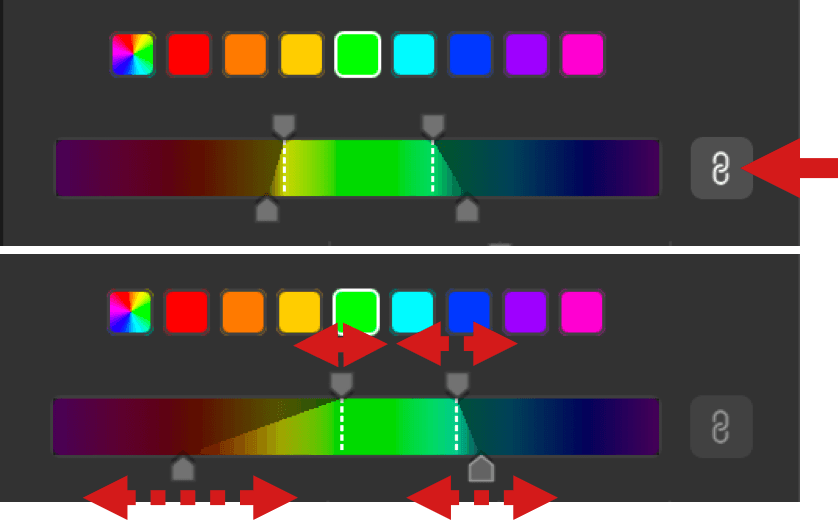
Using the HSL color picker and the hue range scale

The HSL color picker allows you to do more precise hue selection by clicking in the image. You can increase the radius of the hue selection with the Radius slider, which is set to 5 pix by default (size range is 1-50 pixels).
The hue range scale is a flat view of the RGB color wheel (colors are presented with all the hues as a circle, which helps also to visualize the opposite hue, for example, yellow and blue are opposite).
When you click in the image with the HSL color picker, the range of hues will be displayed in the scale:
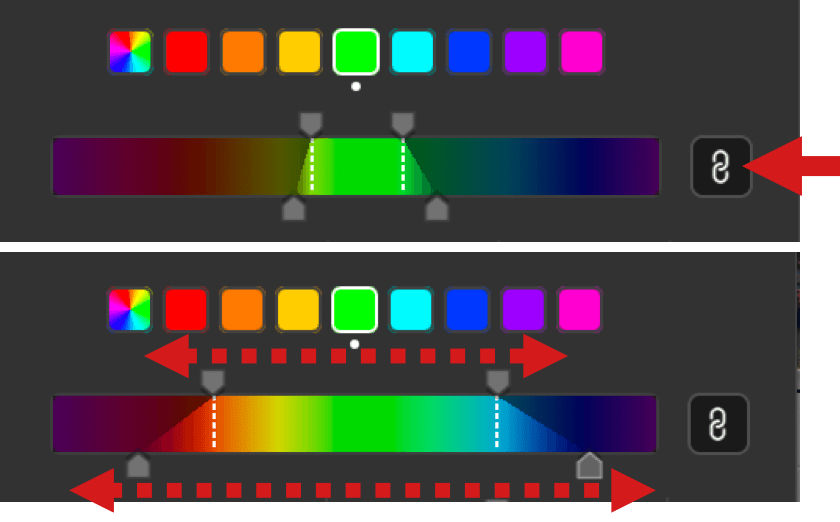
- The two vertical dotted white lines are the limits of the hue range, and you can refine it manually with the two handles above the scale: move them closer to each other to reduce the hue range, move them in the opposite way to extend it and, thus, to include more hues in the selection.
- The two handles below the scale allows you to adjust the fall-off (transition) hues: the farther you move out the two vertical lines, the smoothest the fall-off.
- The chaining button, active by default:
- Active (black button): upper or lower handles are linked and can be moved symmetrically. By moving the upper handles, you extend or reduce the color range equally on both left and right, and the fall-off remains unchanged. By moving the lower handles, the fall-off will adjust equally left and right, and the upper handles will not move.
- Inactive (gray button): upper or lower handles are no longer linked, and can be moved differently left and right. If you move an upper handle, the other will not move, and the fall-off will remain the same on the side you are adjusting. If you grasp one of the lower handles, you will adjust the fall-off on that side only, and the corresponding upper handle will not move.
Working with the global channel
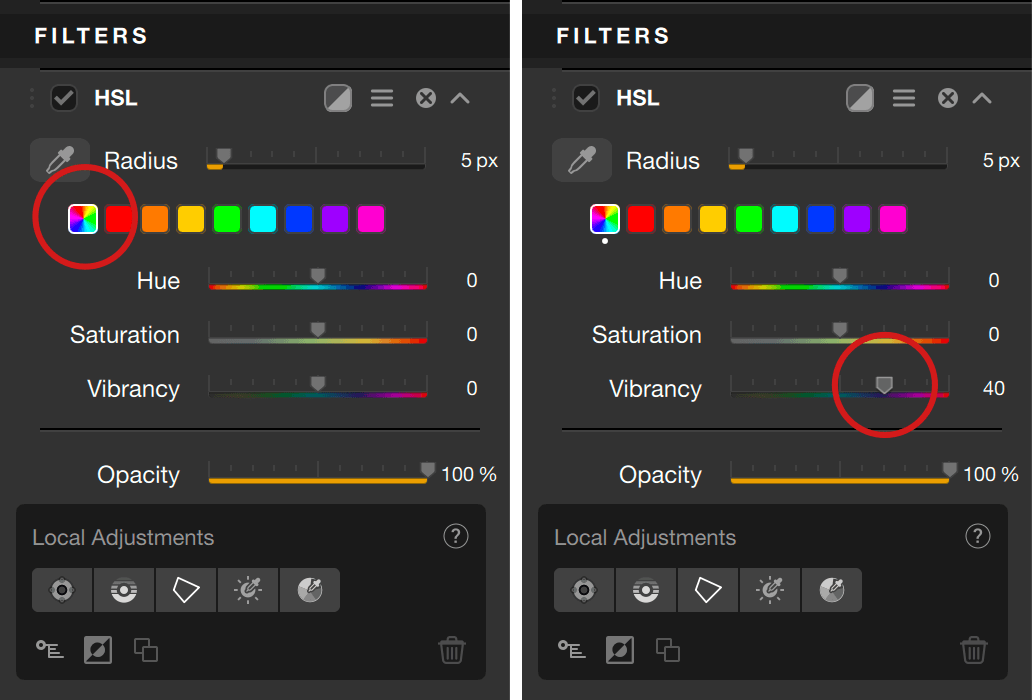
The global channel lets you adjust the hues and the colors in the whole image. If you use the HSL color picker, the HSL panel will switch to the individual channel mode.
When active, the global channel mode displays 3 sliders:
- Hue: set to 0 by default, it will affect the colors globally and introduce a strong color cast, depending on the slider position. The slider scale displays the 8 color channels, if you position the slider within red, a strong red cast will be applied to the whole image.
- Saturation: set to 0 by default, the slider boosts all the colors the same way. If you move to the left, all the colors will start to turn grey.
- Vibrancy: set to 0 by default, the slider boosts the colors in a more subtle way. The hues which are already well saturated won’t be affected too much, and the emphasis will be on the less saturated hues. Beside this, the blue sky will be reinforced without affecting the other hues too much, and the skin hues will be protected from excessive saturation.
High Key
Lets you simulate the look of a photo in bright light, with uniformly light tones and low contrast. This filter is also useful for enhancing photos originally taken without highlights.
| Glow | Controls the degree of brightness added around objects from the “Standard Highlights” effect. |
| Standard High Key | Lets you add highlights uniformly throughout the image. |
| Dynamic High Key | Adds a unique highlight effect that changes according to the color and tone of the original subject. This command makes dark subjects lighter than light subjects. |
| Saturation | Controls the overall intensity of colors in the photo. |
| Blacks | Brings out the darkest subjects in the photo and ensures that black tones (a crucial element in a high-light image) are present. |
| Contrast | Controls the overall contrast of the photo. |
| Shade | Moved to the right, the slider will lighten only shadows and recover details drowned in the dark areas. |
| Highlights | Moved to the right, the slider will darken only the brightest areas and recover blown-out details. |
Image Borders
Use this filter to add a unique, natural, and random outline to your photos. This filter uses Nik’s exclusive technologies to create borders that are not only infinitely variable, but also incredibly natural.
| Border type | Select from among 14 borders or frames. |
| Size | Controls the size of the outline added to the image. Tip: Adding an outline always removes part of the image. To prevent your image from being cropped when you add an outline, use a pixel editing application such as Photoshop to increase the size of the image canvas and apply a black outline around the image. Then use the Size slider to create the desired overlap between the image outline and the black outline. |
| Spread | Controls the depth of the added outline. Move the slider to the right to widen the space taken up by the border elements in the image. |
| Grunge | Controls the random details added around the image. Move the slider to the right (more towards Rough) to add more random details to the border and give it more style. |
| Vary Border | Click here to select another border category number at random. A different border is created at random for each number, giving a wide range of results. To create exactly the same border each time, make note of the “Size”, “Spread” and “Clean/Rough” settings and the border category number. To achieve a border that is similar but still different for each image, use the same values (“Size”, “Spread”, “Clean/Rough”) but with a different border category number. |
Indian Summer
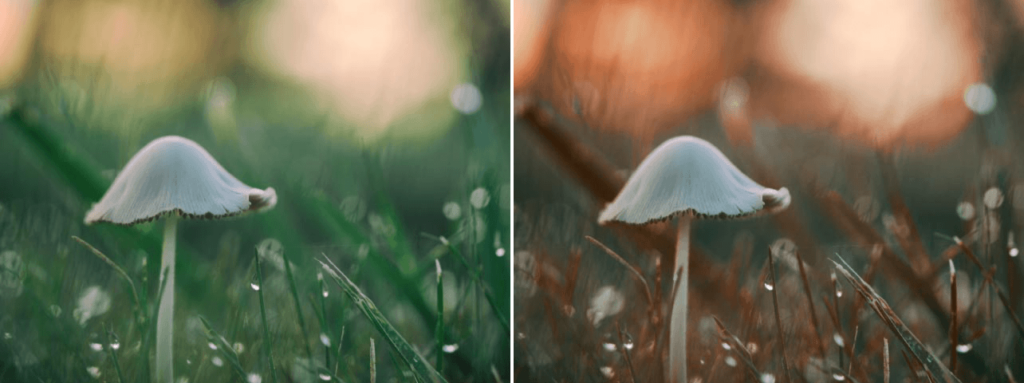
Identifies foliage and greenery in an image, and enhances or stylizes these objects. This filter can be used to create warm colors similar to autumn landscapes.
| Method | Applies one of the 4 available renderings for the color of the foliage visible in the photo. |
| Enhance Foliage | Controls how intensely the filter will be applied. |
Infrared Film
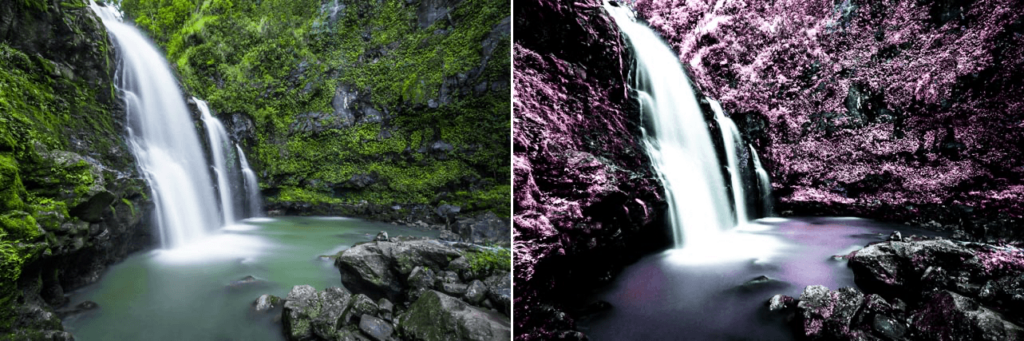
Simulates color and black & white infrared films. This filter simulates different methods of capturing the infrared portion of the electromagnetic radiation spectrum, as well as the effects produced by films capable of capturing these wavelengths.
| Method | Selects Color or Black & White infrared film types, each with different styles. |
| Lighten Highlights | Controls the brightness of the light tones in the picture. |
| Lightness | Controls the overall brightness of the image. |
| Contrast | Controls the overall contrast of the photo. |
| Shade | Moved to the right, the slider will lighten only shadows and recover details drowned in the dark areas. |
| Highlights | Moved to the right, the slider will darken only the brightest areas and recover blown-out details. |
Ink
Simulates the stylistic effect of special photographic papers and toners.
| Color Set | Select one of the 11 color combinations. |
| Intensity | Controls how intensely the filter will be applied. |
| Shade | Moved to the right, the slider will lighten only shadows and recover details drowned in the dark areas. |
| Highlights | Moved to the right, the slider will darken only the brightest areas and recover blown-out details. |
Levels & Curves
Levels and curves are among the most commonly used tools for adjusting the brightness and tone of an image. This filter is especially useful when combined with other filters in a stack.
| Channel | Selects the channel for which the tone is to be set. In addition to the RGB (Red, Green, Blue) channels usually located in the Curve dialog boxes, the Levels & Curves filter also provides a brightness channel that lets you adjust the brightness and contrast of your photo without changing the colors. You can also adjust the brightness and contrast of your photo without changing the colors. |
| Opacity | Adjusts the degree to which the filter is added to the photo. |
| Tone Curve | Click on the curve to add anchor points to it directly. To remove an anchor point, double-click on it. |
| Levels Sliders | Drag the Black Point, White Point, or Midtone slider to adjust the tone levels. |
You can find more information about the Levels & Curves tool in the Overall and Selective Correction Tools section.
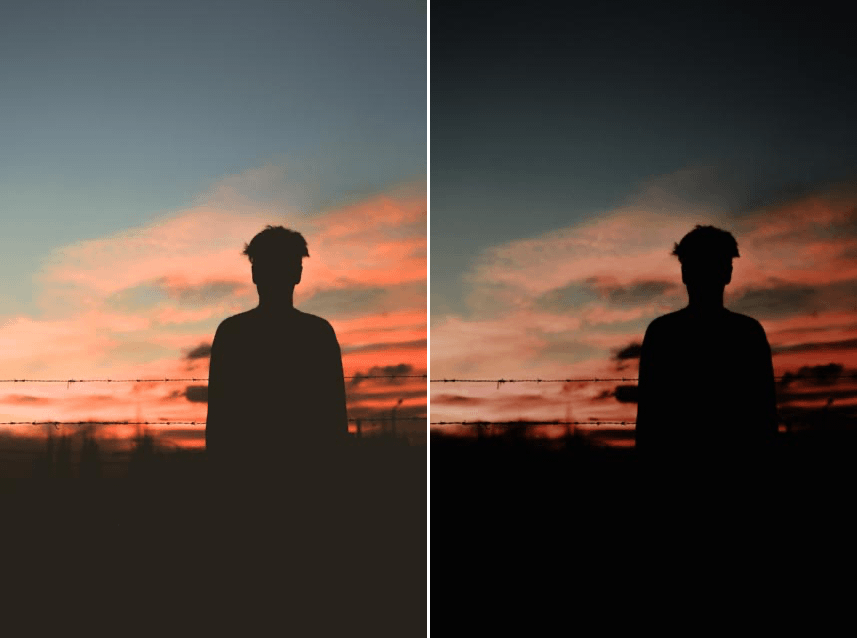
Low Key

Lets you simulate the look of a photo in low light, with uniform dark tones and low contrast. This filter is also useful for enhancing photos originally taken without low light.
| Glow | Controls the degree of brightness added around objects from the “Standard Shadows” effect. |
| Standard Low Key | Lets you add shadows uniformly throughout the image. |
| Dynamic Low Key | Adds a unique low-light effect that changes according to the color and tone of the original object. This control darkens light subjects more than dark subjects. |
| Saturation | Controls the overall intensity of colors in the photo. |
| Whites | Brings out the lightest objects in the photo and ensures that white tones (a crucial element in a low-light image) are present. |
| Contrast | Controls the overall contrast of the photo. |
| Shade | Moved to the right, the slider will lighten only shadows and recover details drowned in the dark areas. |
| Highlights | Moved to the right, the slider will darken only the brightest areas and recover blown-out details. |
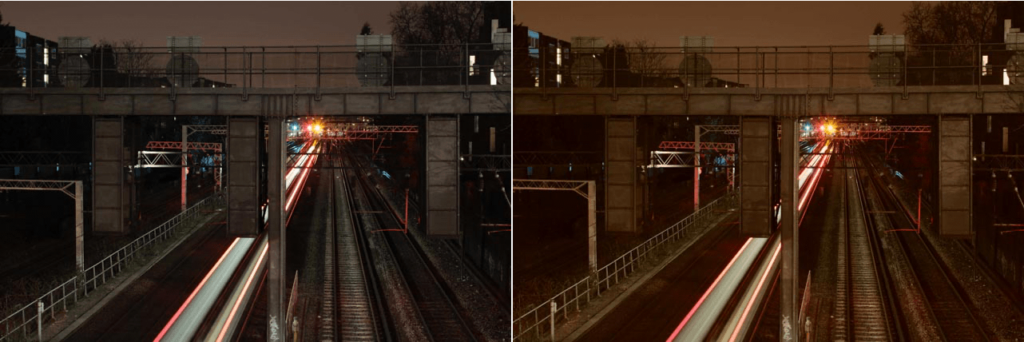
Midnight
Creates the illusion of a photograph taken at night to gives the image character. Use the Midnight filter to create a cinematic effect and reduce detail throughout the image with an advanced blur technique.
| Color Set | Use this drop-down menu to select one of the predefined color combinations. |
| Blur | Controls the amount of blur added to give style to the image. |
| Contrast | Controls the overall contrast of the photo. |
| Lightness | Controls the overall brightness of the image. |
| Color | Controls the relationship between the amount of color added by the filter and the amount of color from the original photo. |
| Shade | Moved to the right, the slider will lighten only shadows and recover details drowned in the dark areas. |
| Highlights | Moved to the right, the slider will darken only the brightest areas and recover blown-out details. |
Monday Morning

Creates a diffused atmosphere and gives the photo a restful look. Use this filter to control contrast and saturation, add grain and apply a blur effect.
| Color Set | Use this drop-down menu to select one of the predefined color combinations. |
| Grain | Controls the amount of grain added to the image. |
| Lightness | Controls the overall brightness of the image. |
| Smear | Lets you control to what extent the filter’s softening technique is applied. |
| Color | Controls the relationship between the amount of color added by the filter and the amount of color from the original photo. |
| Shade | Moved to the right, the slider will lighten only shadows and recover details drowned in the dark areas. |
| Highlights | Moved to the right, the slider will darken only the brightest areas and recover blown-out details. |
Old Photo

Transforms an image so that it looks like an old photo. Different styles let you simulate various color or black & white processes.
| Style | Choose a color or a black & white process. There are six styles available per process. |
| Grain | Controls the amount of grain added to the image. |
| Lightness | Controls the overall brightness of the image. |
| Shade | Moved to the right, the slider will lighten only shadows and recover details drowned in the dark areas. |
| Highlights | Moved to the right, the slider will darken only the brightest areas and recover blown-out details. |
Paper Toner
Simulates the different types of toners commonly used in black & white prints in the darkroom. Use this filter to automatically convert an image to a black & white version before adding the toner effect. For best results and accuracy, apply the B/W Conversion filter first.
| Paper Tone | Use the drop-down menu to select one of the 8 preset tints to be applied to the photo. |
| Intensity | Controls how intensely the filter will be applied. |
| Texture | Adds a unique paper texture to the photo. |
| Shade | Moved to the right, the slider will lighten only shadows and recover details drowned in the dark areas. |
| Highlights | Moved to the right, the slider will darken only the brightest areas and recover blown-out details. |
Pastel
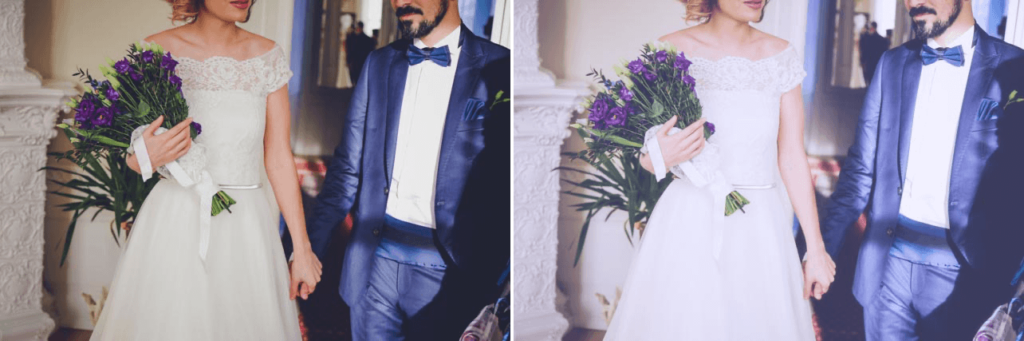
Brightens and softens the image by giving it a smooth and stylish effect. The result is an understated, desaturated image.
| Method | Use the drop-down menu to select a predefined pastel effect. |
| Diffuse | Controls the level of smoothing applied to the photo details. |
| Saturation | Controls the overall intensity of colors in the photo. |
| Contrast | Controls the overall contrast of the photo. |
| Shade | Moved to the right, the slider will lighten only shadows and recover details drowned in the dark areas. |
| Highlights | Moved to the right, the slider will darken only the brightest areas and recover blown-out details. |
Photo Stylizer
Use this filter to give style to any or ordinary image and make it more attractive.
| Stylizer Type | From the drop-down menu, select one of the 5 available styles (the choice of style determines the availability of the following sliders). |
| Style | From the drop-down menu, select one of the available color sets. |
| Intensity | Controls how intensely the filter will be applied. |
| Lightness | Controls the overall brightness of the image. |
| Warmth | Controls the color temperature of the photo. Move the slider to the left to cool the colors (adding blue tones) or to the right to warm them (adding red tones). |
| Shade | Moved to the right, the slider will lighten only shadows and recover details drowned in the dark areas. |
| Highlights | Moved to the right, the slider will darken only the brightest areas and recover blown-out details. |
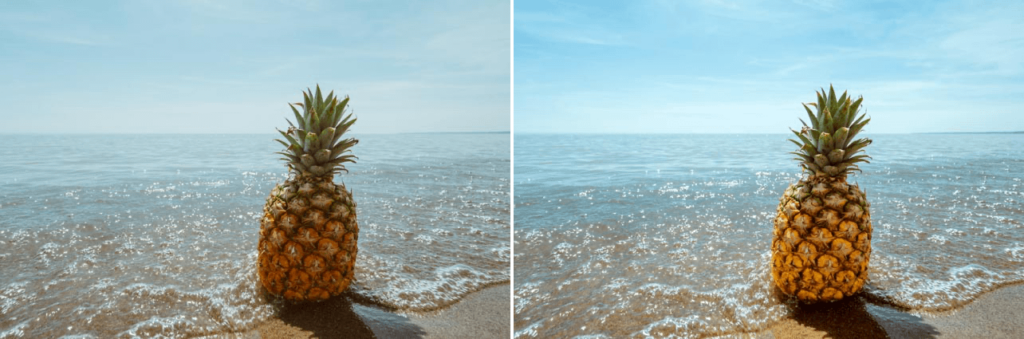
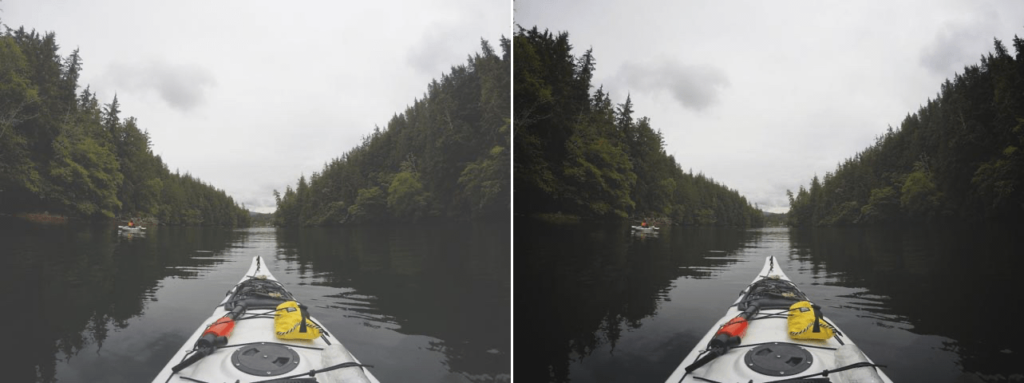
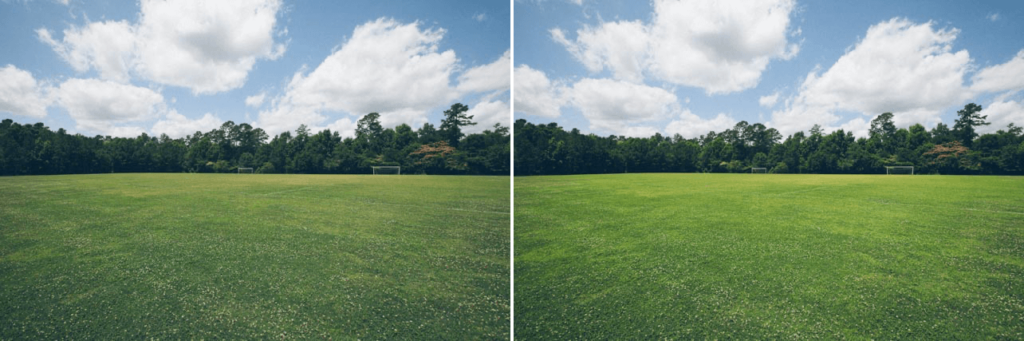
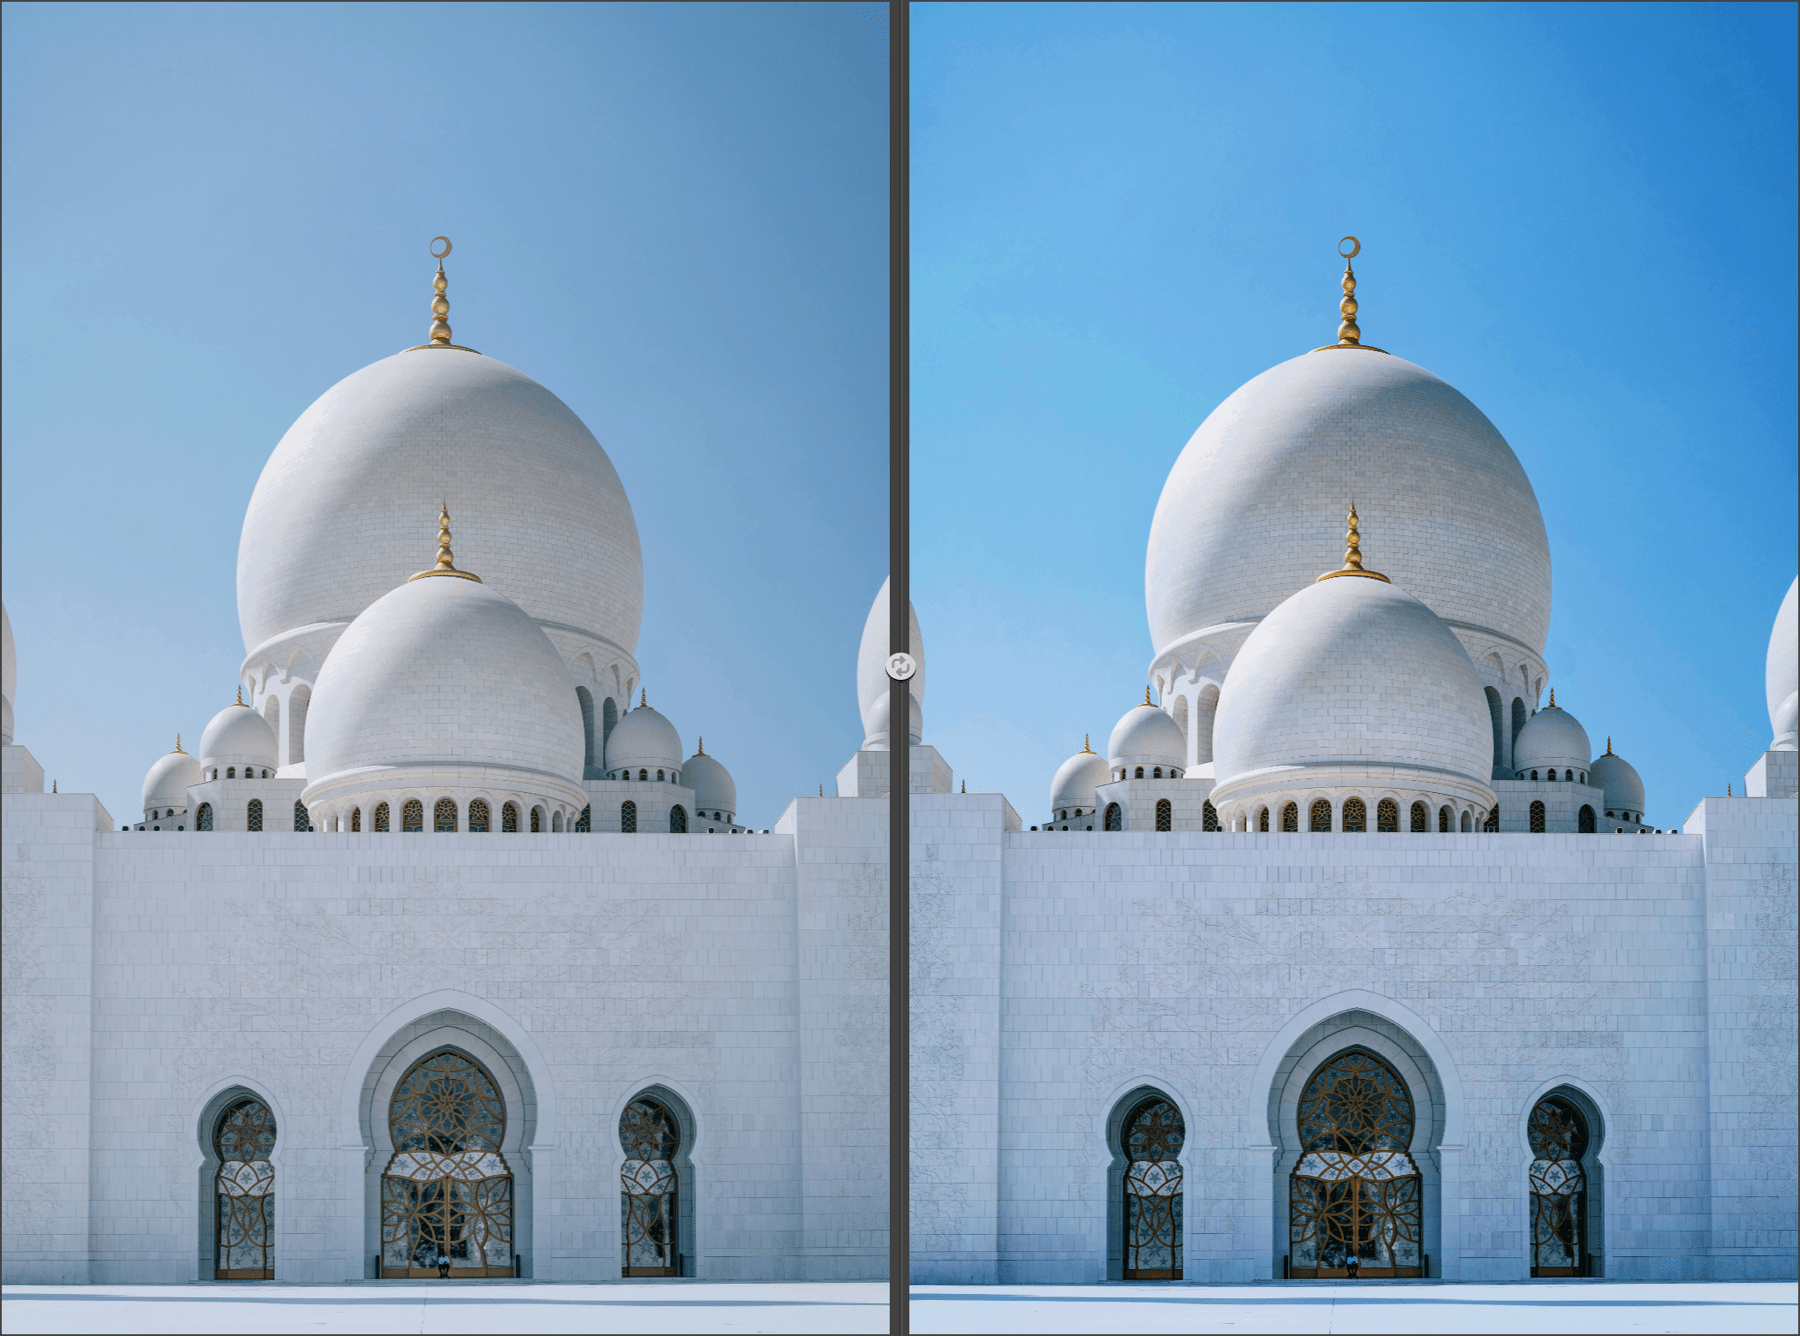
Polarization
Simulates the polarization filter (or PL) of traditional glass. Use this filter to accentuate the blue of the sky while increasing the contrast in the rest of the image.
| Rotation | Simulates the effect of rotating the filter in front of the lens with the resulting different color contrasts. |
| Intensity | Controls how intensely the filter will be applied. |
| Shade | Moved to the right, the slider will lighten only shadows and recover details drowned in the dark areas. |
| Highlights | Moved to the right, the slider will darken only the brightest areas and recover blown-out details. |
Polaroid Transfer
Simulates the effect of Polaroid Instant Processing color film and the transfer of the rough image to paper before it is fully developed. The result is a version of the image with low saturation and contrast, with subtle shades of color throughout the image.
| Edge offset | Adds a border (to which a texture is applied) around the image. When the cursor is set to 0, the entire image is displayed. |
| Texture | Lets you adjust the paper texture effect added to the image. |
| Outer Color | Adds elements from the original image to the border area. The higher the value of this slider, the more elements from the original image are added to the areas created using the Border slider. |
| Saturation | Controls the amount of color from the original image to be preserved. |
| Smear | Lets you control to what extent the filter’s softening technique is applied. |
| Float | Simulates the effect of tearing off different parts of the image during the transfer process. To prevent details from being removed from the image, set the slider to 0. |
| Shade | Moved to the right, the slider will lighten only shadows and recover details drowned in the dark areas. |
| Highlights | Moved to the right, the slider will darken only the brightest areas and recover blown-out details. |
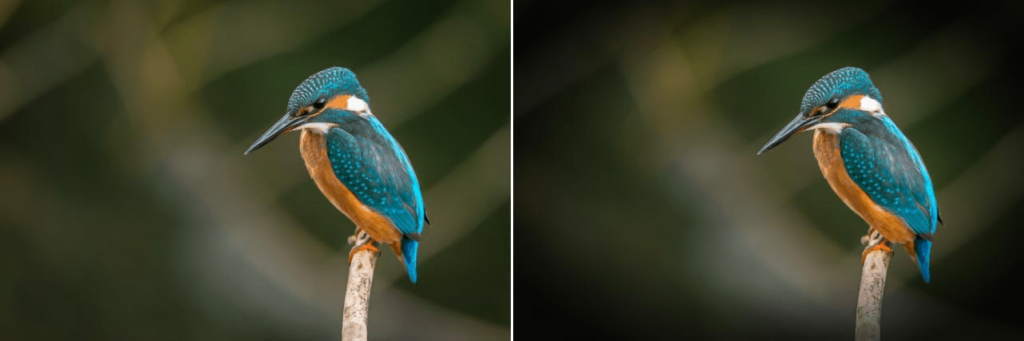
Pro Contrast
Provides advanced options that change the color and contrast of images by analyzing each one and making improvements based on their specifics. Use this filter if you want to increase contrast levels while maintaining detail throughout the image.
| Correct Color Cast | Adjusts the reduction of a color cast automatically identified by the filter in the image. |
| Correct Contrast | Increases the contrast in the image according to the distribution of light and tone. |
| Dynamic Contrast | Adjusts the contrast of each object in the image according to the tone distribution. This unique control automatically adjusts different areas to varying degrees. |
| Shade | Moved to the right, the slider will lighten only shadows and recover details drowned in the dark areas. |
| Highlights | Moved to the right, the slider will darken only the brightest areas and recover blown-out details. |
Reflector Efex
Simulates traditional photographic reflectors that allow shadows to stand out and control the light in the image.
| Method | Select Gold, Soft Gold, or Silver. The Gold and Soft Gold options give warmth to the image shadows in varying degrees. The “Silver” option adds neutral light to the shadows. |
| Light Intensity | Controls the amount of light that the reflector adds to the image. |
| Light Falloff | Controls the intensity at which the effect should fade. |
| Position | Controls where the transition should begin. |
| Source Direction | Specifies the point at which the reflector effect begins. |
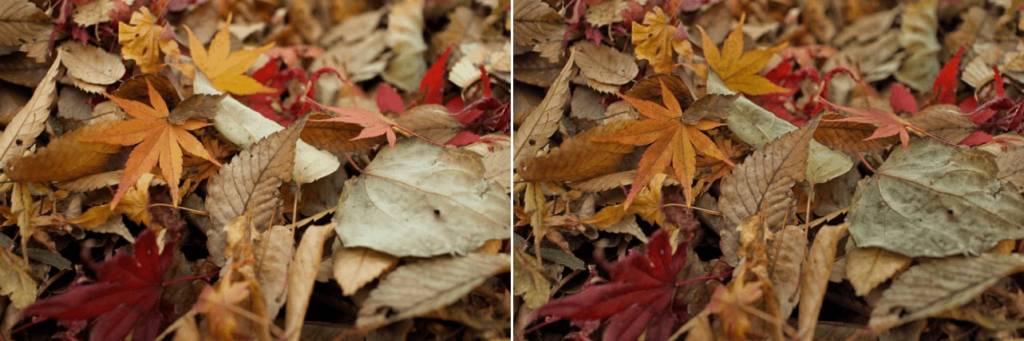
Remove Color Cast
Lets you remove color dominants from the photo quickly and efficiently.
| Color | Indicates the color dominant to be removed from the image. Move the slider until the selected color matches the dominant color in the image. |
| Intensity | Controls the proportion of color tone to be removed. |
Selective Tones (Viveza)
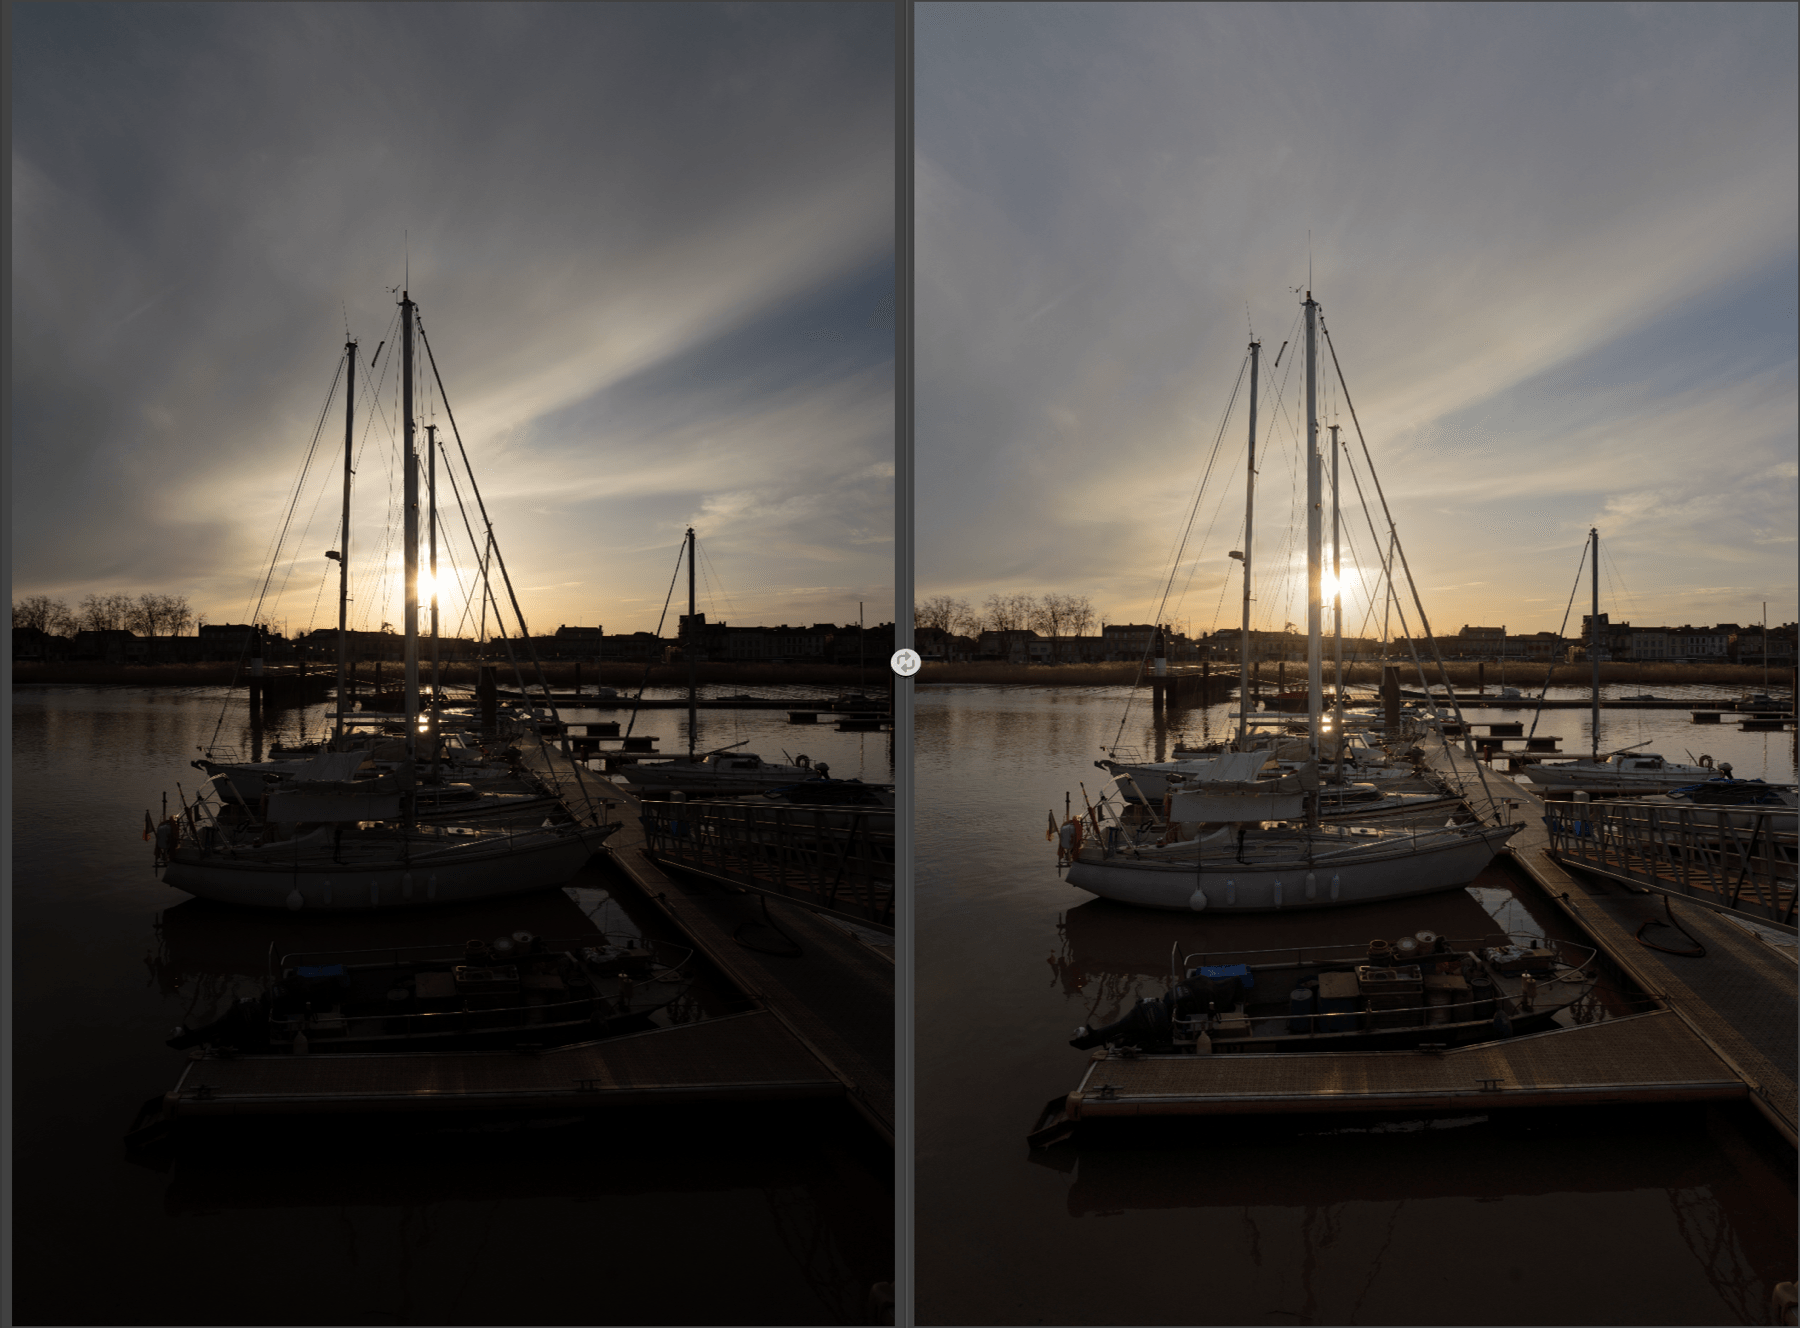
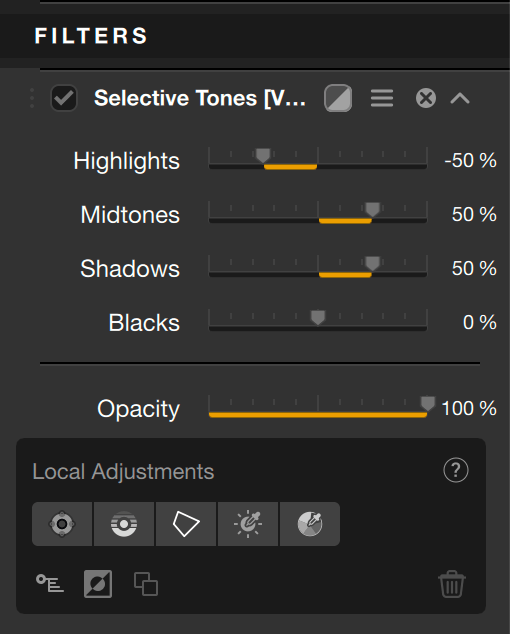
These tools will help you to adjust tonal ranges (highlights, midtones, shadows, blacks):
- Highlights: moved to the left, this slider recovers information and details in the brightest parts of the image, especially those close to the clipping (right end of the histogram). Moved to the right, it allows you to give more brightness to the lightest tones.
- Midtones: this slider affects the midtones (shown in the central section of the histogram).
- Shadows: this slider allows you to lighten the shadows and dark parts of an image.
- Blacks: moving the slider to the right lets you set the “black point” (left end of the histogram) and thus avoid clipping the darkest parts of the image. Conversely, moving the slider to the left, you will make the darkest areas of the image even more dense.
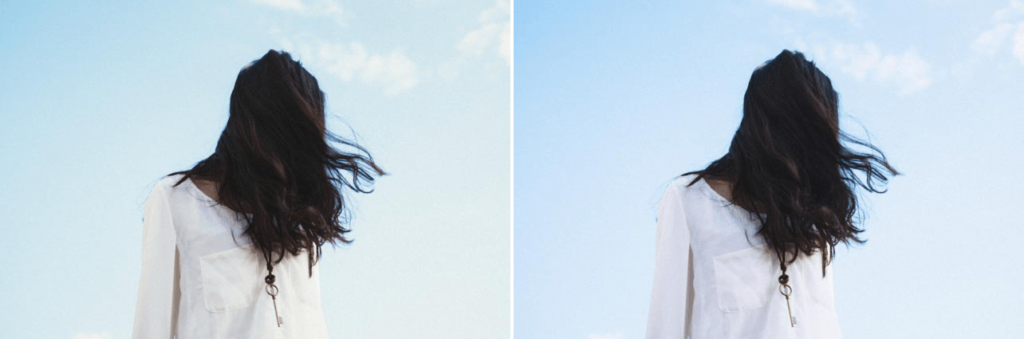
Skylight Filter
Simulates warming lens filters. Use this filter to attenuate dominant blues while adding warmth sparingly to the colors in the photo.
| Intensity | Controls the degree of warming effect to be added to the picture. |
Solarization
Simulates the Sabatier darkroom process (more often called solarization). Use this filter to create a style effect in which certain tones and colors are reversed.
| Method | Use this drop-down menu to select the type of solarization applied to the image using different styles designed for color or black & white effects. |
| Saturation | In the color methods, this slider controls the intensity of the colors in the photo. In the black & white methods, this slider controls the saturation of the image prior to black-and-white conversion, allowing you to adjust the resulting image contrast. |
| Elapsed Time | Adjusts the effect as darkroom photographers do when they change the amount of time the image remains in the developer before re-exposing it to achieve varying results. |
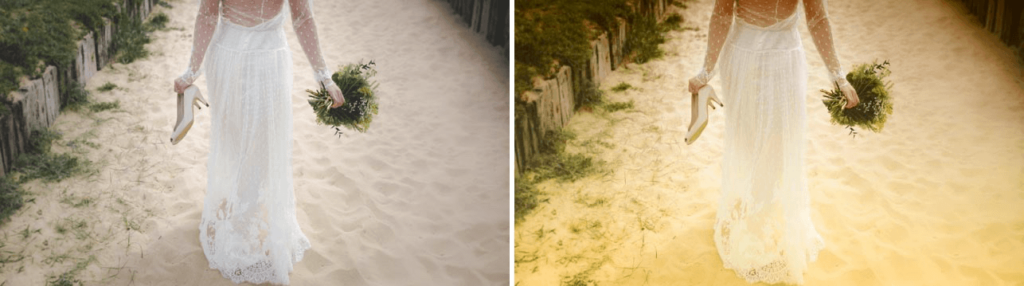
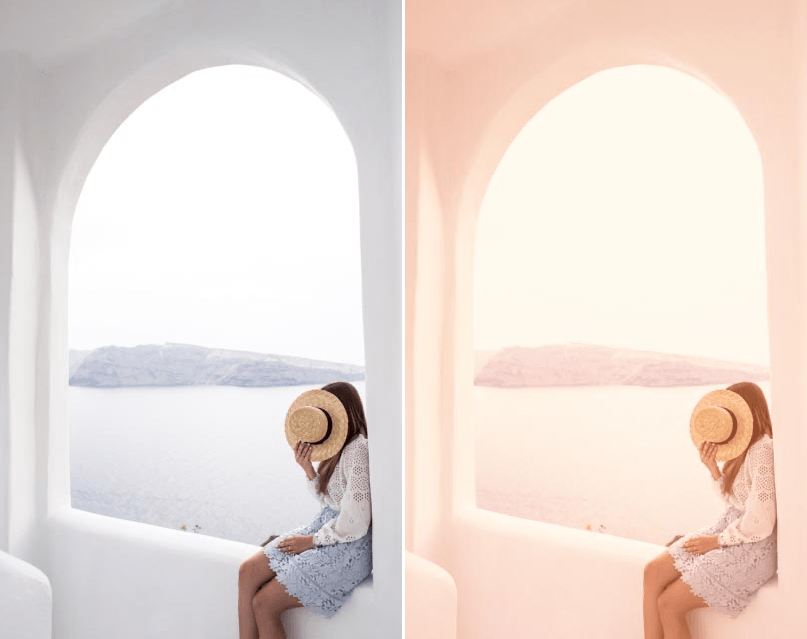
Sunlight

This filter adds natural sunlight and warmth to the image. Use this filter to give the impression that your photo was taken on a warm, sunny day.
| Light Strength | Controls the amount of light added to shadows in the image. Move this slider to the left to increase contrast or to the right to add warm light throughout the photo. |
| Light Temperature | Controls the temperature of the light added to the image. Move this slider to the left to increase the warmth of the light or to the right to decrease it and give the image a cooler tone. |
| Lightness | Controls the overall brightness of the image. |
| Contrast | Controls the overall contrast of the photo. |
| Saturation | Controls the intensity of the colors in the photo. |
Tonal Contrast

This filter lets you modify the textures and details of the photo efficiently.
| Highlights | Controls the level of contrast applied to light tones in the photo |
| Midtones | Controls the level of contrast applied to midtones in the photo |
| Shade | Controls the level of contrast applied to dark tones in the photo. |
| Saturation | Controls the intensity of the colors in the photo. |
| Contrast Type | Use this drop-down menu to select one of the 5 contrast types available. |
| Shade | Moved to the right, the slider will lighten only shadows and recover details drowned in the dark areas. |
| Highlights | Moved to the right, the slider will darken only the brightest areas and recover blown-out details. |
Vignette: Blur
Attenuates the details around the center of the image, allowing the eye to be drawn into the image.
| Blur shape | Use the drop-down menu to select a circular, oval or rectangular shape for vignetting. |
| Type | Use the drop-down menu to select the type of blur added to the image. |
| Transition | Controls the rate at which the vignetting effect is applied to the original image. |
| Size | Sets the area in the image to which vignetting is to be applied. |
| Opacity | Controls the overall intensity of the filter. |
| Place Center | Positions the center of the vignetting effect. |
Vignette Filter
Simulates the application of a vignetting effect worthy of a darkroom.
| Color | Lets you select the color to be used for the vignetting. Use the eyedropper to select a color from the photo or click on the color chart to open the color picker tool. |
| Blur shape | Use this drop-down menu to select a circular, oval, or rectangular shape (with smooth or coarse edges) for vignetting. |
| Adapt Edges | Controls the relationship between the shape of the vignette and the image details. The higher the value of this slider, the more the vignetting shape becomes part of the image. |
| Transition | Controls the rate at which the vignetting effect is applied to the original image. |
| Size | Sets the area in the image to which vignetting is to be applied. |
| Opacity | Controls the overall intensity of the filter. |
| Set center | Positions the center of the vignetting effect. |
Vignette: Lens
Simulates the vignetting created by different types of lenses. The darkening of the edge of the frame helps to draw the viewer’s eye within the image boundaries and gives the picture more depth.
| Amount | Controls the intensity of the vignetting. Move the slider to the left to add vignetting darkening to the image edges. Conversely, move the slider to the right to add lightening vignetting to the edges. |
| Blur shape | Controls the overall shape of the vignetting: circular or rectangular. |
| Size | Sets the area in the image to which vignetting is to be applied. |
| Lightness | Adjusts the brightness of the vignetting effect. |
| Set center | Press the Place Center button to select the center position of the vignetting in the image. |
White Balance (Viveza)
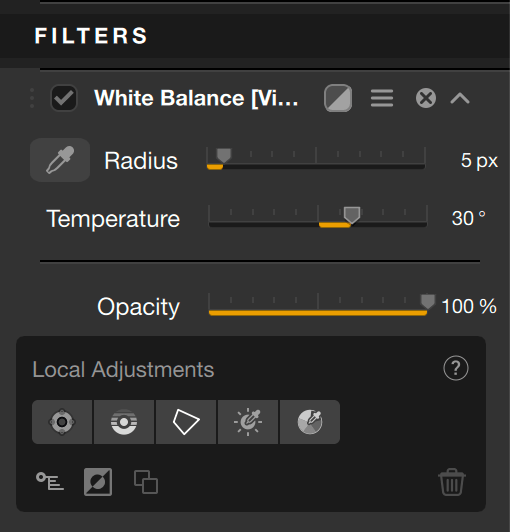
The White Balance tool allows you to restore natural, balanced colors and compensate for the presence of colored dominants. Of course, you can also take advantage of it to create special effects and renderings:
- In the White Balance, click the pipette to activate it.
- Move the mouse pointer over the image and it will turn into an eyedropper.
- You can adjust the diameter of the sampling area (shown by the circle at the end of the dropper) using the Radius slider. The default diameter is 5 pixels, on a scale from 1 to 50 pixels.
- To neutralize a dominant, click on a neutral area of the image, white or gray.
- To introduce a dominant, click on the desired neutral color (for example, click on a blue to warm up the image, click on a yellow, orange or red to cool it down).
- You can change the white balance as many times as you wish by clicking repeatedly in the image.
Change or fine-tune white balance
Whether you want to neutralize a color cast or alter the warmth of the image, you can fine-tune the white balance using the Temperature slider. Set to 0 by default, its scale ranges from -1
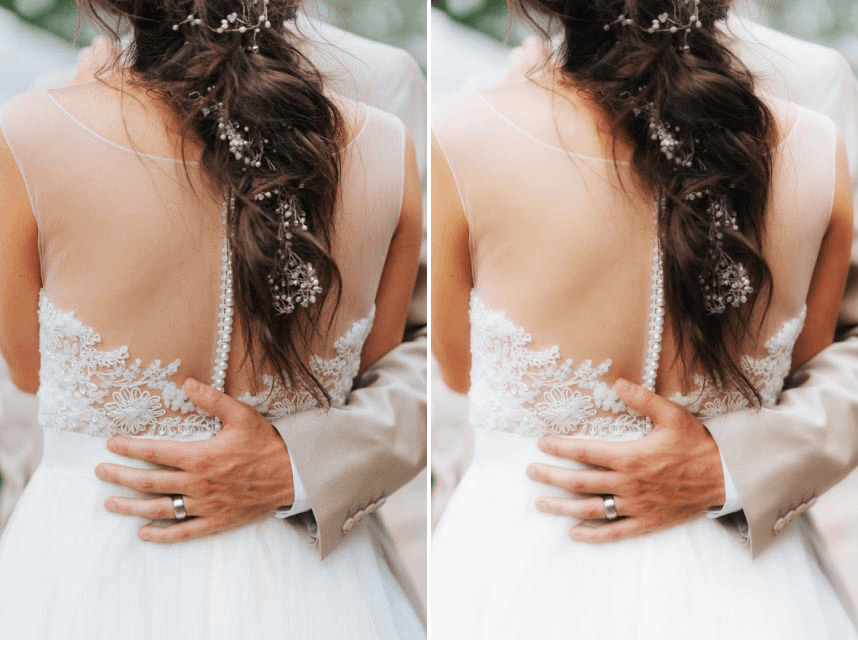
White Neutralizer
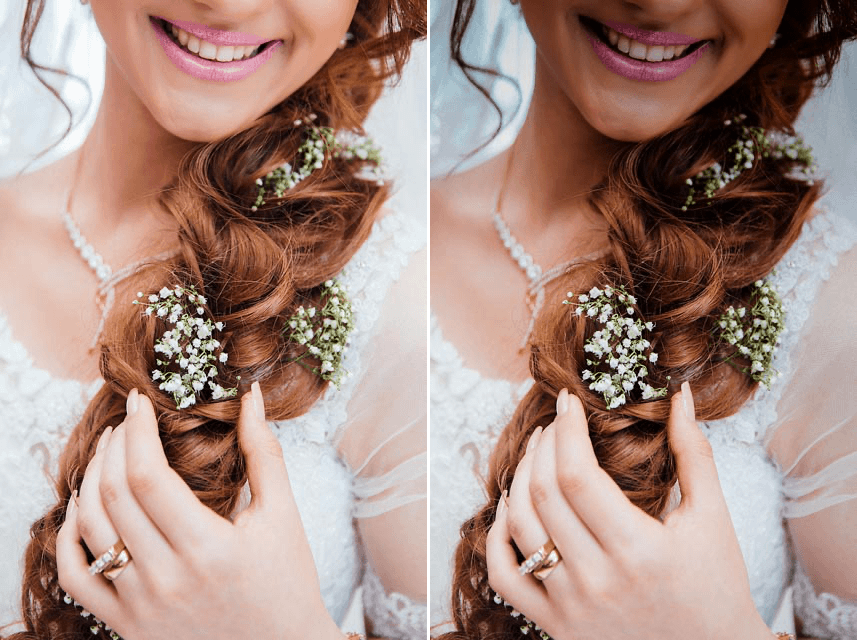
Removes color dominants from light-colored objects, such as a white wall or a wedding dress. Use this filter to clean up images and create bright, vivid whites without changing other colors in the photo.
| Color | Indicates the color dominant to be removed from the image. Use the eyedropper to select a color from the photo or click on the color chart to open the color picker tool. |
| Adjust Whole Image | Removes the color selected in the Color command from the entire image. |
| Neutralized Whites | Removes only the color selected in the Color command from light objects in the image. |
| Shade | Moved to the right, the slider will lighten only shadows and recover details drowned in the dark areas. |
| Highlights | Moved to the right, the slider will darken only the brightest areas and recover blown-out details. |
Global and local adjustment tools
Overview
The right panel shows the filters and presets selected in the left panel, and their associated tools, sliders and settings.
Each filter in Nik Color Efex uses a number of sliders and tools specific to the adjustments and effects it offers. They are used in the same way from one filter to another:
- The sliders all have a default value which may be 0%, 50% or 100%, depending on the case and effect.
- Sliders affecting brightness and tonality go from dark on the left to brighter on the right.
- Sliders affecting colour and effects are less intense to the left and more intense to the right.
- The Strength sliders can be moved from 0% (no correction or effect) to 100% (maximum correction or effect).
- To reset a slider to its default value, double-click on it.
- In the drop-down lists, hover your mouse over the effects and renders to preview them. Click on the desired effect or rendering to apply it.
- You can select the same filter several times if you wish.
- You can reorder filters by dragging and dropping each section.
Filter effect mask
Another way to preview the adjustments is to toggle the Filter effect mask button, especially with an active local adjustment. The image turns into grey levels, white areas showing where the effect is 100%, black areas showing where there is no effect, and all gray levels showing the effect amount variations. It is also a good help to adjust the Opacity slider.
To the contrary of the local adjusment masks, the filter effect mask does takes into account:
- The local mask opacity.
- The impact of the global mask.
In other words, the black and white mask shows only shades of gray to indicate where the effect will be stronger or weaker.
Opacity slider
When using a Nik Color Efex filter, you can fine-tune the overall intensity of the effect and the corrections it applies.
By default, the slider is set to 100, its maximum value. Set it to 50 to halve the intensity, and to 0 for no correction at all.
When you apply Local adjustments, another Opacity slider lets you adjust the intensity of the locally applied corrections, independent of the overall opacity slider.
Levels & Curves tool
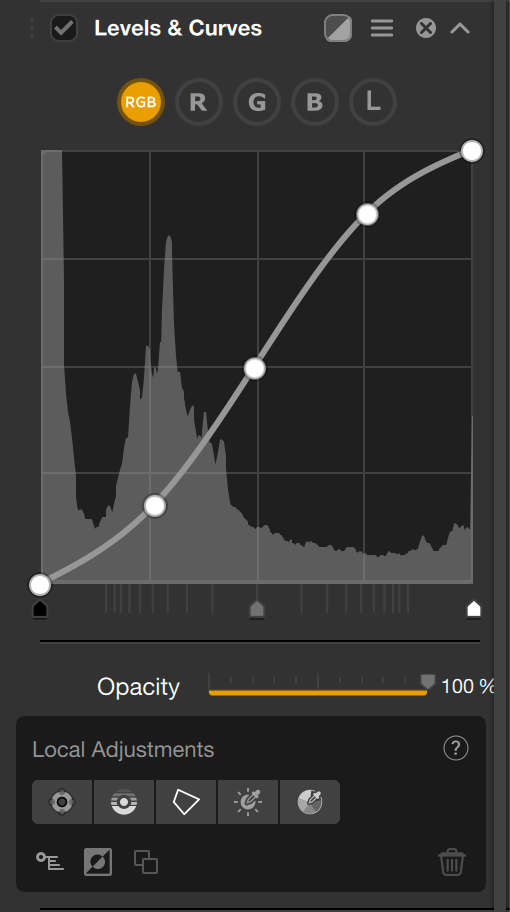
The Levels and Curves tool is found in the Filters list, in the Contrast category. Select it and it will be added to the Nik Color Efex Pro Filters section in the right panel.
The Curve lets you refine or completely rework the contrast in your images, by affecting the curve either globally or via the RGB channel, and by using the Level sliders:
- RGB button: this is selected by default and is used to adjust the brightness and contrast of your image without altering the colors. The histogram represents the 3 RGB channels combined, and the curve is white.
- The R, G, and B buttons: let you adjust the brightness of the Red, Green or Blue channels, to attenuate or reinforce their respective dominance. The histogram represents the selected channel and the curve takes the color of the chosen channel (red, green, or blue curve).
- Curve: click on the curve and hold down the left mouse button to adjust it. You can add anchor points to the curve, which will allow you to lock the contrast settings to specific points on the curve, and therefore on the image. To remove an anchor point, double-click on it.
- Levels sliders: Move the Shadows (left), Midtones (center), or Highlight (right) sliders to adjust their respective ranges.
To reset the settings:
- Click on the double arrow and select Reset Filter (you have the option of keeping or removing the local settings).
- Double-click on the anchor point(s) to remove them (the curve is reset once the last remaining anchor point is removed).
- To temporarily disable the tool effects, check/uncheck the Levels & Curves box.
Local adjustments
Local adjustments are available with all Nik Color Efex’s original filters and settings.
Therefore, you will be able to apply the different effects on parts of the image and adjust their opacity. The associated sliders and settings are available next to each local adjustment dot, and in the filter sections in the right panel. If you move a slider for a local adjustment, the slider in the right panel will also move and vice versa.
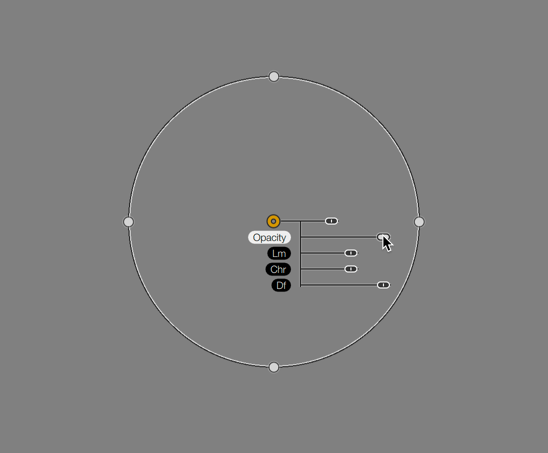
In addition to the common black-handled settings of size, Lm (Luminance), Chr (Chrominance) and Df (Diffusion), you have the following slider:
- Op (Opacity), has a white handle, and applies the desired level of effect to the active local adjustment dot.
A detailed description of the operation of each filter and associated tools can be found in the Filter Library section.