

In Photoshop, there are several ways to access the Nik Collection plugins, starting with the Plugins menu, then the reversible workflow with smart objects and filters, the possibility to share layers and take advantage of Photoshop’s selection tools, including AI-based tools and, finally, the special case of Nik HDR Efex.
Please note that you can’t use Photoshop when a Nik Collection plugin has been opened from there, as both software are tight together when using layers, masks and smart objects.
A dialog box will warn you as soon as you open a file in Nik Collection. In order to use Photoshop again, you’ll need to apply or cancel your editing in Nik Collection.
Opening an image
Opening an image in the Nik Collection from Photoshop’s Plugins menu or Photoshop Elements Filter menu

Opening an image from Photoshop into Nik Collection:
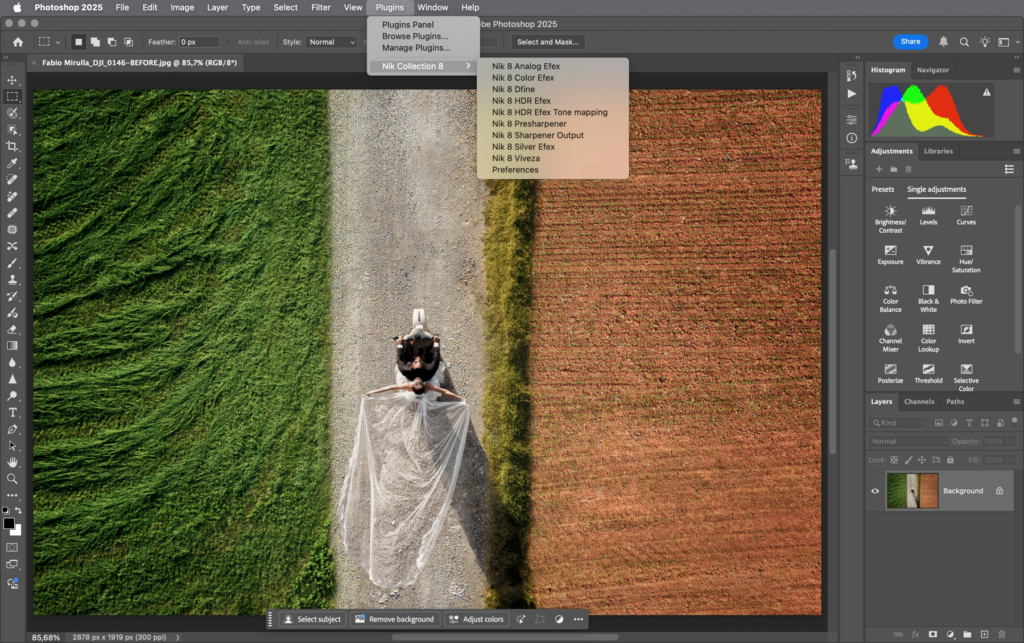
- The first time, go to the Plugins menu, then go to the Nik Collection sub-menu and select the Nik Collection plugin you need.
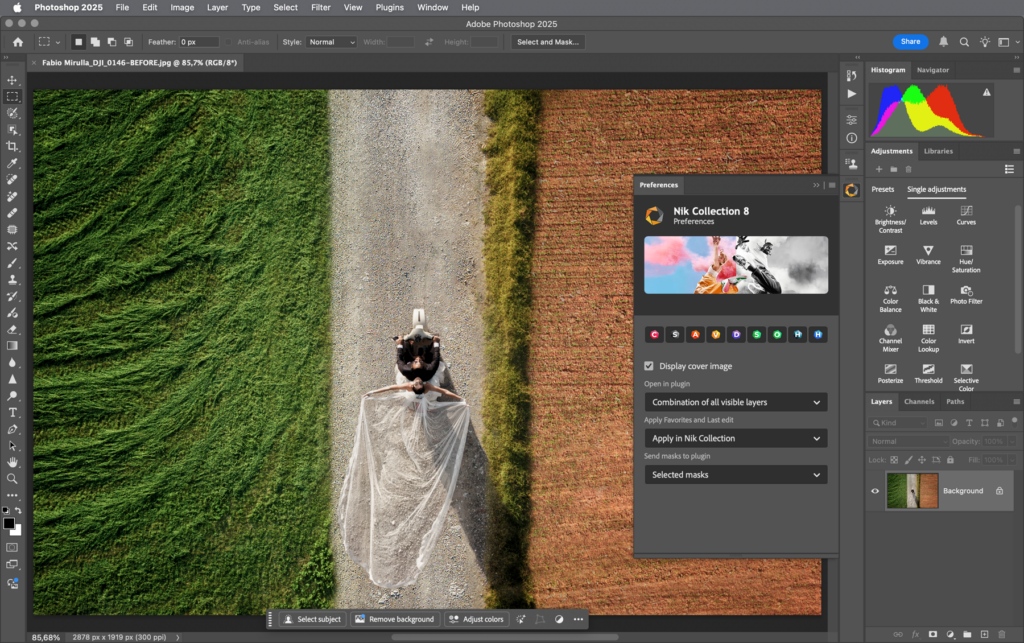
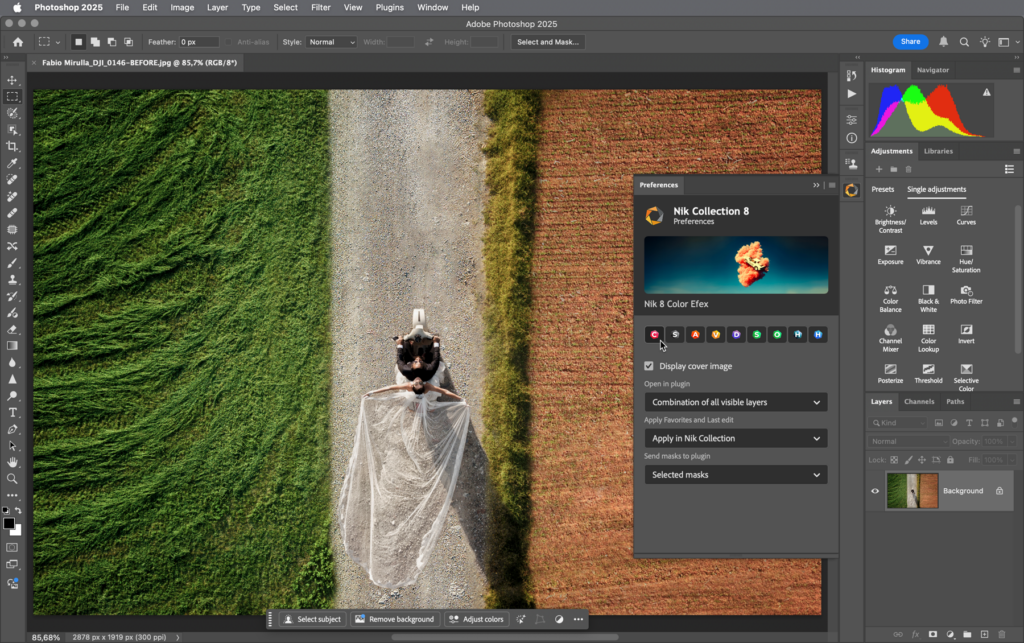
- You can also send directly to any plug-in from the Preferences panel, without the need of switching to a plugin panel.
- The relevant plugin panel opens: click on Open.
- The image will open in the selected plugin.
- Perform your processing and corrections.
- Click on Apply.
- The plugin applies processing and then closes.
- Your processed image is displayed in Photoshop.
- Save or Save As (to create another file), then exit Photoshop.
Opening an image from Photoshop Elements into Nik Collection:
- Go to the Filter menu, then go to the Nik Collection sub-menu and select the Nik Collection plugin you need.
- The relevant plugin panel opens: click on Open.
- The image will open in the selected plugin.
- Perform your processing and corrections.
- Click on Apply.
- The plugin applies processing and then closes.
- Your processed image is displayed in Photoshop Elements.
- Save or Save As (to create another file), then exit Photoshop Elements.
- As soon as you click on Open, Photoshop generates a layer and a layer mask on top of the background layer (which is the original image), named * Nik Collection *. The type of layers and layer masks will change as soon as you hit, in the Nik Collection plugin, the Apply button, and depending on its settings.
- You can also process your images in Nik Collection through Photoshop or Photoshop Elements from your host application, such as DxO PhotoLab or Adobe Lightroom Classic. See the Workflow chapter in the pages of the associated programs.
Nik HDR Efex is a special case. To see how to launch it in merge mode from within Photoshop, please check at the bottom of this page.
The Nik Collection iconic panels
From version 8 onwards, the Nik Collection Palette is no longer available and can’t be activated anymore in Photoshop’s File > Automation menu. It has been replaced by the plug-in panels, fully integrated in Photoshop’s UXP iconic panel system.
The Nik Collection Preferences panel and the individual plugin panels in Photoshop appear when you select for the first time one of the plugins in Photoshop’s Plugins menu. Those panels behave the same way as all the panels of the program. You can open, close, move, rearrange them as you wish. Note that changing the Photoshop Workspace will reset the panels, and you will have to select the Nik Collection plugins in the Plugins menu again to make them reappear.
By default, the Nik Collection panels do not collapse automatically when you are done. You can change this behaviour in Photoshop preferences:
Preferences>Workspace>check Auto-Collapse Iconic Panels.
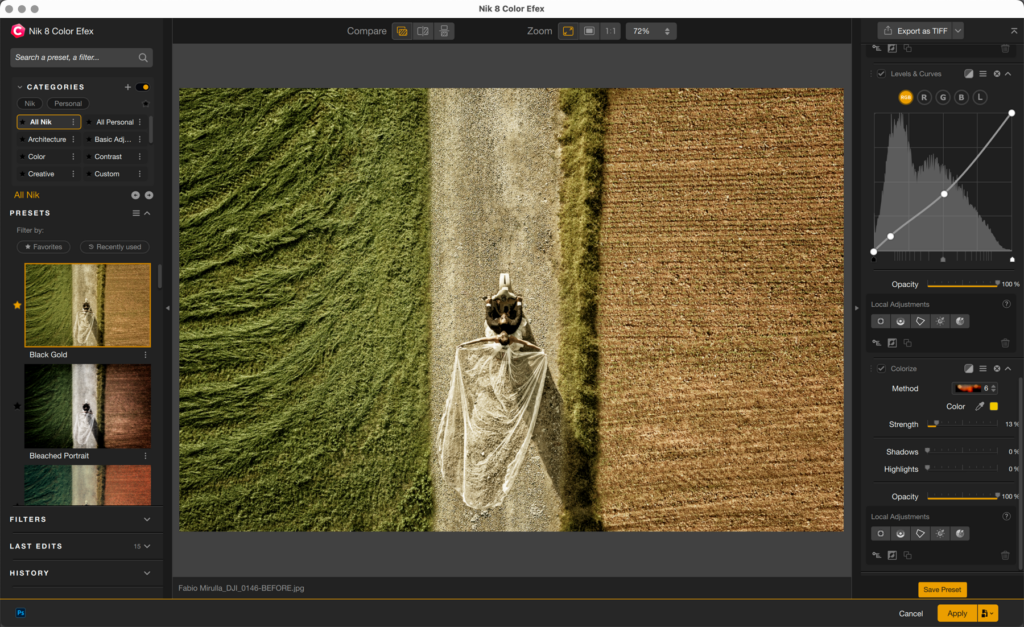
The Nik Preferences panel
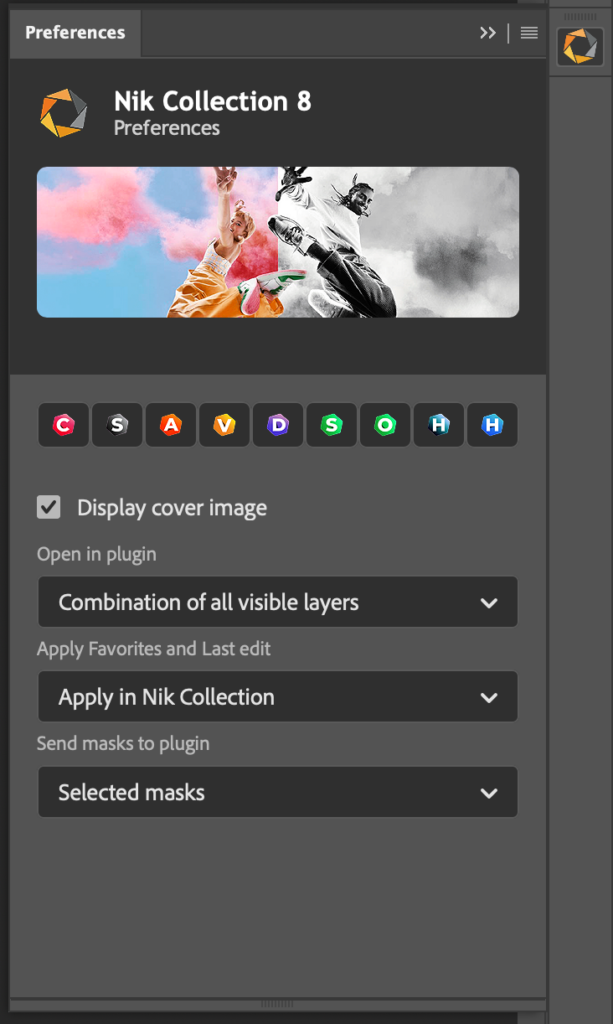
This is the starting panel, where you can display or hide the individual plugin panels and set the behavior of Nik Collection within Photoshop:
- The upper row buttons will directly send and open the image in any of the plugin you choose.
- Display cover image checkbox: checked by default, lets you hide or show the header in all panels.
- Open in plugin:
- Combination of all visible layers: when you open an image, Nik Collection will display it and all of its Photoshop layers as a single, flat image.
- Active layer: only opens the selected, active Photoshop layer in Nik Collection.
- Apply Favorites and Last Edit:
- Apply in Nik Collection: opens the relevant Nik Collection plugin when clicking on Last edit or Favorite buttons in the panel.
- Apply in Photoshop: applies directly the last edit or favorite, without opening the relevant Nik Collection plugin.
- Send masks to plugin:
- All masks: all masks, including the masks of other plugins, will be open in any of Nik Collection’s plugin.
- Selected masks: a dialog box lets you select which masks, including the masks of other plugins, will be open in any of Nik Collection’s plugin.
- Do not send masks: none of the masks, including the masks of other plugins, will be open in any of Nik Collection’s plugin.
The individual Nik plugins panels
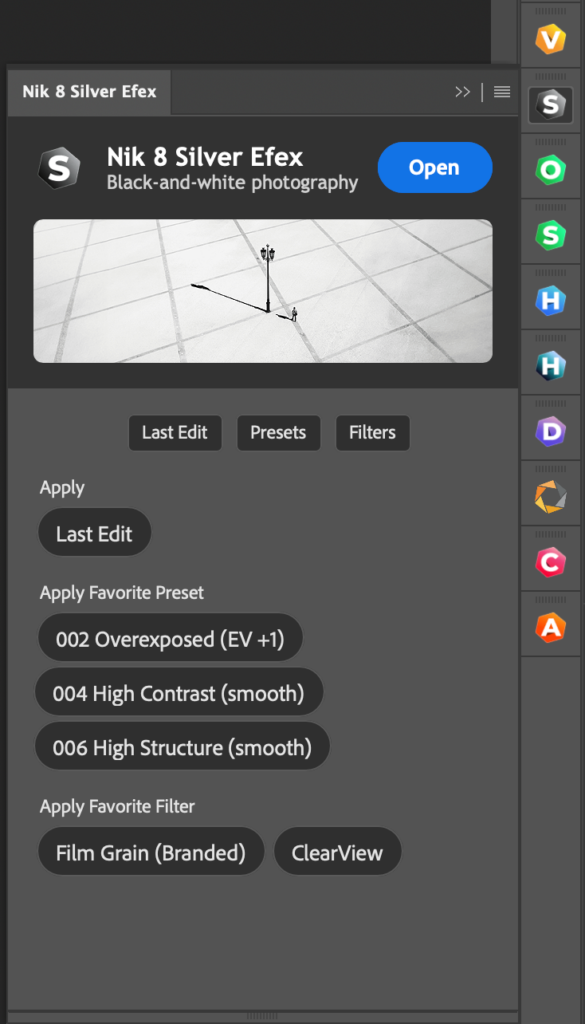
When displayed, each plugin has its own panel, with the following buttons:
- Open: clicking on this button will open the image in the relevant Nik Collection plugin.
- Last Edit: applies your most recent processing to a new image.
- Presets: applies any preset marked as favorite in the relevant plugin (the favorite presets will be shown in the panel).
- Filters: applies any filter marked as favorite in the relevant plugin (the favorite filters will be shown in the panel).
If you click on all the buttons, you can combine and show all last edits, presets and filters in the panel. You can scroll through or resize the panel to show them all.
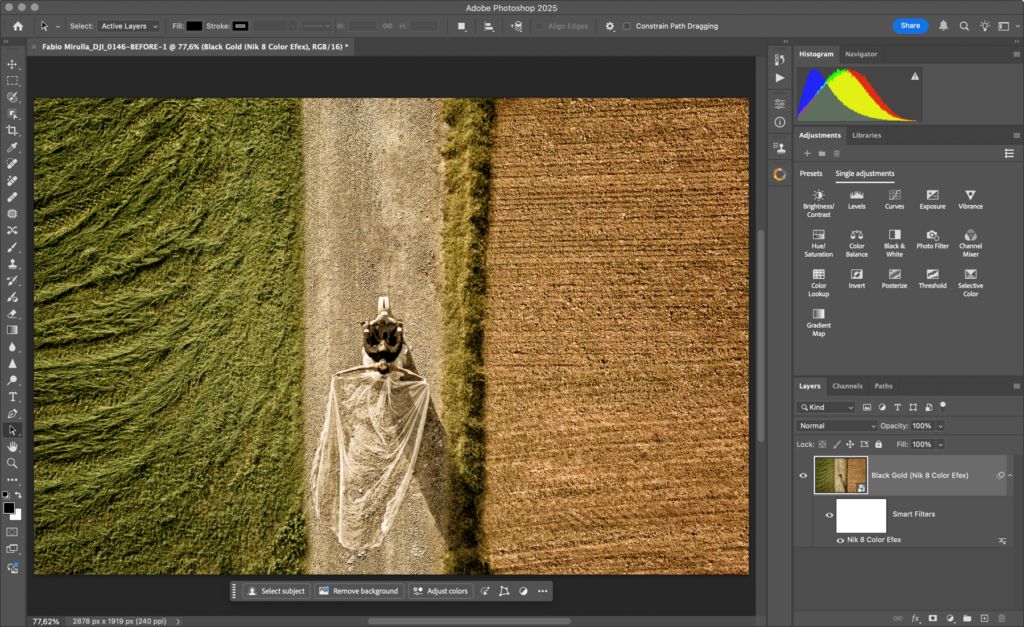
Working with smart objects
In Photoshop, a smart object1 is a layer that includes the original image to ensure a non-destructive and reversible workflow, all Nik Collection plugins are compatible with this. This means you can make corrections or apply a rendering to the image, which you can modify as you wish, after saving and even after closing the applications.
Going through Photoshop, you have two ways to convert to a smart object:
- In Photoshop itself (Method 1).
- In a Nik Collection plugin (Method 2).
Convert to a smart object in Photoshop (Method 1)

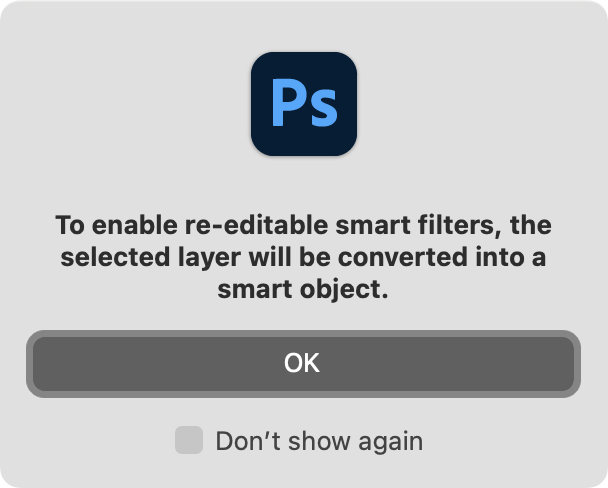
- Open the image in Photoshop2.
- In the Filter menu, select Convert for Smart Filters.
- A dialog box informs you that the selected layer (the background layer of your image) will be converted to a smart object (you can disable this dialog). Click OK.
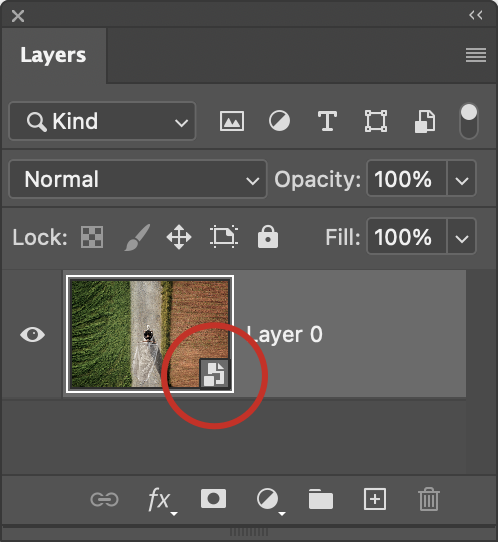
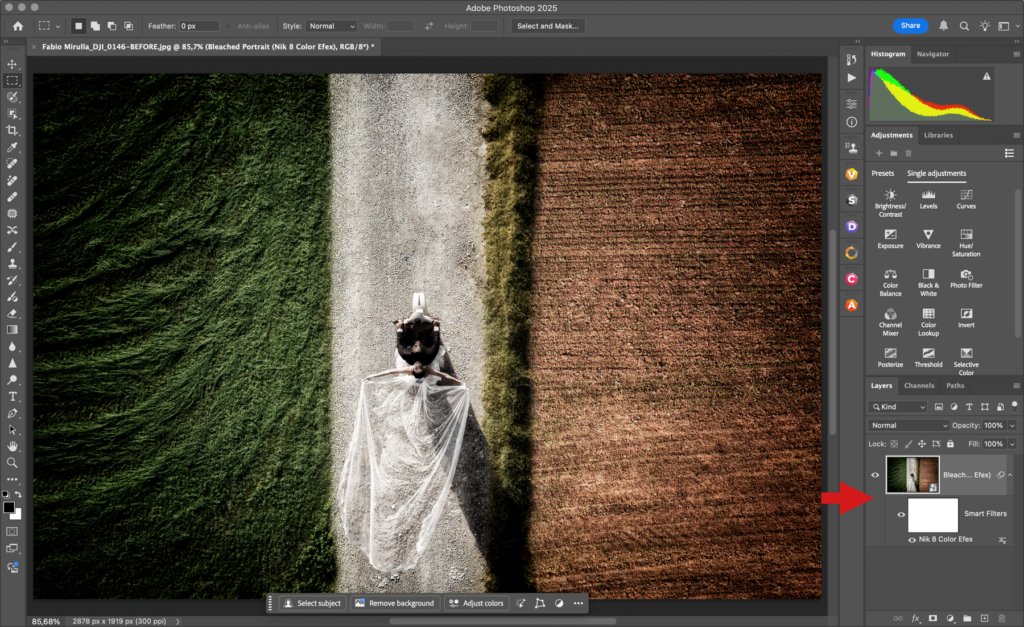
- Your image is converted to a smart object, the background layer is renamed Layer 0, and an icon appears in the thumbnail in the Layers panel.
- To select a plugin, 3 possibilities:
- Go to the Plugins > Nik Collection menu and select the desired plugin3.
- In the Nik Preferences panel, click on the desired plugin button.
- If the desired plugin panel is already open, click Open.
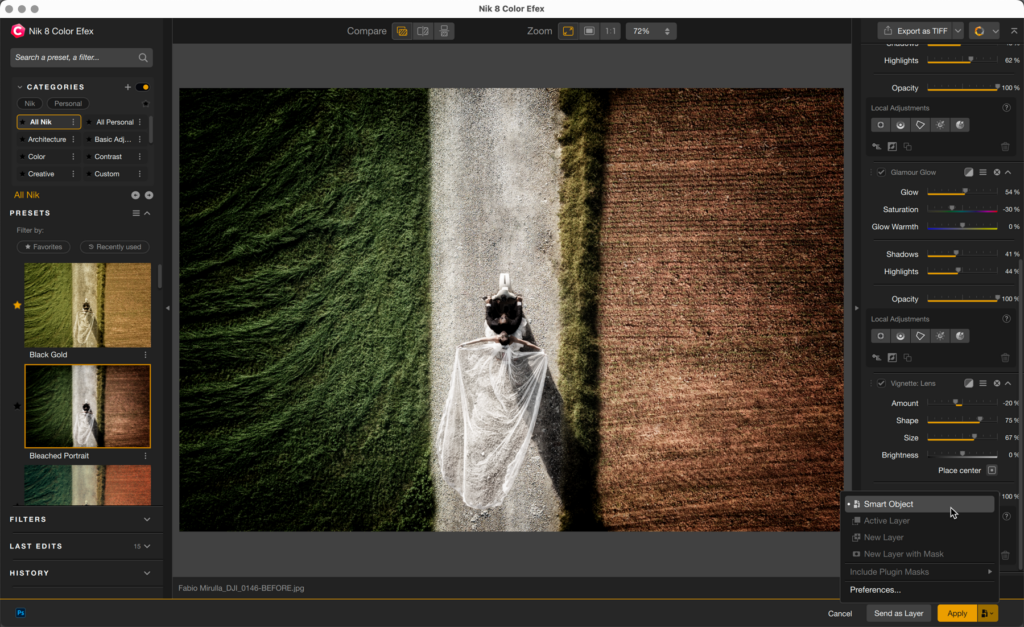
- Work your image in the chosen plugin software, and then click Apply. If you click on the second half of the Apply button, you will see, in the menu, that Smart Object is marked by a dot and, so, is already selected.
- The plugin closes, and the processed image is displayed in Photoshop.
- In the Layers panel, a filter effect thumbnail appears below Layer 0 with the name of the plug-in used below it.
1Both Lightroom Classic and Lightroom desktop client (since version 8.1) let you open images as Smart Objects in Photoshop (see the Adobe Lightroom Classic & Lightroom page, in the Workflow chapter).
2Does not apply to Photoshop Elements (Photoshop Elements does not offer a workflow with smart objects and filters).
3Nik HDR Efex offers its own option for working as a smart filter.
Convert to a smart object in the Nik Collection (Method 2)
- Open the image in Photoshop.
- To select a plugin, 3 possibilities:
- Go to the Plugins > Nik Collection menu and select the desired plugin***.
- In the Nik Preferences panel, click on the desired plugin button.
- If already open, open the desired plugin panel and click Open.
- Work your image in the selected plugin.
- Work your image in the chosen plugin software, and then click on the second half of the Apply button:
- If the smart object option is not set as default in the Nik Collection Host preferences, click the Smart Object option to select it.
- If the smart object option is already set as default in the Nik Collection Host preferences, the Smart Object option is marked as selected with a dot.
- Click Apply.
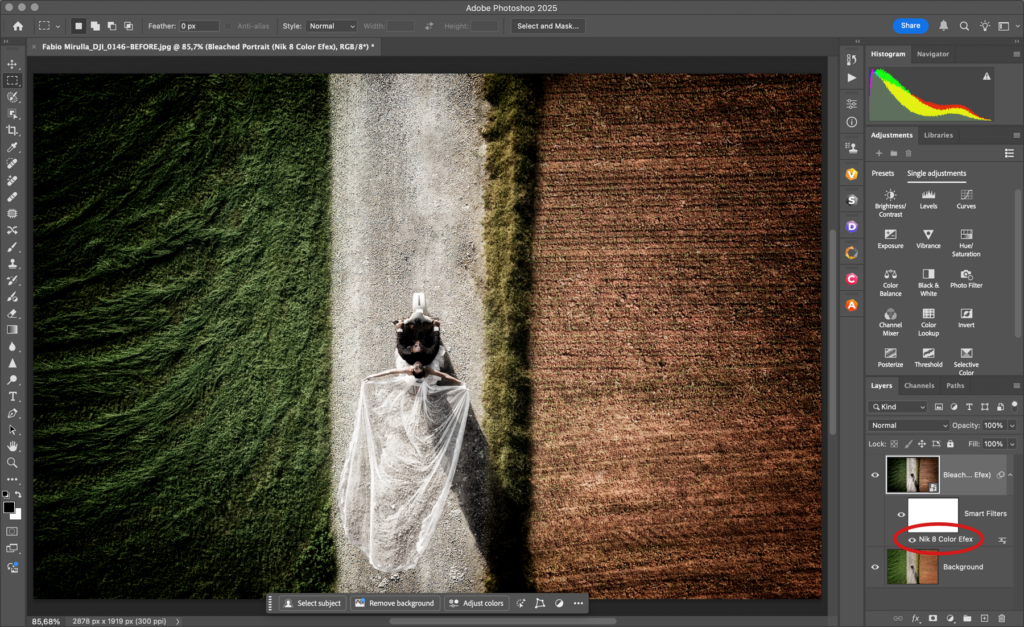
- The plugin closes, and the processed image is displayed in Photoshop as a smart object above Layer 0 or background image, as follows:
- A thumbnail with the smart object icon and the name of the Nik plugin or the filter which was applied.
- A white smart filter mask with the name of the plugin below.
If there are Photoshop masks and users want to access them in Nik Collection, then Nik Collection creates a copy of those masks. Later, if the user creates a smart object, upon reopening it, only the Photoshop masks that were copied by Nik Collection will be reusable within the smart object.
In other words, if the user created new masks afterward or modified existing ones, they won’t be available or updated in the smart object.
Re-editing your processing
- Open the processed image in Photoshop.
- In the Layers panel, double-click the plug-in name below the filter effect thumbnail.
- The plugin software used to process the image opens, you can edit it or even completely redo your image processing.
- Click on Apply.
- The plugin closes, and the processed image is displayed in Photoshop.
- Save and exit Photoshop.
Permanently applying processing
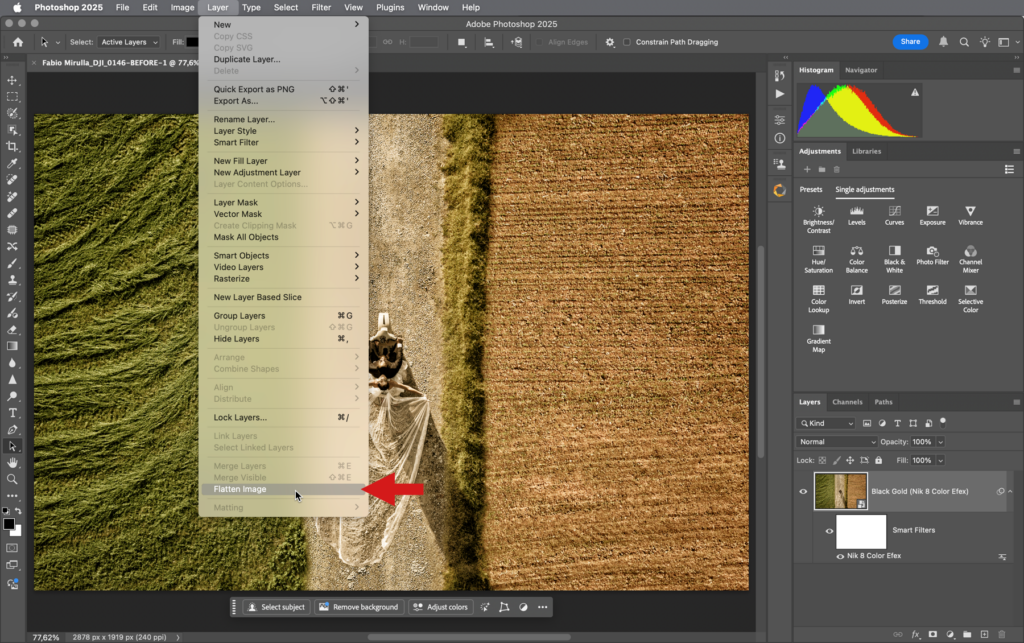
- If it is not already the case, open the image in Photoshop.
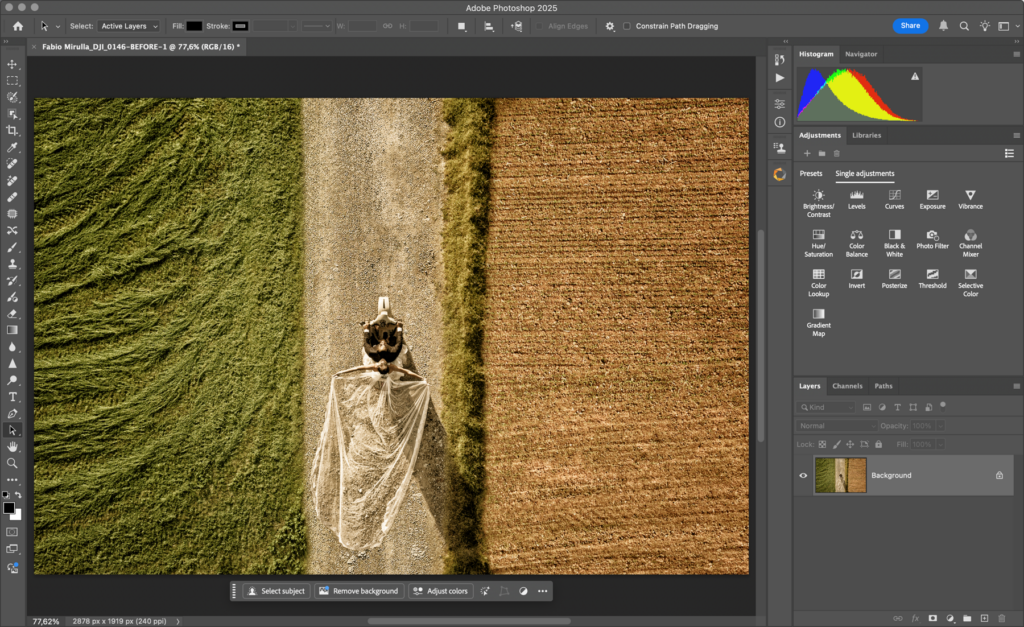
- In the Layer menu, select Flatten Image.
- The mask of the filter is Layer 0 and forms the background layer; at this point the processing is no longer reversible.
- Save and exit Photoshop.
Send as a layer
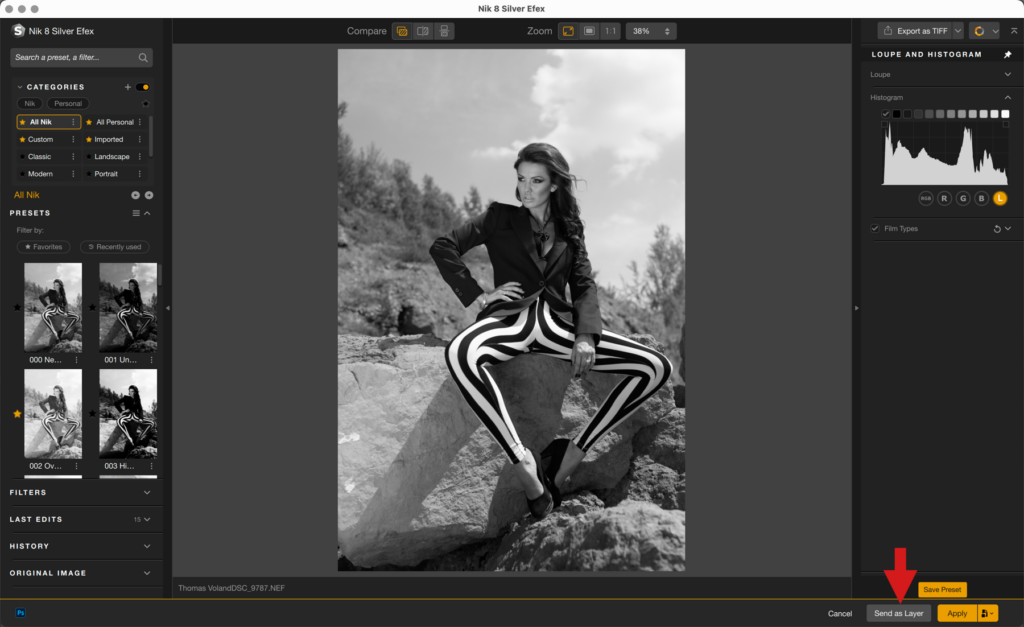
Nik Collection plugins allow you to export your editing as layers to Photoshop, at any time. These layers can be used to send intermediate editing steps, and/or to cumulate several effects, presets or filters, even from several different plugins.
To send layers to Photoshop :
- After opening an image in Photoshop, open it in one of the Nik Collection plugins.
- In the plugin, apply a filter, preset or any edit.
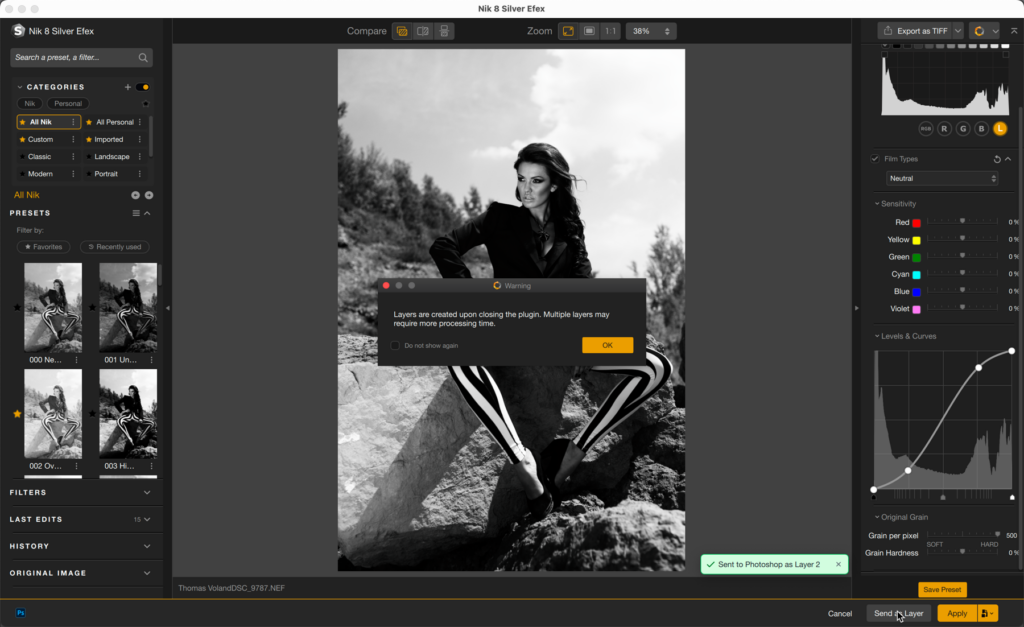
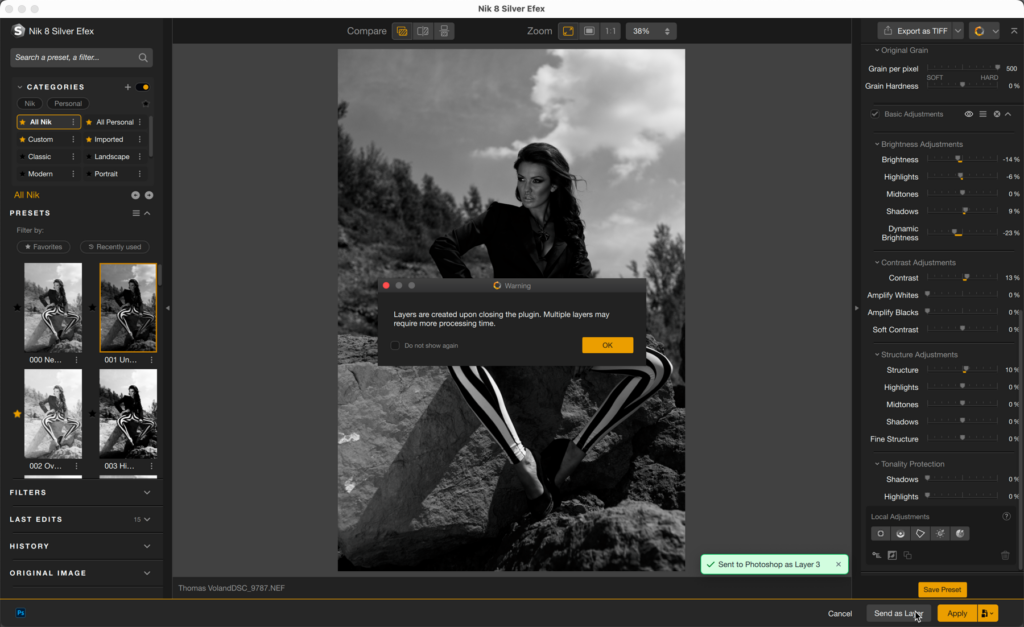
- In the bottom right-hand corner, between the Cancel and Apply buttons, click Send as a layer.
- If you wish, apply another filter or preset, or modify your corrections. You can also switch to another plugin.
- Click as necessary on Send as a layer1.
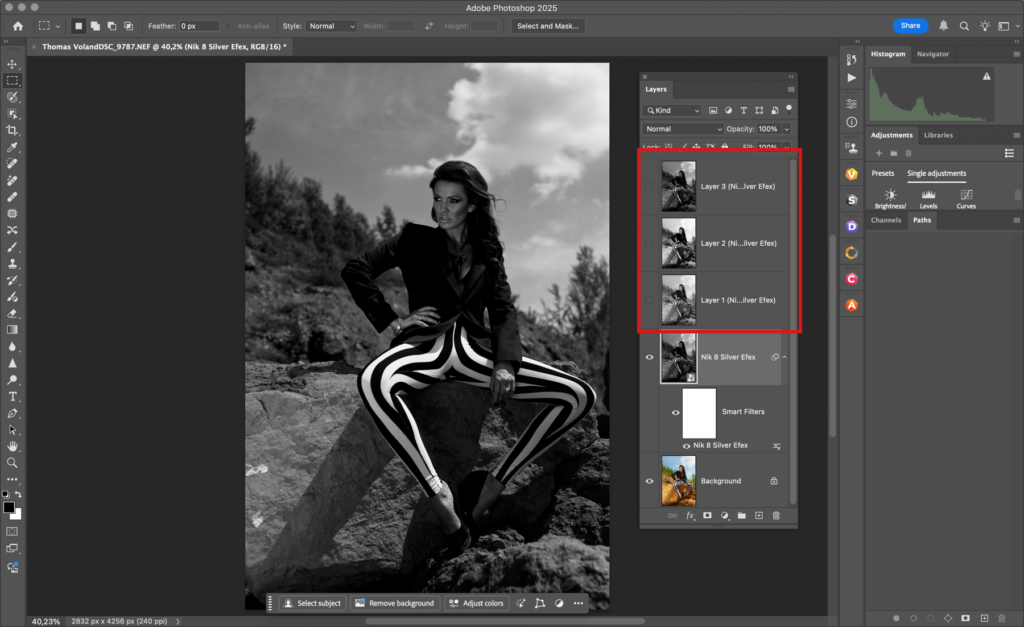
- When you’ve finished, click Apply2. The plugin closes, the layers are visible in Photoshop’s Layers panel.
1 The more layers you export, the longer it will take to generate them.
2 Even if you click on Cancel, layers will be sent to Photoshop.
Mask exchange between Photoshop and Nik Collection
Photoshop has many selection tools, some of which are AI-based, and you can take advantage of them in Nik Collection plugins to apply perfectly targeted filters, presets and corrections. You can also pass these selections from one plugin to another.
Photoshop’s selection tools include:
- Rectangle and Ellipse marquee.
- Lasso and all its variants.
- Object selection (IA), Quick and Magic Wand.
- Subject selection (AI).
- Pen.
- Path and Direct selection.
Importing Photoshop selection masks and layers into Nik Collection:
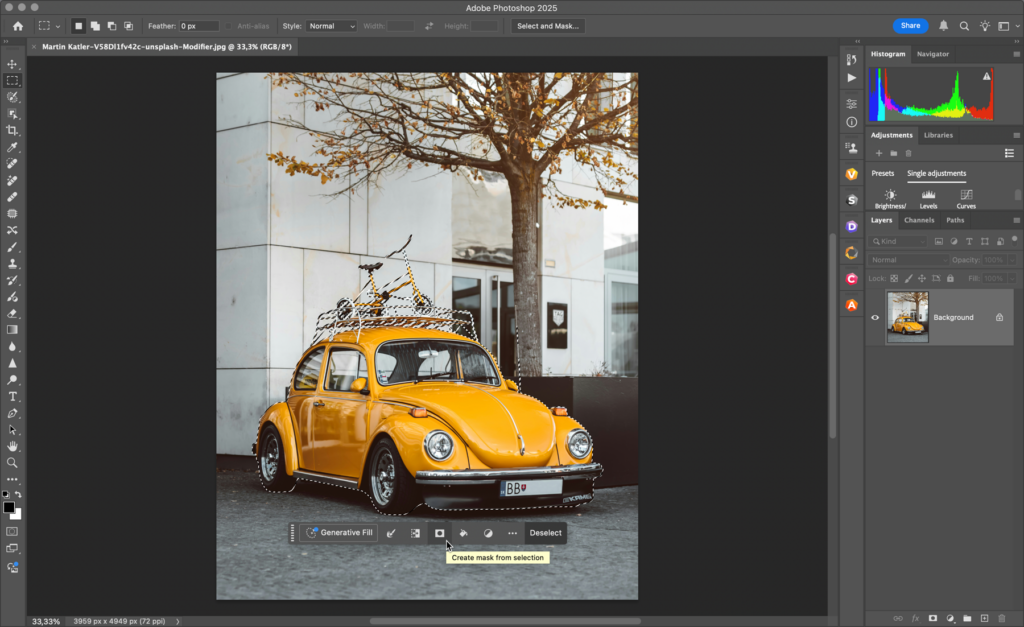
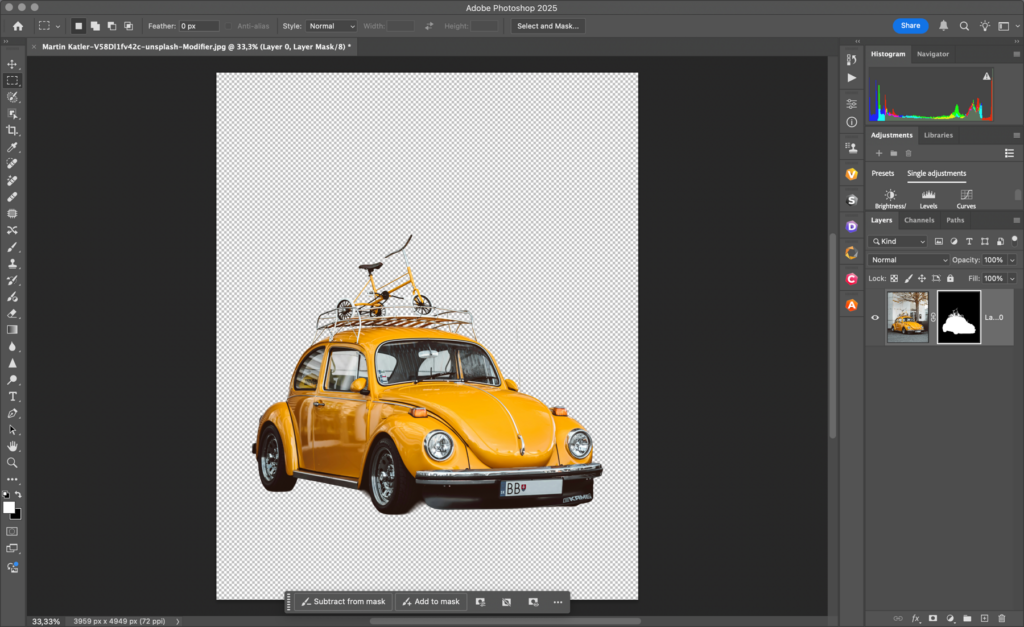
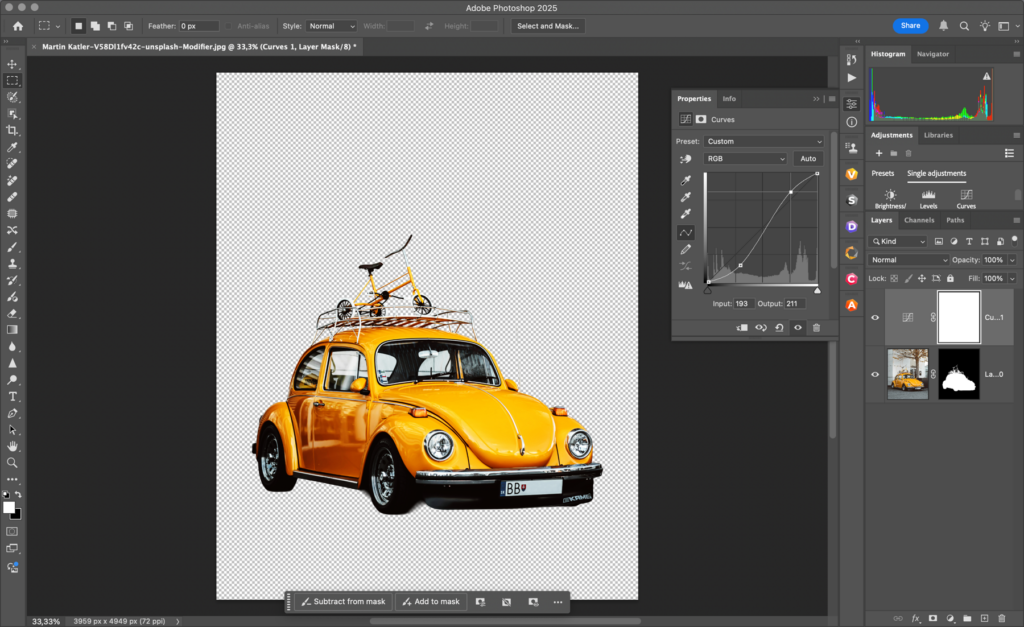
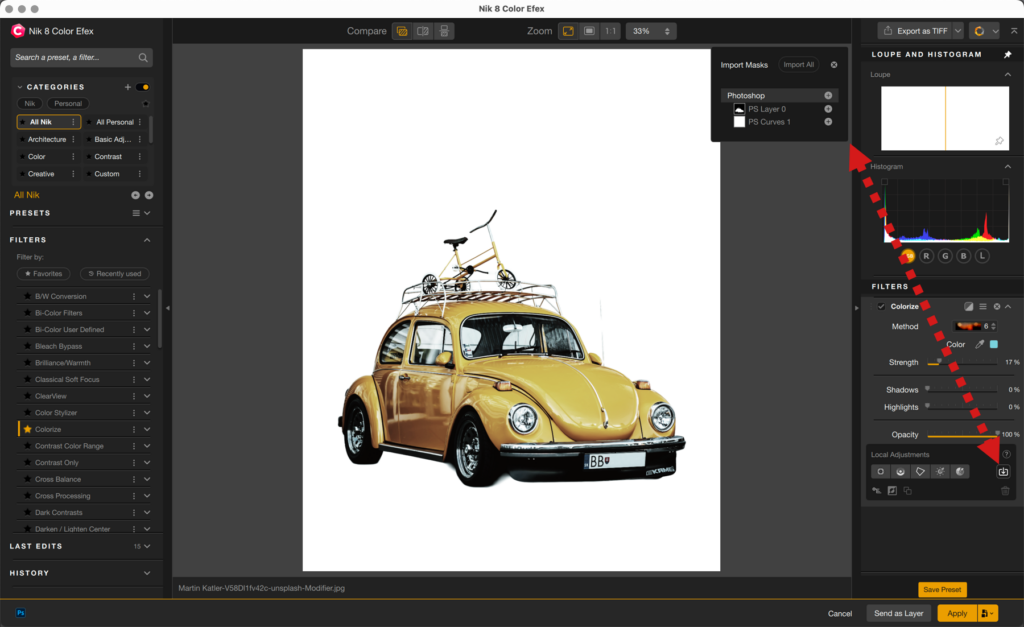
- Beforehand, it is recommended to duplicate the Background layer in Photoshop, and do your selection on the duplicate layer, and add duplicate background layers as necessary*.
- Do your selections and, for each selection, go to the floating toolbar below the image and click on the Create mask from selection icon and/or create layers and/or adjustment layers as needed.
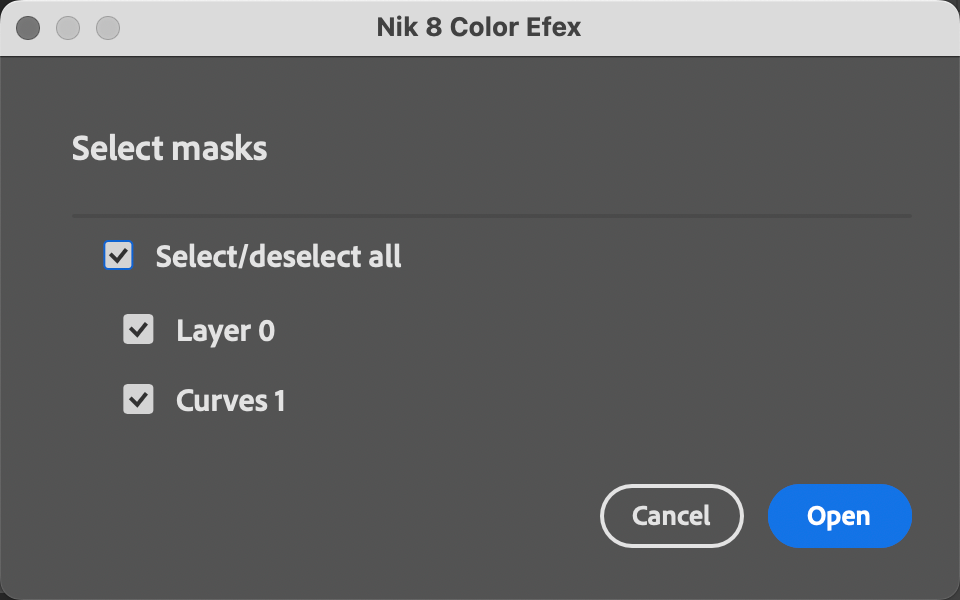
- Open the image in the Nik plugin of your choice. If, in the Nik Preferences panel, you have set Send masks to plugin > Selected masks, a dialog box will pop-up and ask you to select the Photoshop masks with the checkboxes, or select all the masks in one go with the Select/deselect all checkbox.
- When the masks are selected, click on Open.
- Once in the Nik plugin, apply a filter, a preset, or any tool offering local adjustments.
- To add the Photoshop masks in the Nik plug-in local adjusment list, click on the Import Masks button.
- In the floating Import window, choose the masks created in Photoshop:
- If there are multiple Photoshop masks, click the + button to add the desired mask(s).
- To add all Photoshop masks, click the + button on the Photoshop line or click on Import all (if there are Nik Collection masks, they will added).
- The imported Photoshop masks will appear in the local adjustments list and behave exactly like Nik Collection’s native tools. You can apply corrections, effects, duplicate, invert, and delete them.
*All imported masks retain their name, whether it’s the original default name or a customized one.
Please refer to Adobe Photoshop’s user manual for more information on the layer and selection tools behaviour and usage.
Apply and back to Photoshop
The Apply button
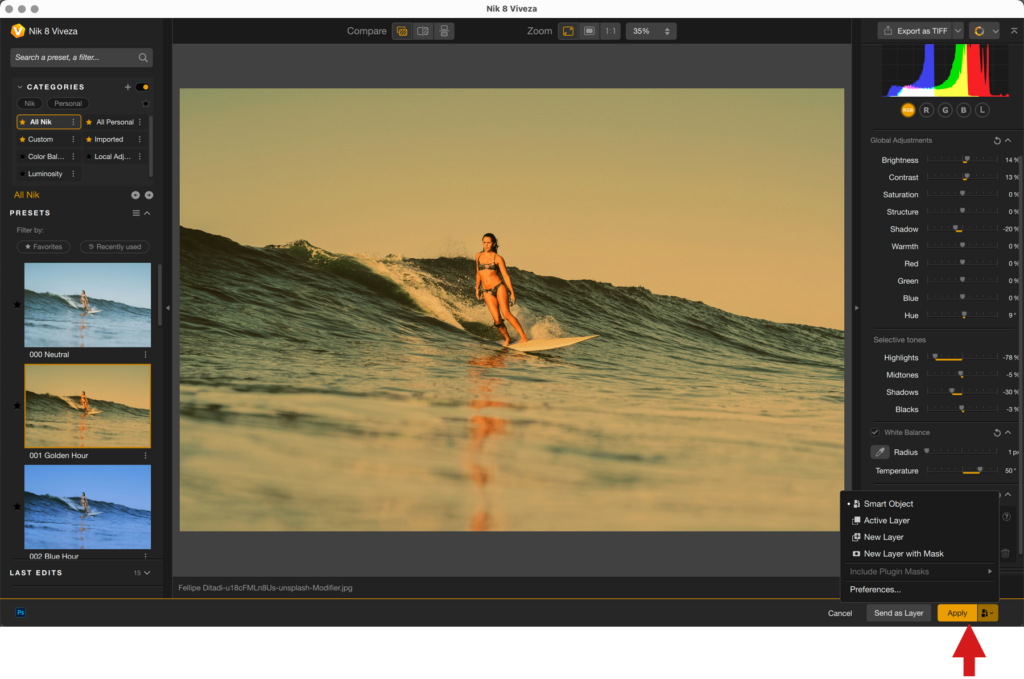
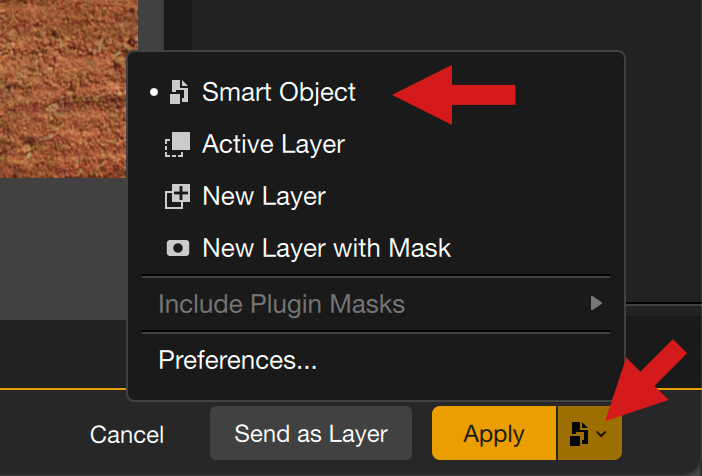
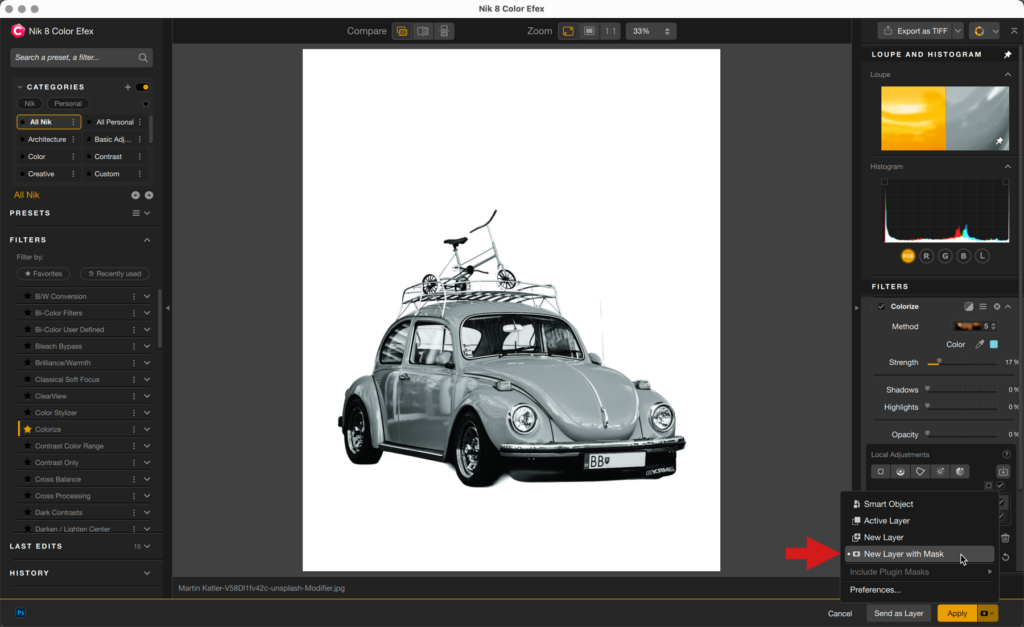
When you click the Apply button, the Nik Collection plugin you are using will apply the adjustments based on the options selected in the second half of the button, which is only displayed when working within the Photoshop workflow.
Options for the Apply Button:
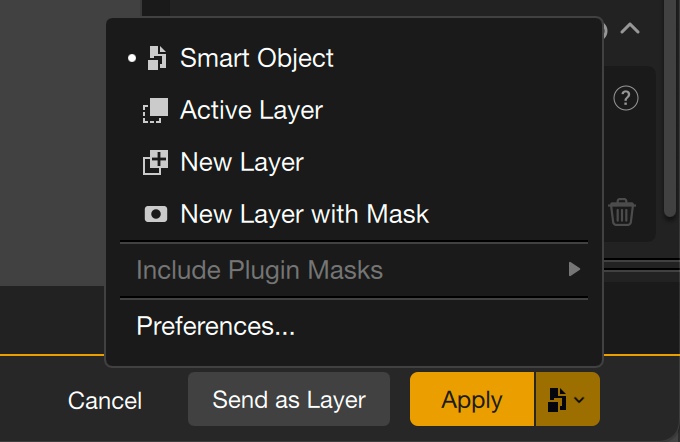
- Smart Object: Applies the Nik plugin’s processing and converts the Photoshop layer into a smart filter. This option is selected by default if the layer is a smart object previously created in Photoshop.
- Active layer: Applies the Nik plugin’s processing to the selected layer in Photoshop.
- New layer: Applies the Nik plugin’s processing to a new layer that will be created upon returning to Photoshop.
- New layer with mask: Generates a mask in Photoshop that allows you to paint or erase the Nik plugin’s processing using Photoshop tools. The created mask is not merged with a layer.
- Include Plugin Masks: This option sends Nik masks as alpha channels to Photoshop. These channels are visible in the Channels tab. The submenu also provides:
- A list of masks
- The ability to select them one by one
- The ability to select all at once (Select all button)
- The option to merge them with the Merge selected masks toggle
- The ability to deselect all selected masks in the list at once (Unselect all button)
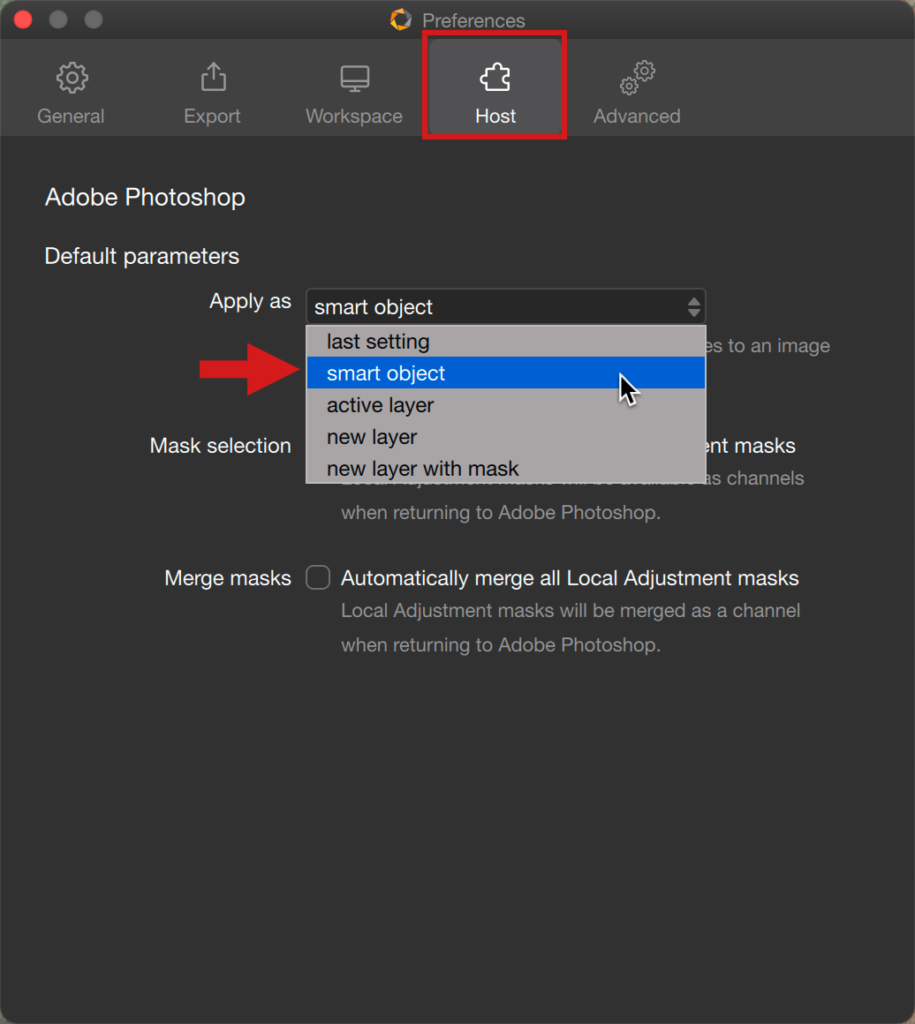
- Preferences: Opens the Preferences window, Host tab, to choose how corrections and masks are handled when using the Apply button, i.e. sending images back to Photoshop.

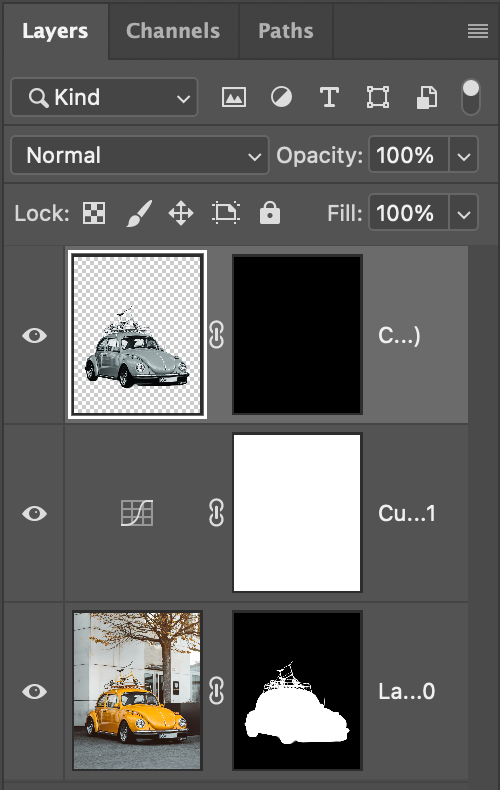
- Apply as submenu:
- new layer: Effects are applied to a new layer that will be generated after clicking the Apply button. When back in Photoshop, the Layers panel will show you:
- Background layer (original image).
- Layer named after the plugin (plus, in the case of Color Efex, the name of the filter).
- Effect is applied to the image displayed in the canvas.
- last setting: Effects will be applied using the last option chosen in the Apply as menu, even if you quit Nik Collection and start a new session.
- smart object: Effects will be applied as a smart object and a smart filter, which keeps full workflow and edits reversibility. When back in Photoshop, the Layers panel will show you:
- Original image renamed as Layer 0.
- Smart Filter mask.
- Name of the plugin used.
- Effect is applied to the image displayed in the canvas.
- active layer: Effects are applied to the existing layer after clicking the Apply button. When back in Photoshop, the Layers panel will show you:
- Original image renamed as Layer 0, with the effect applied.
- Effect is applied to the image displayed in the canvas.
- new layer with mask: Effects are applied to a new layer that will be generated after clicking the Apply button. In that scenario, the masks will be kept and will be visible in Photoshop’s Layer panel.
- Background layer (original image).
- Layer plus the mask named after the plugin (plus, in the case of Color Efex, the name of the filter).
- The mask lets you add or subtract the effect using Photoshop’s brush.
- Effect is applied to the image displayed in the canvas.
- new layer: Effects are applied to a new layer that will be generated after clicking the Apply button. When back in Photoshop, the Layers panel will show you:
- Mask selection, automatically select all local adjustments masks: when checked, this option will send all Nik Collection local adjustment masks as separate channels to Photoshop.
- Merge masks, automatically merge all local adjustments masks: when checked, this option will send all Nik Collection local adjustment masks as a single channel to Photoshop.
- Changing the Apply button behavior in its own options menu will not change your setting in the Preferences. This lets you change the option on the fly as needed in your workflow.
- Only one type of Photoshop masks can be sent to Nik Collection: layer masks.
- Photoshop masks are not available for import if a Nik Collection plugin has been started from Photoshop’s Filter menu. Use the panels instead.
- Photoshop masks can’t be included in Nik Collection’s Last edit and Preset.
Using the layers back in Photoshop
When you are done with the different layers, you can either:
- save the image without flattening it, which keeps all the layers available when you open the image in Photoshop again. In that scenario, you will be able to edit or even duplicate, suppress, whatever every single layer.
- save the image by flattening it with all the layers. In that case, if you open the image in Photoshop again, you won’t find any layer, except the background layer, which is the image itself. To flatten the image in Photoshop, go to Layers menu > Flatten image.
If you are combining Lightroom Classic or Lightroom with Photoshop, as long as you don’t flatten the layers, they will be kept in your workflow and preserved in the roundtrips between these apps.
Launching Nik HDR Efex in merge mode
Nik HDR Efex is special because you have the choice to use it on a single image (tone mapping mode) or multiple images (merge mode). In the case of the merge mode, you don’t need to have the images already open in Photoshop.
In Photoshop Elements, access to Nik HDR Efex still goes trough the Filter menu.
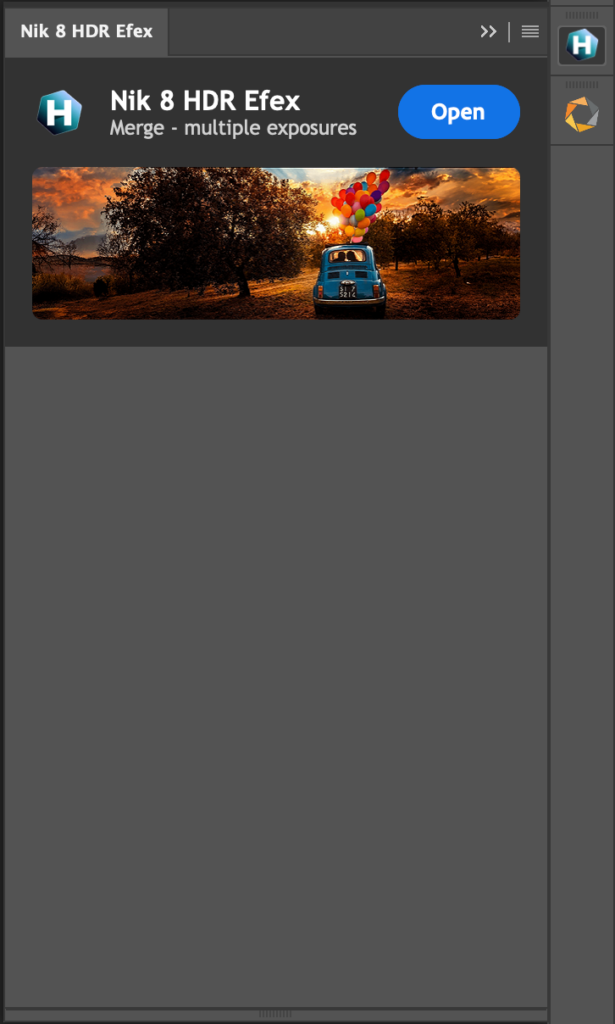

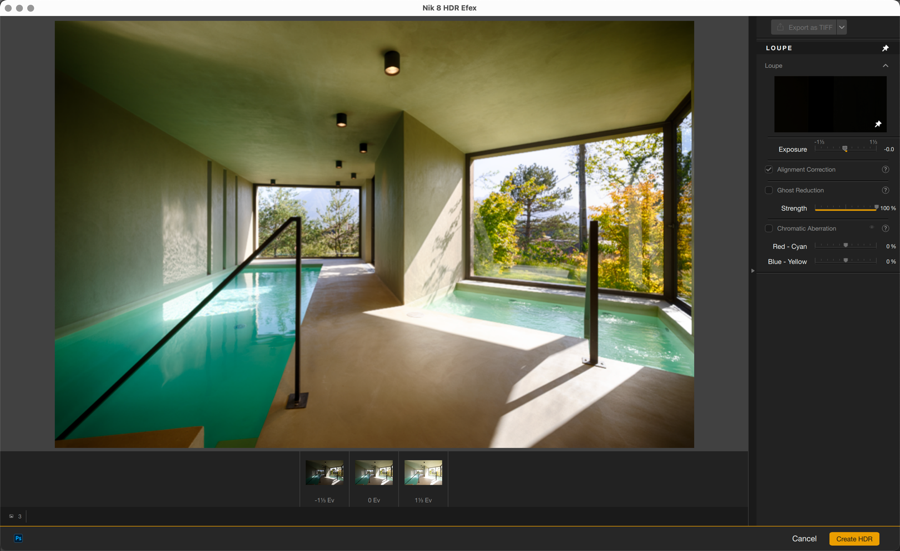
To send picture(s) and launch Nik HDR Efex in merge mode:
- In Photoshop, if it is the first time, go in the Plugins menu>Nik Collection and select Nik HDR Efex or Nik HDR Efex Tone mapping. If already displayed, you can also start from the Nik Collection Preferences panel or the Nik HDR Efex panel(s).
- A dialog box opens to select images.
- Click Add files to open a system dialog. Find and select the images you want to merge, then click Open.
- The Nik HDR Efex dialog box displays the list of selected images.
- To unselect an image from the list, click to uncheck the box next to the file name.
- If you wish to switch to a reversible workflow, check Merge as a Photoshop Smart Object*.
- Click on Merge.
- The Nik HDR Efex Merge Settings window opens.
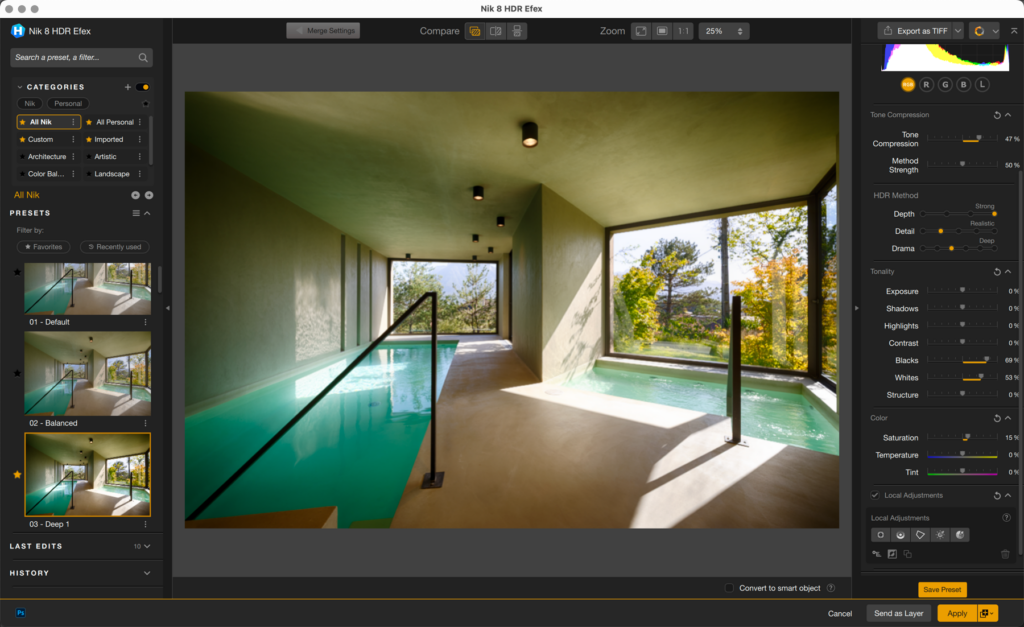
- After selecting the options you need, click Create HDR.
- The images are merged, and the HDR image opens in Nik HDR Efex.
- Once you have finished processing, click Apply.
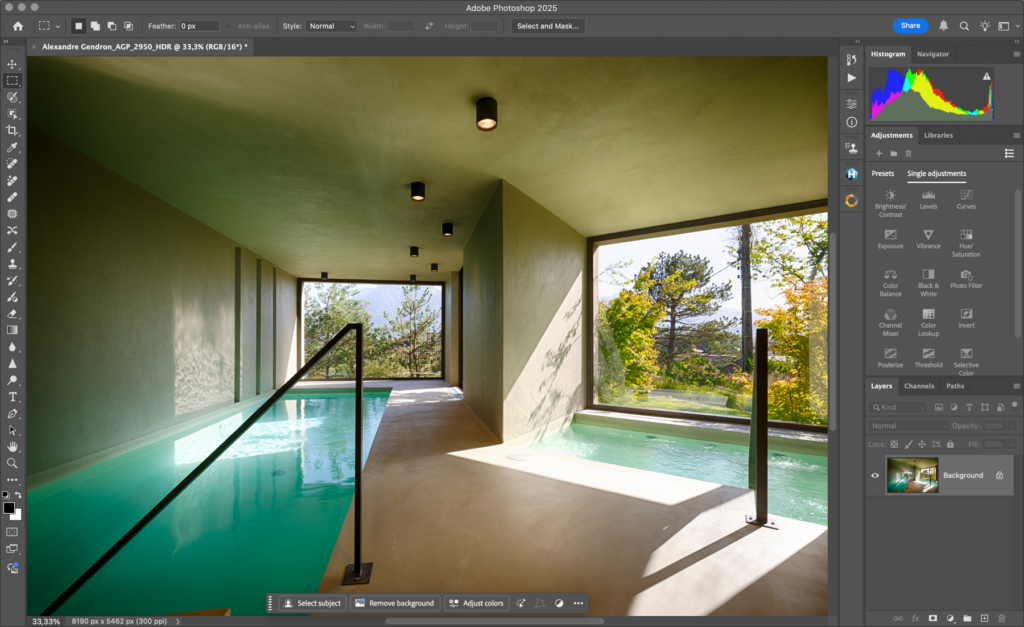
- The image processed in Nik HDR Efex is displayed in Photoshop. A layer bearing the name of the Nik HDR Efex plug-in has been created
* Smart Objects are not available in Photoshop Elements.
For more information on the contents and options of the HDR Merge dialog box, see the Nik HDR Efex chapter.