With the Nik 6 HDR Efex plugin, you can stitch and merge images with different exposure settings to expand their dynamic range, giving you the ability to reproduce the darkest and brightest tones in the same image. Thanks to its 32-bit engine, Nik HDR Efex offers lots of creative options for surreal and natural renderings, because you can correct the resulting image globally and selectively using control points. of Control Points.
Acessing Nik HDR Efex is different from other Nik Collection plugins, please refer to the Workflow chapter for more information.
Preferences (HDR tab)
Use the Nik HDR Efex settings to set your preferences for the interface, ghost image processing, GPU acceleration, image output, image stacking with originals, as well as access to the online user guide.
Options in the general tab are discussed in the Common Interface and Tools chapter > Preferences.
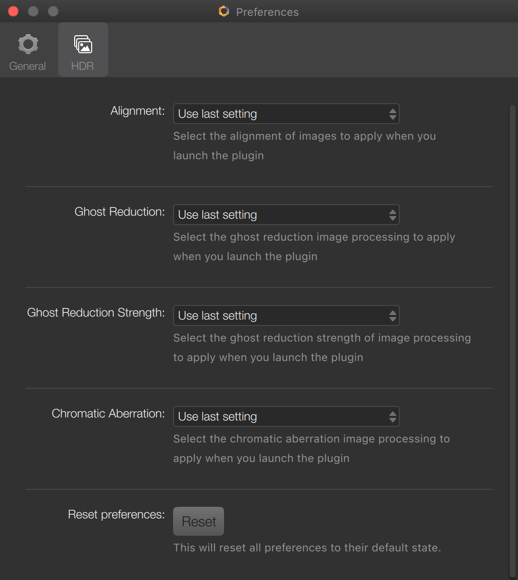
Nik HDR Efex can merge images taken handheld and/or containing moving elements. It is also capable of correcting chromatic aberration. For this, you have the following options:
- Alignment*: Enables or disables the alignment of images that have not been shot on a stable, stationary surface or with a tripod.
- Ghost Reduction*: Enables or disables the processing of elements or moving subjects in the sequence of images to be merged.
- Ghost Reduction Strength*: There are 5 levels of ghost reduction — 20% to 100%. The higher the value, the more effective the reduction, but the presence of artifacts and noise in the image will be proportionately higher.
- Chromatic Aberration*: Chromatic aberration occurs in the form of colored fringes along elements with strong backlighting, and this phenomenon can be amplified when merging images. You can enable or disable the correction, but we recommended that you correct this beforehand on the original images in the host program.
- Stacking*: in this section, for users of Adobe Lightroom Classic as the host application, there are two checkbox options available:
- Automatic import: allows the transfer of the merged image into the Lightroom Classic catalog.
- Stack with first image: stacks the merged image with the first image of the selected sequence in Lightroom Classic.
- Reset Preferences: Resets all preferences to their default values.
* Changes take effect on the next launch of Nik HDR Efex.
For each of the display options above, if you select Use last setting, the setting from the previous session will automatically be applied.
Merging images
Working in Nik HDR Efex is a two-step process: merging images and then processing the HDR. On this page, you will learn about image merging, which uses a special interface, the Merge Settings window, to handle a number of issues inherent to image merging. Once the original images have been merged, the HDR image will be displayed in the plugin.
- Upon image opening
- Handling problems
- Previewing and inspecting merged images
- Start HDR merging
Access and use of Nik HDR Efex is based on a particular workflow, especially with respect to host applications. For more information, see the Workflow chapter.
Upon image opening
When you have selected the differently exposed images for HDR, and transferred them to Nik HDR Efex, they will open in a window with the following elements and options:
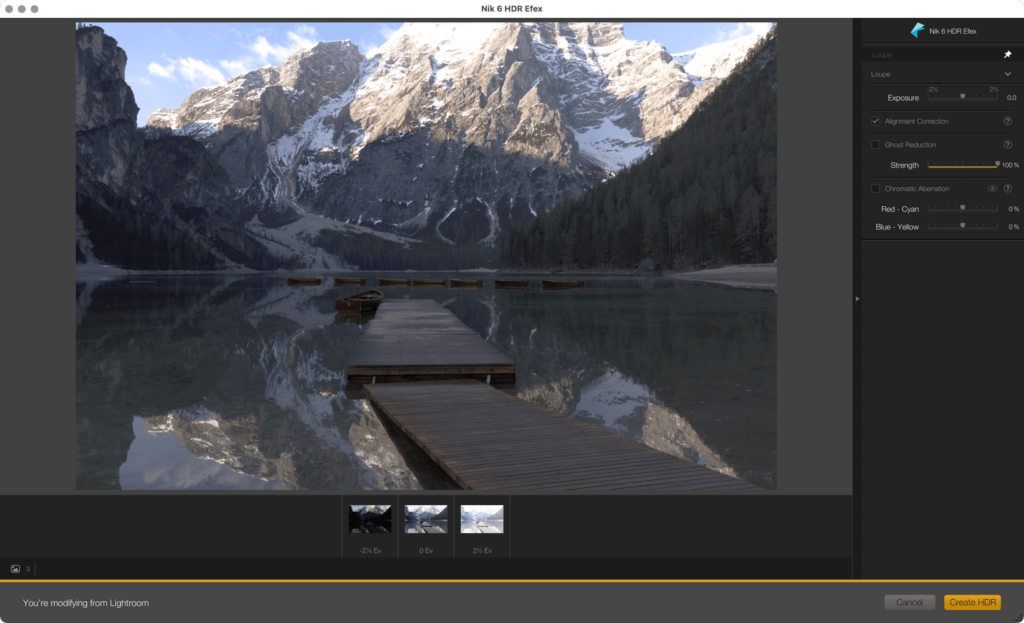
- Image thumbnails are displayed at the bottom of the window, and the filename will appear bottom left when you hover over the them. The darkest image is on the left, the normally-exposed one is in the center, and the brightest one is on the right. This also applies if your series contains more than 3 images: The same if you only open 2 images.
- If the gap between each image exceeds 3 EV, a warning sign (a yellow triangle and exclamation mark) in the thumbnail and a message in the right pane will warn you that the quality of the merge is at risk, but you can still run it. Alternatively, choose images with less pronounced range, or add intermediate images.
- An exclamation mark in a yellow triangle can also indicate a number of issues related to metadata and information (focal length, image size, etc.) that Nik HDR Efex needs for image merging. In some cases, Nik HDR Efex will proceed anyway with automatic cropping if necessary.

In case of issues or inconsistencies linked to the exposure gaps, besides the yellow triangle, exposure adjustment menus will appear below the thumbnails:

- Below the thumbnails is a menu that lets you manually adjust the exposure difference from one frame to the next (bracketing), if for some reason Nik HDR Efex does not automatically detect this information in each image’s EXIF metadata.
- You can also set exposure bracketing by batch by selecting a value from the EV spacing menu (Exposure value**), located in the right panel. For example, if you choose 3, you will apply a 3-stop (or 3-EV) difference between the darkest image and the normal image, and then between the normal image and the brightest image. In this case, the difference between the darkest and lightest image will be 3 EV + 3 EV = 6 EV, or 6 f-stops.
- Each change to the Exposure Values and their disparities refreshes the preview of the final image.
* If you transfer just one image into Nik HDR Efex, it will be opened directly without going via the merge window, in which case you will be able to work in single-image HDR mode, but with all the limitations that this imposes in terms of dynamic range.
** The notion of exposure value (EV) expressed here is 1 EV = 1 f-stop. Key: 1 EV = 1 aperture = 1 stop.
Handling problems
Prior to merging images, Nik HDR Efex lets you fix some problems and preview them in the viewer. In the right panel each of the following options can be activated by clicking the corresponding checkbox (defaults are set in Preferences > HDR tab):

- Alignment correction: lets you better align a group of images taken without a tripod.
- Ghost Reduction*: Algorithms detect and prevent the repetition of a moving element in the image (pedestrian, vehicle, etc.). You can adjust the intensity of the reduction using the slider (100% by default), knowing that the higher the value, the more efficient it will be, but at the expense of computation time, with the likely appearance of artifacts or localized noise in the final image.
- Chromatic aberration*: Used to attenuate colored fringes along contours subject to high contrast (for example, tree branches against a bright sky, at the edge of the image). Nevertheless, it is advisable to deal with this phenomenon on the original file, in the host application. The two sliders, set to 0 by default, let you deal with red-cyan and/or blue-yellow fringing.
* You can inspect the effect of reducing ghost images and chrromatic aberration in the preview of the merged image (see bellow).
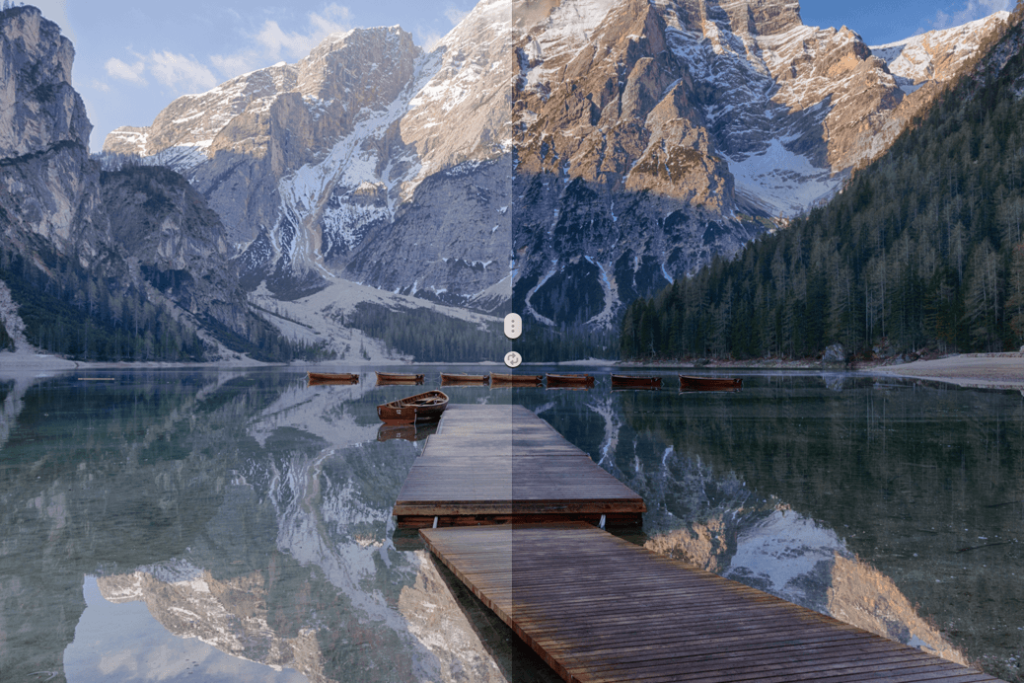
Previewing and inspecting merged images
A preview of the image after the HDR merge is available in the interface. The look will vary according to the settings and gap in EV values. This preview lets you check the image for possible exposure or alignment issues, the presence of ghost elements, and color fringing.
Loupe
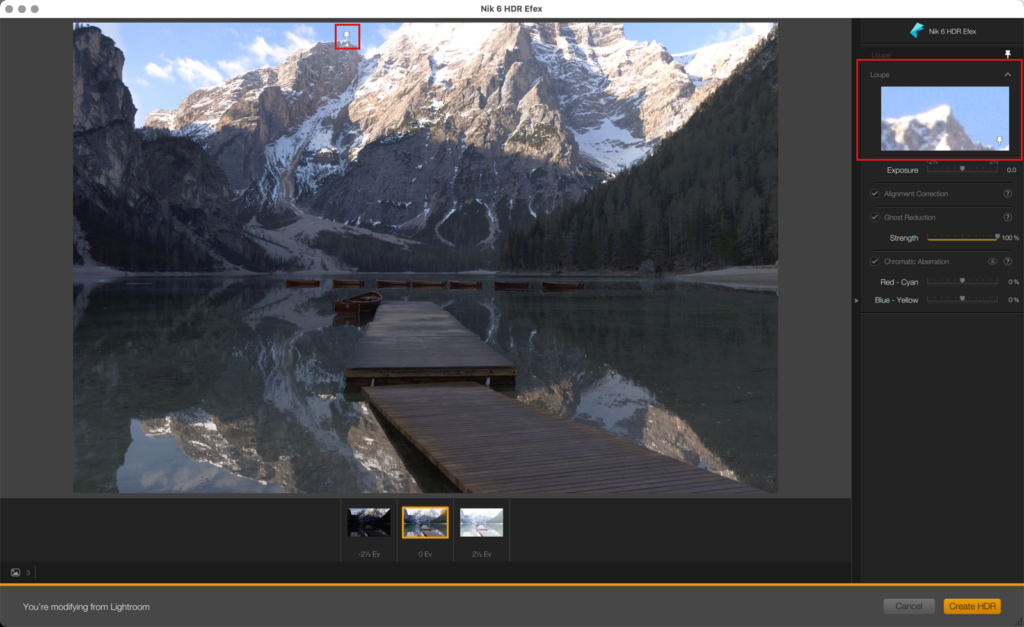
The magnifying loupe lets you:
- Navigate around the picture: click inside the loupe and drag.
- Position and lock the loup in a specific location: click on the pin and place it in the desired place on the image.
Exposure Slider
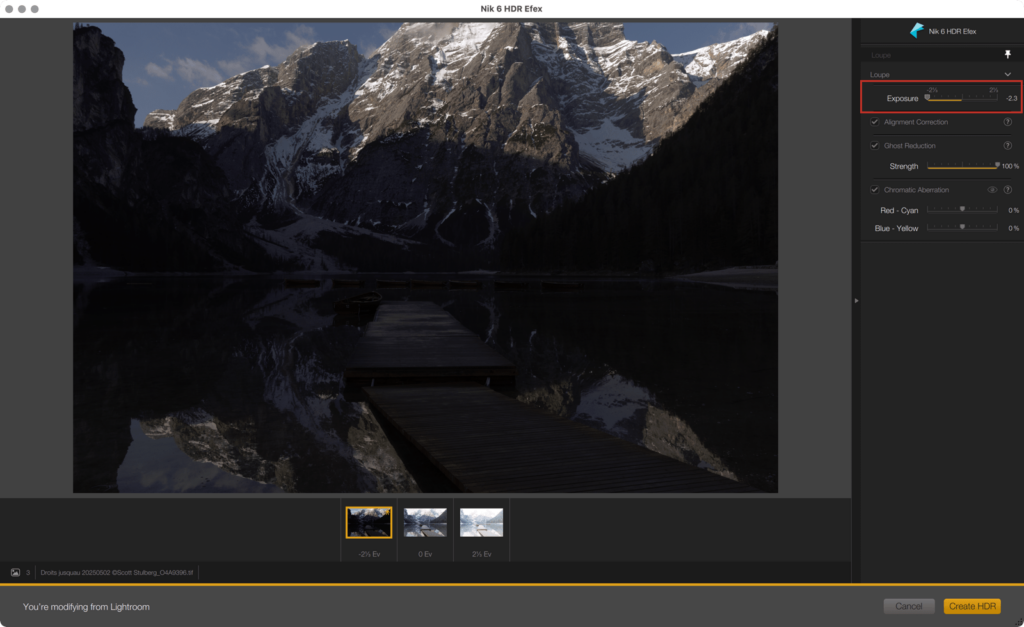
The Exposure slider, located in the right panel, displays preview of each merged image, with an indication of the EV values at each end of the scale.
To see the darkest image, move the slider all the way to the left, and for the lightest image, move the slider all the way to the right; you can view the intermediate images anywhere along the slider.
The slider also makes it possible to darken or lighten the image, which makes it easier to spot ghost images and chromatic aberration.
Chromatic aberration correction preview
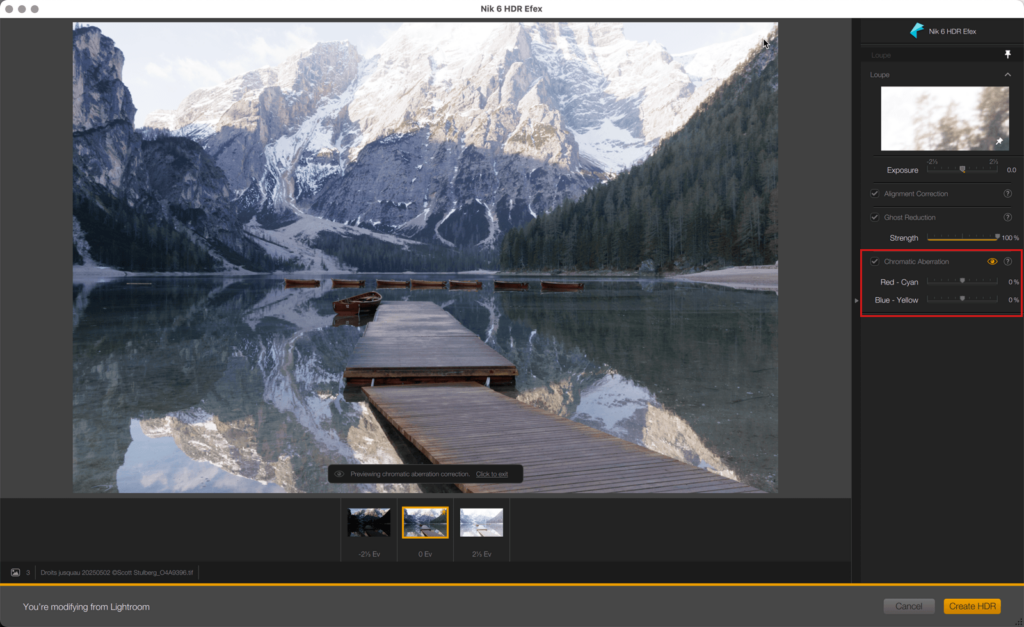
By clicking on the eye of the chromatic aberration section, in the right panel, you can check the contents of the image by moving the mouse around the preview while looking at the magnifying loupe. A marker indicates that you are in preview mode which you can exit by clicking on this marker or on the eye.
Start HDR merging
Once you have adjusted your settings, all you have to do is start merging the images:

- Click Create HDR.
- You will immediately switch to the Nik HDR Efex interface, and a progress bar will indicate that it is being processed.
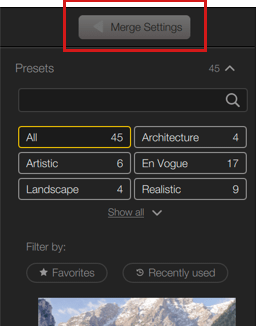
If you want to go back to the merge window, click the button in the top of the left panel.
Correction tools
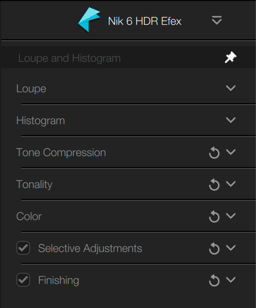
Nik HDR Efex’s correction tools let you go far beyond simply choosing a predefined HDR render. You will be able to alter the HDR method, tone compression, tonality, color, and also make localized adjustments using control points.
- Tone compression
- Tonality
- Color
- Selective Adjustments
- Finishing
The processing engine in Nik HDR Efex is 32-bit end-to-end (compared with 16-bit RAW, TIFF, and 8-bit JPEG files).
After merging, your HDR image opens and the program applies a default rendering (preset 01 – by default) and then you can:
- Apply one of the settings offered by Nik HDR Efex and then save.
- Ignore the default preset and apply your own corrections.
- Apply another preset and modify it.
For the last two situations, you can use the tools available in the right panel to alter tone compression, tonality, and color in order to assign selective corrections to control points and lines as well as apply finishing effects.
Tone compression
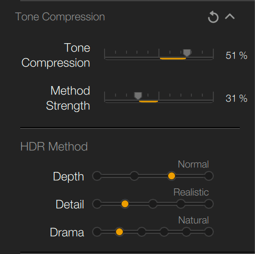
The compression of tones consists in reducing the strong differences in luminosity, restoring detail and information in the dynamic range of the image, and giving it a particular rendering, by combining the following settings:
- Tone Compression*: Adjusts the luminosity of different tones relative to each other.
- Method Strength*: Modulates the combined effect of the HDR method settings (below) and tone compression settings.
HDR method
Depending on the default setting, Nik HDR Efex will apply different levels to the following settings:
- Depth affects the overall impact of HDR rendering with the Off, Subtle, Normal, Strong settings.
- Detail reinforces the level of detail to extremes with Soft, Realistic, Accentuated, Detailed, and Grungy settings.
- Drama: enhances the contrast of details, up to extreme levels, with Flat, Natural, Deep, Dingy, Sharp, and Grainy settings.
* Tip: Select your HDR method settings first and then your tone compression settings. Finally, adjust the Method strength (i.e. adjust the above settings in a 3-1-2 order).
Tonality
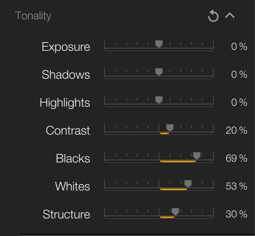
The sliders in the Tonality panel allow you to correct the overall brightness and contrast of your image, and enhance the presence of details and textures:
- Exposure: adjusts the overall luminosity of the image, darker to the left, brighter to the right, with the ability to fine-tune at the end of the spectrum using the following two sliders.
- Shadows: corrects the luminosity of the darkest tones in the image.
- Highlights: corrects the luminosity of the lightest tones in the image.
- Contrast: deals with differences in luminosity, left gives the image a flat aspect (reducing the difference in luminosity between dark and light tones), and right gives it a high-relief aspect (amplifying the differences in luminosity, with dense dark tones and paler light tones). You can fine-tune the contrast settings with the following two sub-sliders.
- Blacks: To the right, subtly lightens the dark areas and recovers more details; to the left, deepens the density of the dark areas.
- Whites: To the left, subtly darkens the details of the light areas; to the right, makes details in light areas brighter.
- Structure: To the right, reinforces small details and textures in the image; to the left, diffuses details and textures.
Color
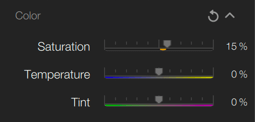
In the Color panel, you can warm up or cool down your image, and reduce or enhance the overall brightness of the colors:
- Saturation makes colors more vivid when you move the slider to the right, or gradually removes colors when you move to the left, until you get a grayscale image.
- Temperature uses the same white balance principle found in all photo software. Warm the image to the right (more yellow), and cool it to the left (more blue).
- Tint compensates for possible color drifts (green on one side, magenta on the other), after adjusting the temperature.
Selective Adjustments
In this paragraph, only tools specific to Nik HDR Efex are discussed. The basic operation of control points and control lines is discussed in the Common Interface and Tools chapter > Control Points and Control Lines.
Selective Adjustments allow you to change only certain parts of the image. Add a control point or line and, when adjusting the corresponding sliders, only affect subjects or areas covered by the control point or line.
In Nik HDR Efex, control points and lines take from the global tone and color sliders, with the added possibility of modulating the chosen HDR method.
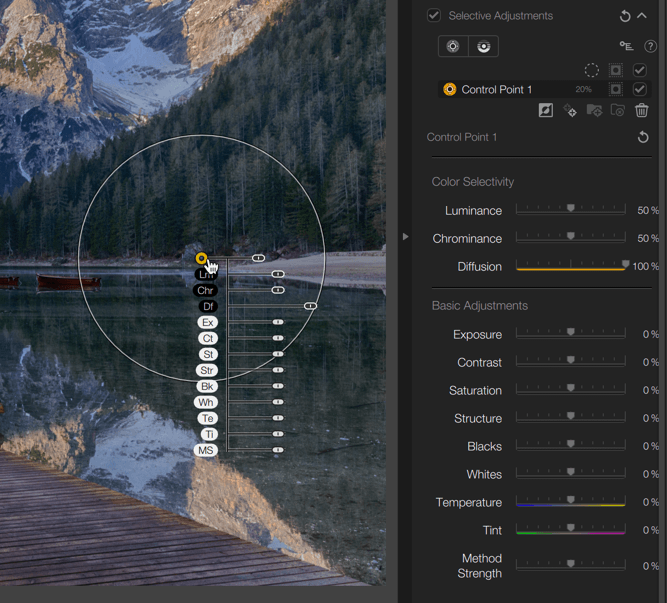
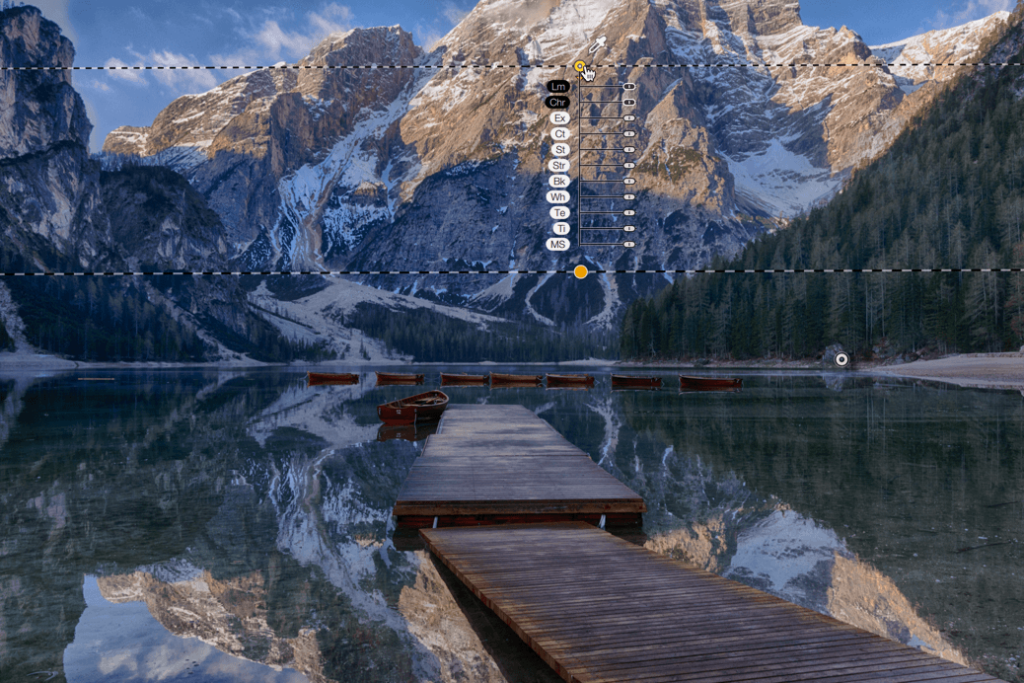
After having affixed a control point or line to the image, in addition to black-handled settings sliders for size, Lm (Luminance), Chr (Chrominance) and Df (Diffusion), white-handled sliders also become available:
- Ex (exposure): modifies the brightness of the selected area or object.
- Ct (Contrast): Changes the contrast of the selected area or object.
- St (Saturation): Adjusts the vivacity of the colors of the selected area or subject.
- Str (Structure): reinforces or reduces the structure (restitution of details and textures) of the selected area or subject.
- Bl (Blacks): Increases or reduces the density of the shadows of the subject or selected area.
- Wh (Whites): amplifies or reduces the luminosities of the highlights of the subject or selected area.
- Te (Temperature): warm up (yellow) or cool down (blue) the subject or the selected area.
- Ti (Tint): compensates for possible color fringing (green on one side, magenta on the other).
- MS (Method strength)*: lets you increase or decrease the effect of the previously chosen HDR method.
* You can adjust the HDR method and tone compression settings with this slider, but you cannot change the type of HDR method or the type of tone commpression with this slider.
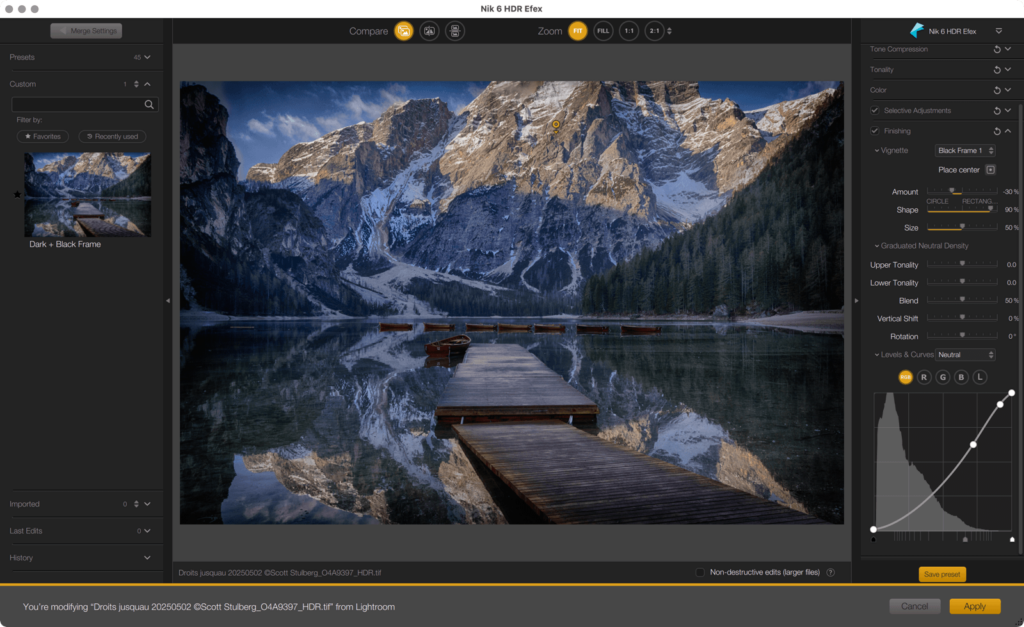
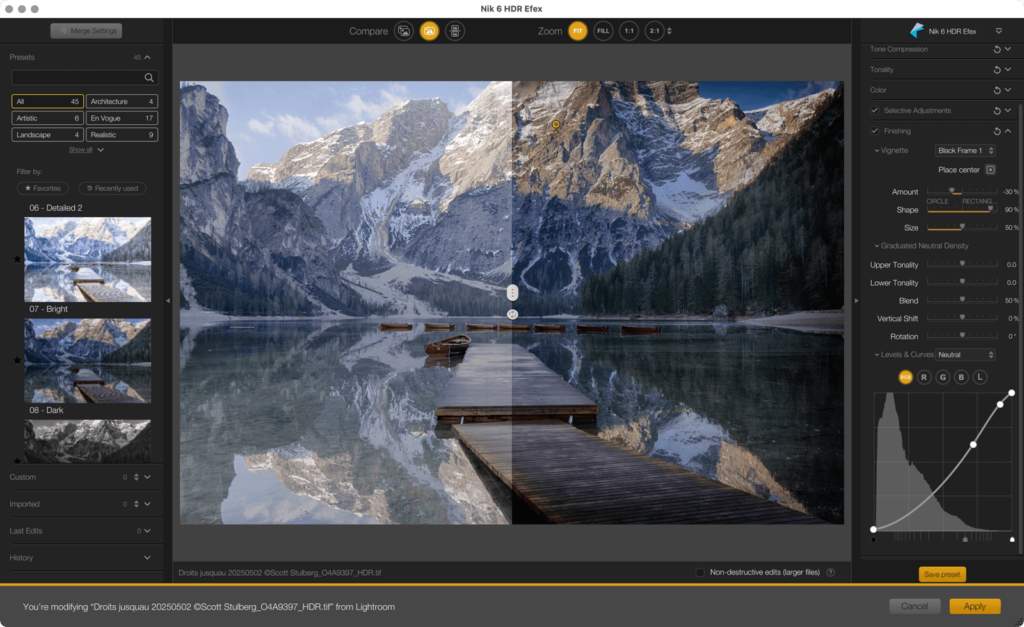
Finishing
The Finishing section is purely creative, allowing you to apply vignetting effects and neutral density, and to use the curve to take contrast further.
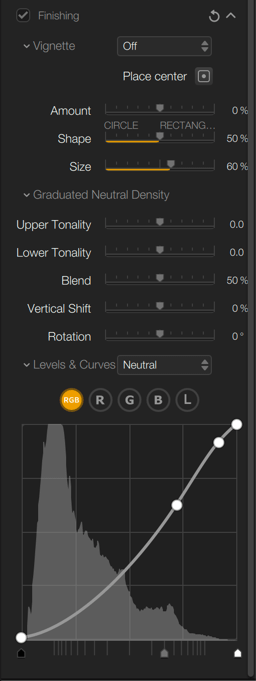
- Vignette section: these tools let you darken or lighten the edges of the image, to give it a vintage effect or to focus attention on the subject:
- Toning drop-down menu: set by default to 1 (Neutral, no tinting). Hover your mouse over the list to see the effect in real-time on your image. To select an effect and apply it, just click on it.
- Place Center: Click the button to position an off-centered vignetting effect. The mouse pointer will change to a “+” that you then click to place in the image. If you want to change the positioning, click the button again and start over.
- Amount: controls the intensity of the vignetting. Moving this slider to the left darkens the edges of the image; moving to the right lightens them.
- Shape: controls the overall shape of the vignetting, from circular to rectangular.
- Size: sets the extent of the vignetting effect in the image.
- Graduated Neutral Density applies more or less density to the upper and lower areas of the image without altering the colors:
- Upper Tonality alters the density in the upper 2/3 of the image.
- Lower Tonality: acts on the density, lighter or denser, in the lower 2/3 of the image.
- Blend: controls the transition (0% sharp, 100% diffuse) between the image and the edge of the upper or lower tones.
- Vertical Shift: allows you to extend or reduce the density effect.
- Rotation: controls the rotation angle of the effect.
- Levels and Curves section: the curve lets you fine tune or completely rework the contrast and color of your images, either by using a predefined curve, or by altering the curve and level sliders directly:
- Levels and curves menu: set to Neutral by default, this menu allows you to select contrast, silver film contrast, or color curve presets. You can configure the curve as you wish and of course you can change the settings.
- Channel button: set to RGB by default (RGB: Red, Green, Blue) lets you select the channel to correct. In addition to the RGB channels, you will also find a Luminosity channel (L). You can also adjust the brightness and contrast of your photo without changing the colors.
- Tone curve: Click on the curve to adjust it, and add anchor points, which will allow you to lock the contrast settings at specific points on the curve, and thus on the image. To remove an anchor point, double-click it.
- Levels sliders: let you adjust the extent of Shadows (left), Midtones (center), and Highlights.
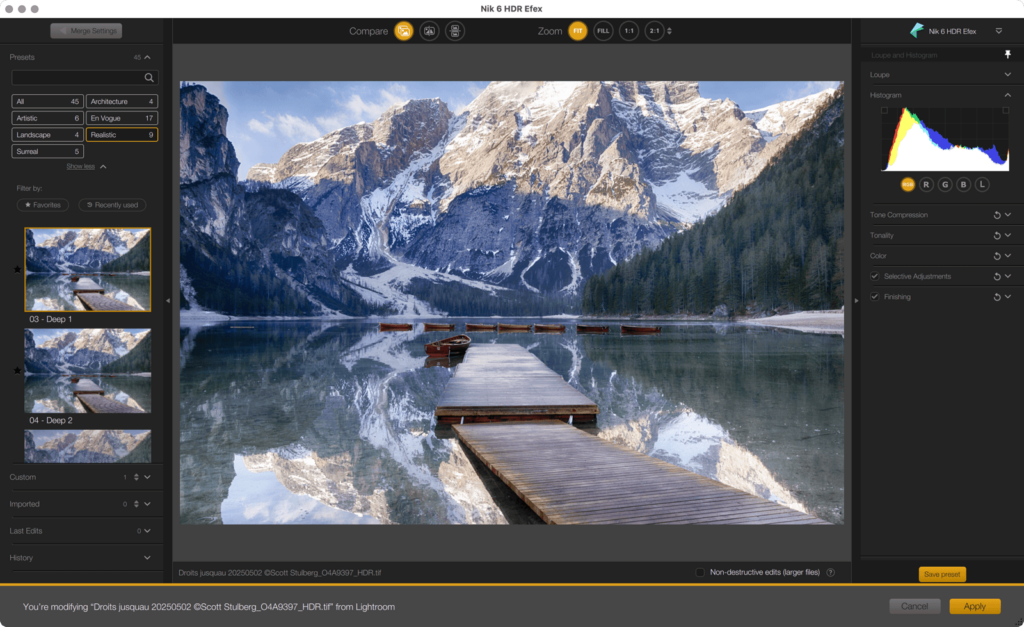
Creating a custom Nik HDR Efex preset
To learn about Nik Collection’s custom settings, see the Common Interface and Tools chapter > Custom settings.
45 presets are available in Nik HDR Efex, in 7 categories:
- All: covers all Nik HDR Efex presets.
- Artistic.
- Landscape.
- Surreal.
- Architecture.
- En Vogue.
- Realistic.
You can create your own Presets:
- By modifying the settings of an existing Filter.
- By combining multiple Filters and changing their settings.
- By combining Filters and Presets, where again you can modify the settings.
To create a preset in Nik HDR Efex:
- In the Presets section of the left panel, click the presets you want to add to the right panel. You can also use an existing setting in one of the Custom, Import or Last edits sections.
- Proceed to the desired settings in the palettes in the right panel.
- Click Save Preset then name it and click save in the dialog box that appears (you can also save your control points and/or control lines using the checkbox in the dialog).
- Your custom settings are available in the Custom section.