

DxO PureRAW 3 does not contain any image correction or editing tools. Its role is to deal with image noise, correct for lens flaws, and output either a linear DNG or TIFF file for retouching, or a JPEG for immediate use and distribution. All these files can be opened in the program of your choice, outside DxO PureRAW 3.
DxO PureRAW 3 features a workflow that is fully integrated with Adobe Lightroom Classic.
Export to application is automatic if you have activated the option in the processing options dialog (see photo processing chapter).

To export optimized images, do the following:
- In the Lightbox, select the processed images (you can use the filter function to just display Processed images).
- Right-click the image selection and, in the context menu, choose Export to application…
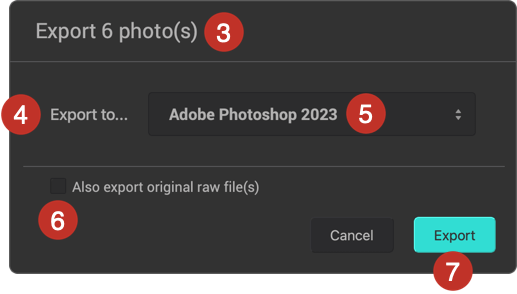
- The floating window shows the number of images to be exported.
- By default, the Export to… section features a list of Adobe programs. You can also choose another application. In which case, click Select software. Then, in the Applications folder (Mac) or the Programs folder (PC), select the desired application, and click Open.
- The name of the chosen application will appear in the window.
- By clicking on the checkbox, you can merge the original RAW files with files that have been optimized by DxO PureRAW 3.
- Click on Export.
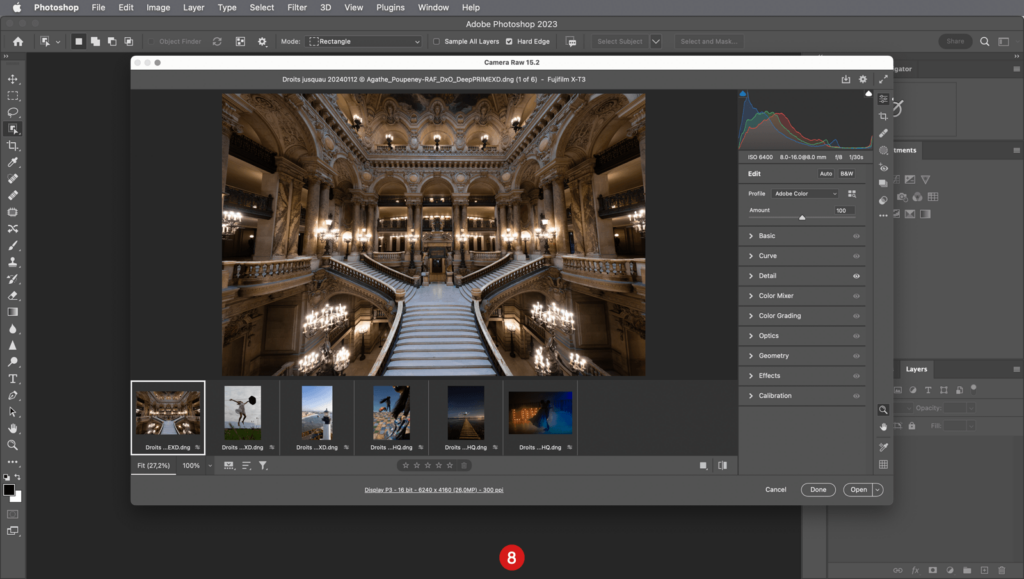
- The chosen application opens and displays the exported images.
Note that the Export window remembers the chosen application.
Exporting does not move the processed files; they remain in the same destination folder set during the processing stage.
Workflow integrated with Adobe Lightroom Classic
Thanks to the Lightroom Classic plug-in, you can process your images directly from the Adobe program, in one of two ways:
- Using Plugin – Extras (File menu).
- Using the Export option from the right-click context menu.
Image Processing with Plugin – Extras
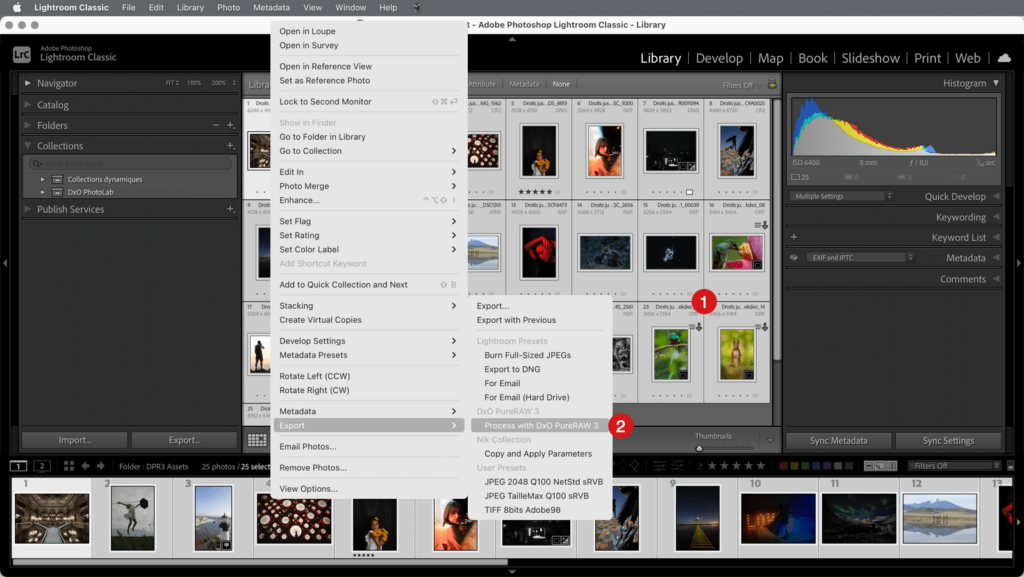
- In Lightroom Classic, select the image or images you would like to process.
- Right-click on the image selection and then, in the drop-down menu, select Export > DxO PureRAW 3 > Process with the DxO PureRAW 3 plugin.
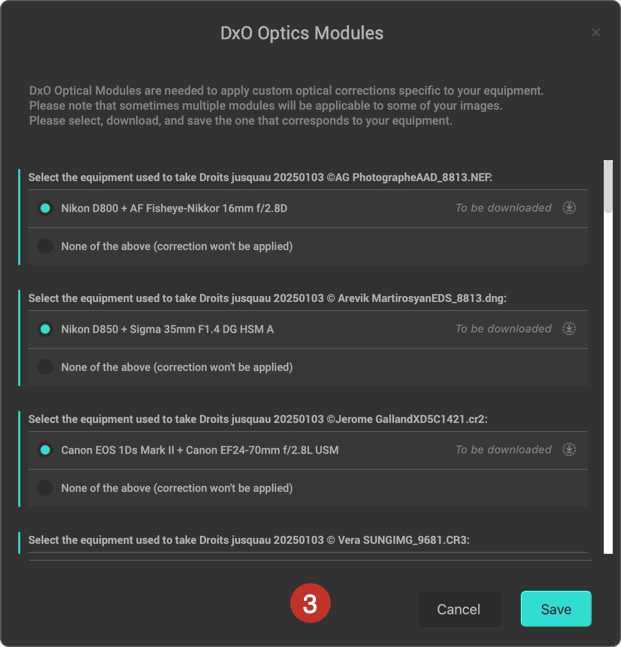
- The first time you use the module, or if you are using a new camera and/or a new lens, a dialog box will ask you to download and install the relevant DxO Optics Module. If a dialog box does not open, skip to Step 4. Click on Download the selection. After installation, click Save. (You will not need to restart your computer*).
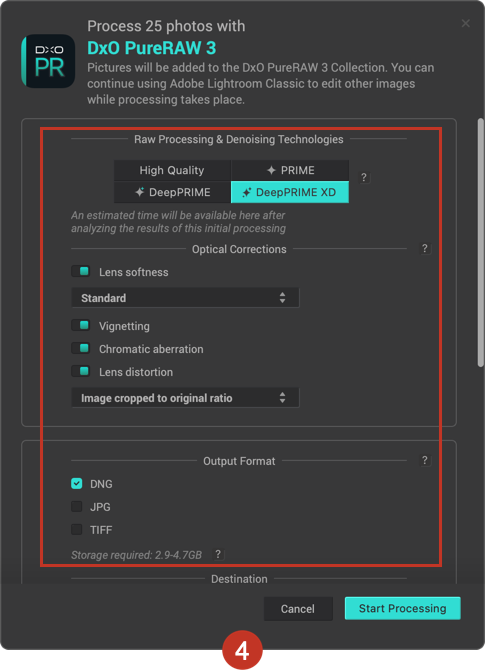
- In the options window, select the processing method, Optical corrections, output format, and file naming options*.
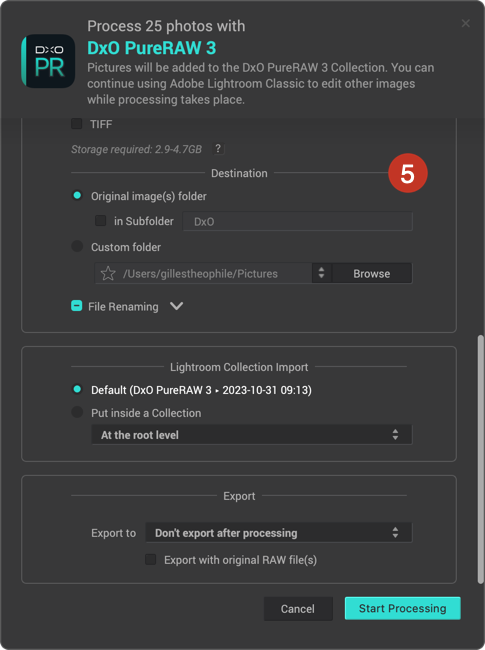
- DxO PureRAW lets you choose a destination folder:
- Create a DxO subfolder in the original folder.
- Select an existing or create a custom folder.
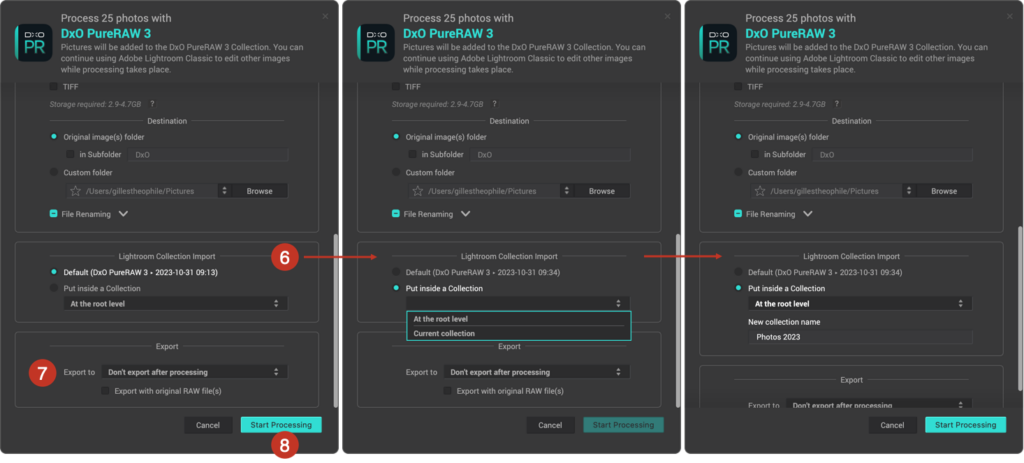
- For a better integration with Lightroom Classic’s workflow, you can also select the default Collection, select an existing Collection or create a Collection:
- Default: this is the default behavior (before PureRAW 3.7) where a DxO PureRAW Collection set is automatically created, and collections automatically add up after each processing. In that case, the collection name is YYYY-MM-DD HH:MN.
- Put inside a Collection: (this behavior is available from PureRAW 3.7 onwards) the menu lets you select an existing collection, the current collection (the one already selected), at the root level or within a Collection set. If you type in a Collection name, a Collection with that name will be automatically created in Lightroom Classic, right after the processing.
- You can also select a program you would like to open the images in, in addition to Lightroom Classic*, if required.
- Click Start Processing.
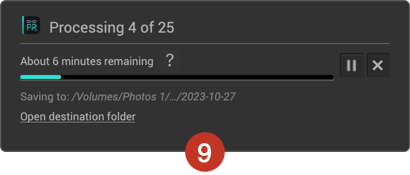
- A dialog box will show a progress bar and the estimated time remaining. You can cancel by clicking the “X” at the end of the progress bar.
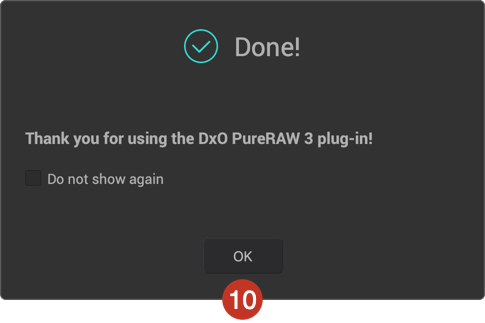
- A new dialog box will confirm that the photos have been processed. Click OK. (You can deactivate this window by clicking Don’t show again.)
- Once processing is complete, Lightroom Classic automatically shows the files in a new Collection. This Collection, identified by the date and time the photos were processed, is filed under a Collection Set named DxO PureRAW 3.
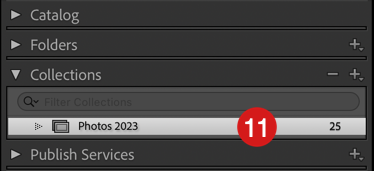
DxO PureRAW 3 automatically creates a Collection Set the first time it is used, and new Collections are added as photos are processed.
If you process images a second time, the suffix “-2” is simply added to the name of the processed images. Further edits are tagged with “-3,” “-4,” etc.
*The installation of DxO’s Optics Module, editing method, file format, and destination folder are the same when using DxO PureRAW 3’s standalone mode. See Processing Photos (standalone mode) for details of the available options.
Please note:
- All metadata from the original images are transferred to the processed images, including the star rating, keywords, IPTC fields, EXIF data, etc.
- If you process images that have already been edited in Lightroom Classic, any changes made to the originals will be applied automatically to the processed images. This applies to all tools in the Develop module, including masks (local adjustments), crop, and black-and-white conversion tools as well as the application of input profiles and pre-defined development settings.
- To avoid applying the same correction twice, only the corrections from the Detail panel (Sharpness and Noise Reduction) and the Lens Correction panel are not transferred. The sliders in the Detail panel are set to 0, and no chromatic aberration profiles are activated in the Lens Correction panel.
- Of course, after processing, you can use all of the tools in Lightroom Classic’s Develop module with the same range of editing options and possibilities as with the original RAW files. Corrections made after processing can be reversed, edited, and removed as many times as you like.
Processing images using the context menu > Export option
You can also choose an indirect method, via the Export menu:
- In Lightroom Classic, select the image or images you would like to process.
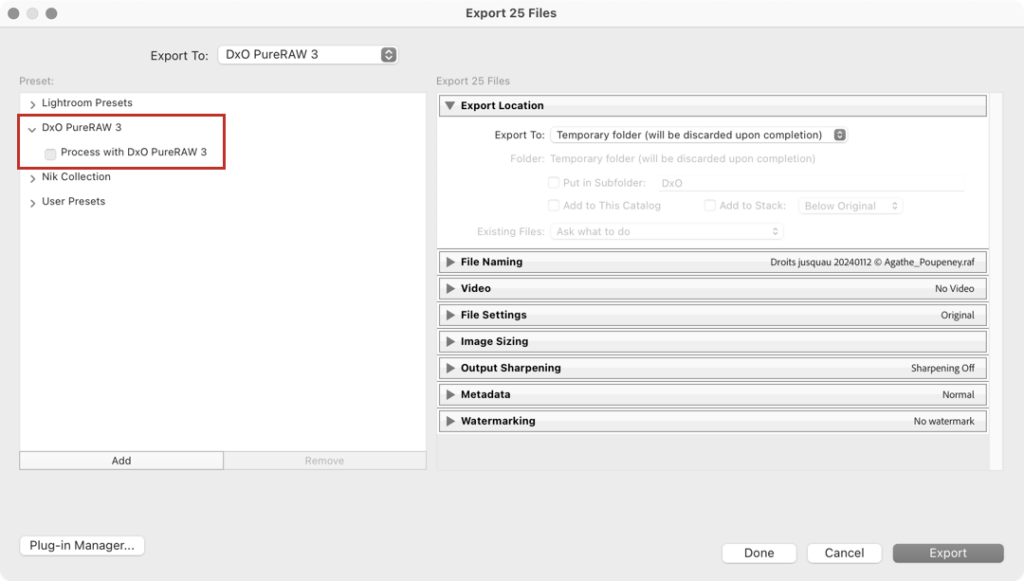
- Right-click on your selection of images and then, in the drop-down context menu, choose Export > DxO PureRAW 3 > Process with DxO PureRAW 3.
- The DxO PureRAW 3 processing options dialog is displayed.
- Follow steps 4 to 11 of the workflow for Plugin – Extras.
Possible corrections with Lightroom Classic
While the JPEG files produced by DxO PureRAW 3 should be thought of as finished files ready to be shared or printed, Linear DNGs are more like RAW files that you can edit without any limitations in Lightroom Classic:
- White Balance
- Tone, Automatic or Manual (Exposure, Highlights, etc.), Tone Curve.
- Presence (Clarity, Texture, Dehaze, Saturation, Vibrance).
- Color (HSL, Color Grading, black & white conversion, etc.).
- Masks (local adjustments).
- Export to external editors (Photoshop, Nik Collection by DxO, DxO ViewPoint, DxO FilmPack, etc.)
- Creative tools
- Photo Merge (HDR, Panorama, Panorama HDR).
- Enhance (Super Resolution).
Corrections to avoid
On the other hand, because the following corrections have already been applied by DxO PureRAW 3, you should not use the following tools:
- Lens corrections: Do not combine DxO and Adobe optical corrections.
- Noise Reduction and AI Noise Reduction: This may smooth out details and thus counteract the action of DxO denoising tools, especially DeepPRIME and DeepPRIME XD.
- Sharpness (in the Develop module and Output Sharpening when exporting): Use sparingly as DxO PureRAW 3 has already optimized sharpness.
Workflow integrated with File Explorer (PC) and Finder (Mac)
DxO PureRAW 3 lets you optimize your images directly from your File Explorer (PC) or Finder (Mac) window:
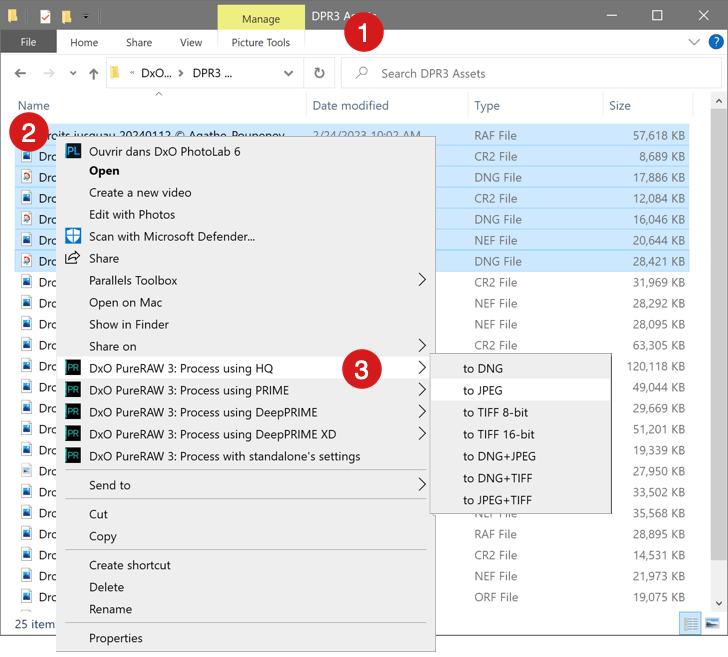
- In File Explorer or the Finder window on your Mac, open the folder that contains your images.
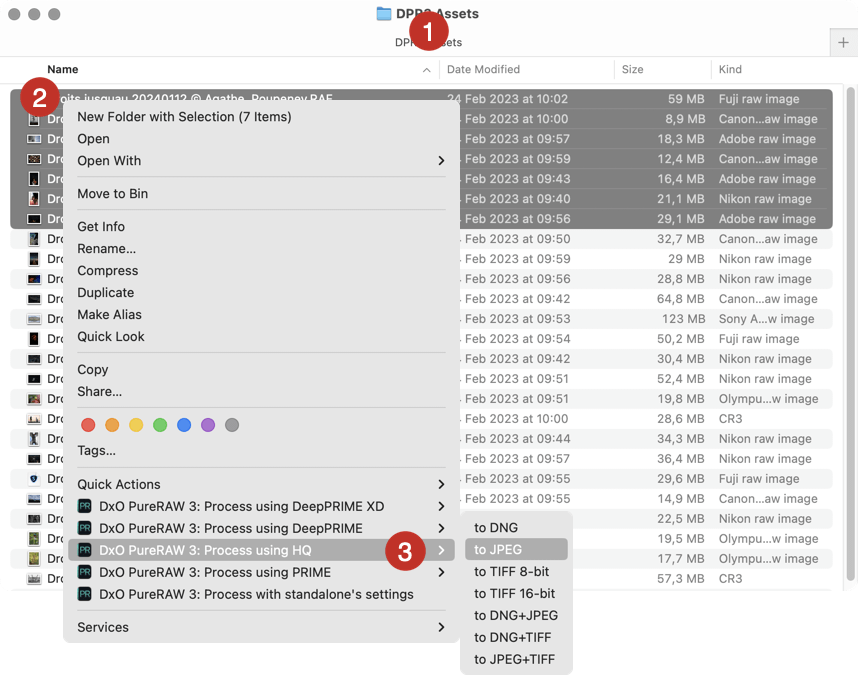
- Right-click on an image or selection of images.
- From the context menu, select one of the DxO PureRAW 3 processing options: Process in JPEG/DNG+JPEG/DNG/TIFF and then, in the submenu, select the processing technology (HQ, PRIME, DeepPRIME or DeepPRIME XD).
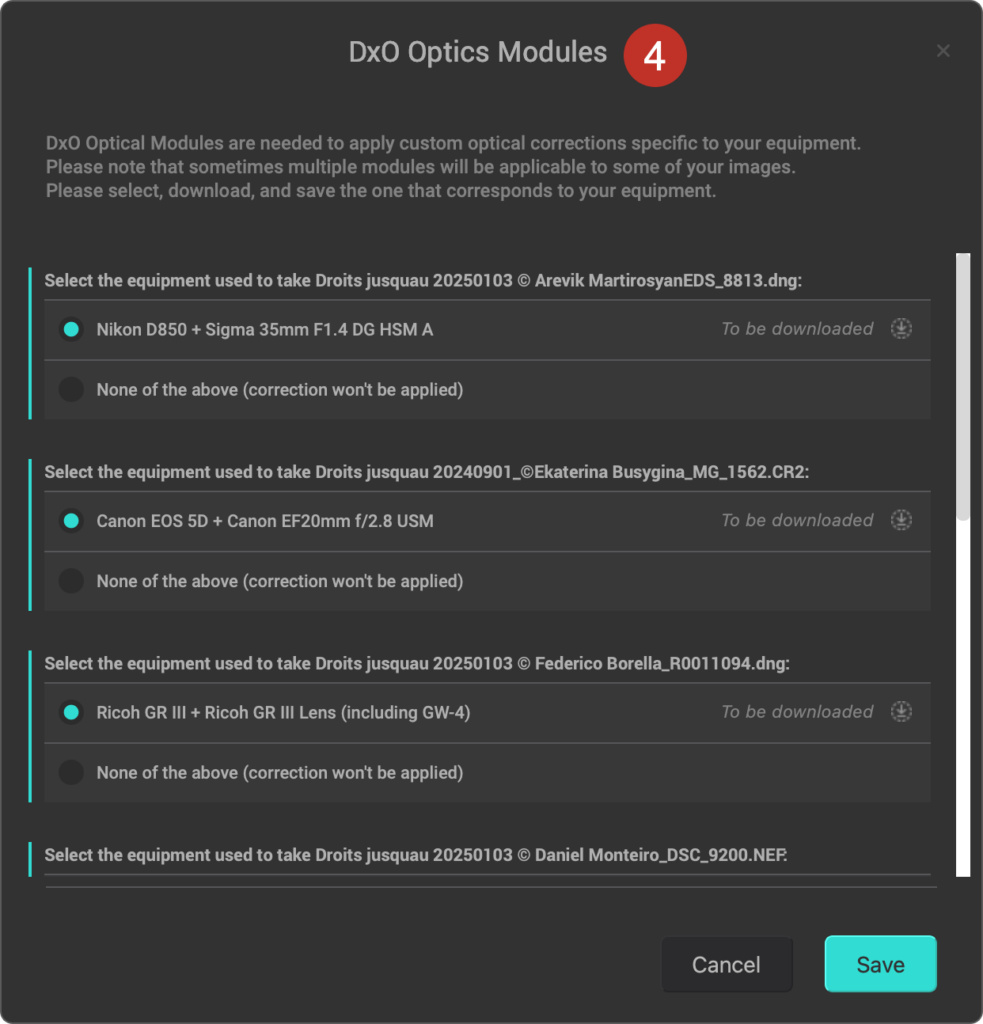
- If the DxO Optics Module has not yet been installed, a window will open prompting you to download and install it. The module will activate immediately and you will not need to restart your machine. If the DxO Optics Module is already installed, skip to Step 5.
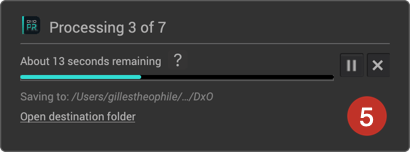
- A dialog box will appear showing the progress bar and the estimated time remaining. You can hit the pause button at any time or cancel by clicking on the X.
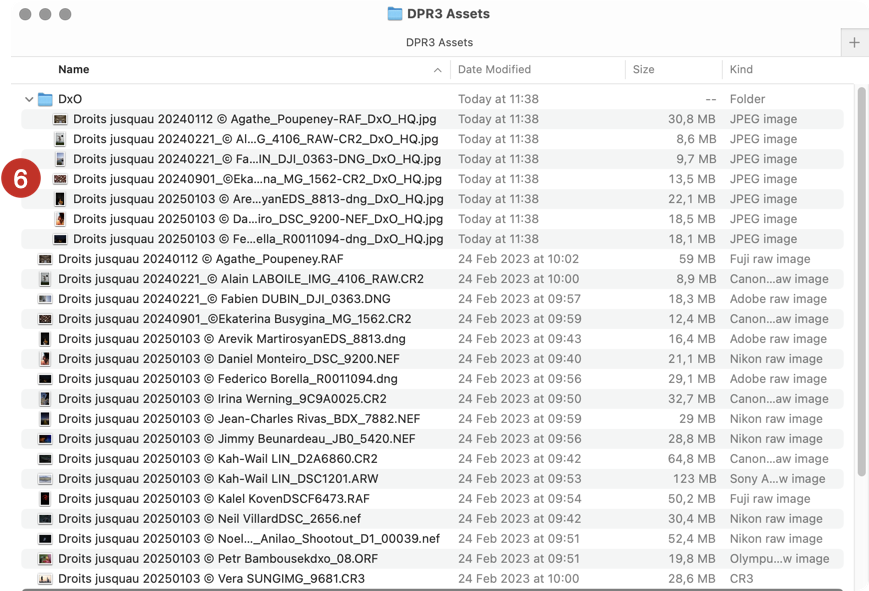
- Your images are available in the DxO sub-folder under your list of files in File Explorer or the Finder window on your Mac.
Please note:
- When using a system explorer to guide your workflow, the options regarding optical corrections (disactivating sharpness and distortion) and destination folder selection are not available.
- The DxO PureRAW 3 option: Editing your photos with the last settings used allows you to start processing with the same editing method and output format used previously.
- On Mac, to make DxO PureRAW 3 options visible in the Finder’s right-click menu, you will need to allow extensions by going to the Apple menu > System Settings > Confidentiality and Security > Extensions > Added Extensions. Then, in the window that appears, scroll down to DxO PureRAW 3 and check Finder Extensions (no restart required).