

DxO PureRAW can be used as a standalone program to process your RAW files. At the end of the process, you will have the choice to send the processed files to another editing program. You can also do batch processing by sending the files to a queue. Export to another program and queuing are described in the relevant pages of this user guide.
The first steps in the workflow when using DxO PureRAW in standalone mode is to do the following:
- Adding photos.
- Installing and managing DxO Optics Modules.
- Selecting the photos.
- Starting photos processing.
- Verifying and comparing photos.
- Renaming the original files.
Adding photos
DxO PureRAW does not allow you to import images directly from a camera or memory card. To do so, you’ll need to transfer the images to your hard drive using your choice of software or device. Once they’ve been added to your hard drive, DxO PureRAW allows you to add photos either by navigating to the folder where they’re saved, or by dragging and dropping them onto the program’s screen from a Finder (Mac) or File Explorer (PC) window.
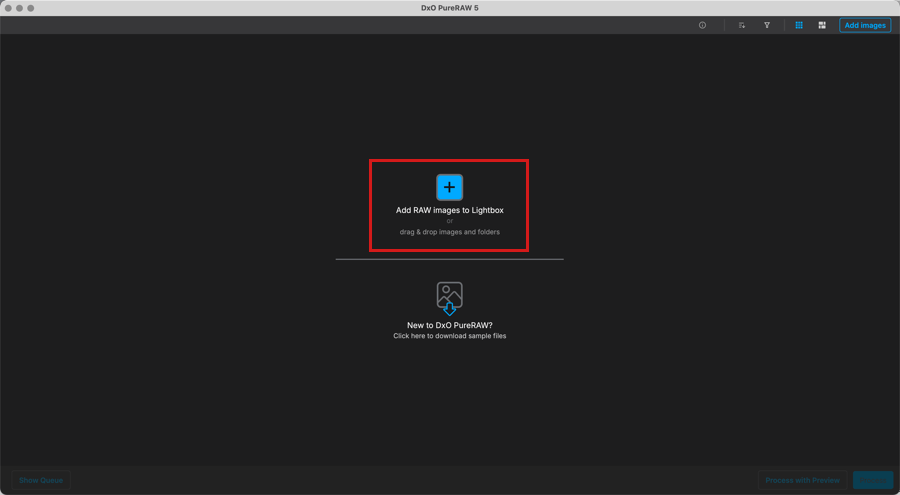
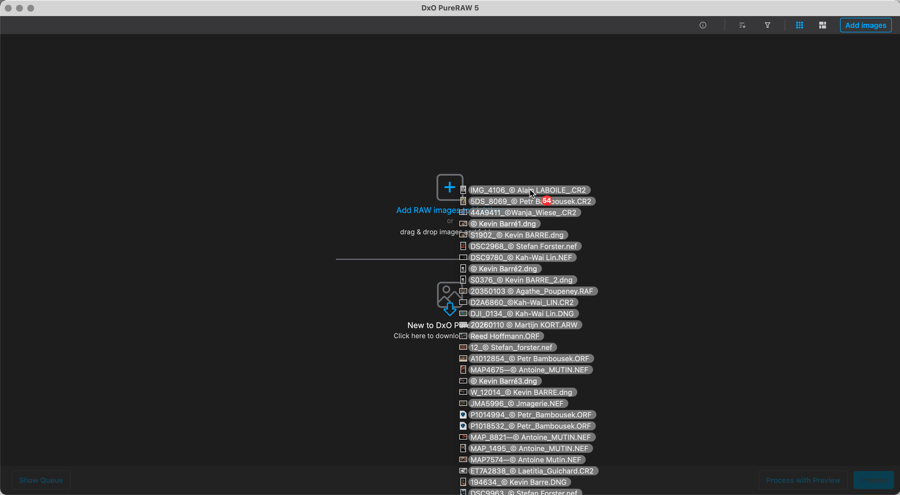
The first time you use DxO PureRAW, the view that allows you to add photos is empty and instead suggests the following buttons and explanations:
- Add RAW files with the Widget.
- Add RAW files to the Lightbox.
- Drag and drop RAW files.
- Download sample RAW images (provided by DxO to try out the software).
Add RAW files with the Widget
You can ask DxO PureRAW to launch automatically when you insert a memory card or connect an external drive to your computer. To do this, you must activate this option in the Preferences:
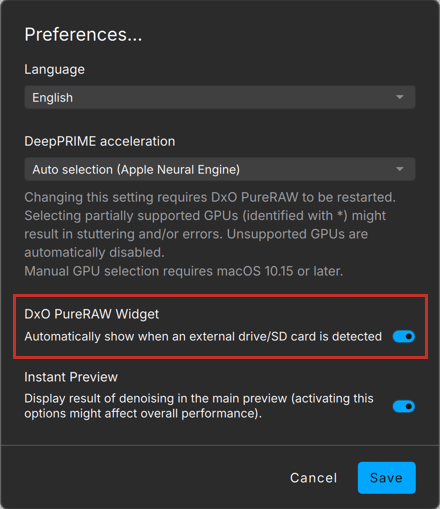
- Mac : DxO PureRAW menu > Preferences > check DxO PureRAW Widget > Automatically show when an external drive/SD card is detected.
- PC : File menu > Preferences > check DxO PureRAW Widget > Automatically show when an external drive/SSD card is detected.
Note that if the option in the preferences mentions SD memory cards, it naturally applies to any type of memory card.
To add RAW files with the Widget:
- Insert a memory card or connect any external drive.
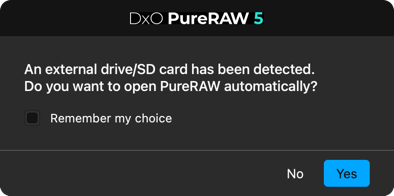
- A dialog box will pop up and ask you if you want to open DxO PureRAW automatically. Click on Yes (you can also check Remember my choice to bypass this step in the next sessions).
- A system dialog box will open and let you choose the source volume and folder.
- In the case of a memory card, open the DCIM folder to access the pictures. In the case of an external drive, open the folder containing the images you want to add to DxO PureRAW.
- Select the images and click on Open.
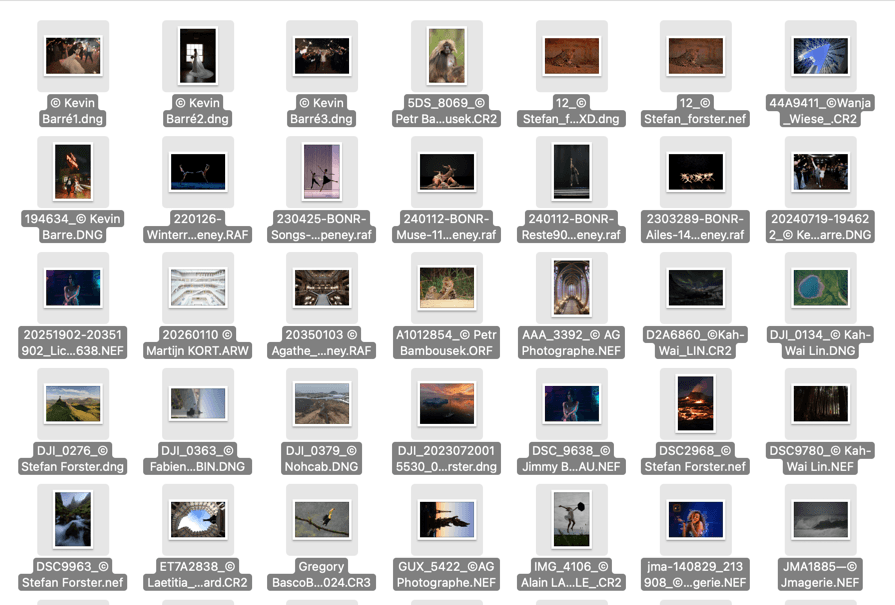
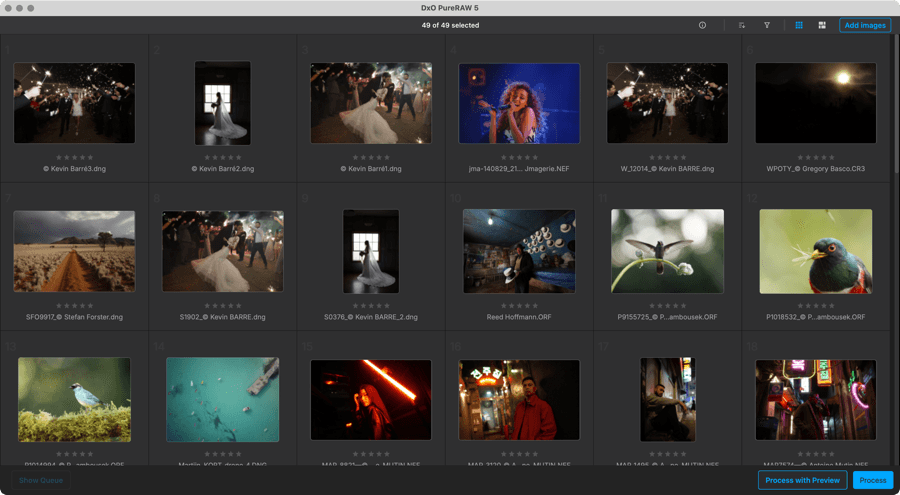
- The images are added in DxO PureRAW and displayed as thumbnails in the Lightbox. Default order is by date.
Add RAW files to the Lightbox
- You have different ways to add photos to the Lightbox:
- Click on Add RAW files to process in the center.
- Or click Add images in the upper toolbar.
- Or go to the File menu and select:
- Add photos to Lightbox: In the dialog box which opens, you will have to select the files one by one or by series.
- Add all photos from folder: In the dialog box wich opens, select a folder. When clicking on Open, all the photos in the folder will be added in one go to the Lightbox.
- If you do not have RAW files, or if you would like to run tests on images other than your own, you can use the samples by clicking Download the sample RAW files.
- A system window will open: Locate the folder of photos you would like to add.
- Select the images from the folder.
- Click on the Open button.
- The selected images are displayed as thumbnails. Default order is by date.
- The upper toolbar shows the number of images displayed.
Drag and drop RAW files
- Open an image folder in an operating system window (Finder on Mac, File Explorer on PC).
- Select a folder or a selection of images, then drag and drop the item to the DxO PureRAW window. You can use this method even if there are already thumbnails present in the DxO PureRAW window.
- You can also drag and drop images from the Finder or the Windows Explorer onto the DxO PureRAW icon in the Dock (Mac) or on the desktop (PC). This action will open the program and display the images.
Download sample RAW images
If you are using DxO PureRAW for the first time and/or have no images:
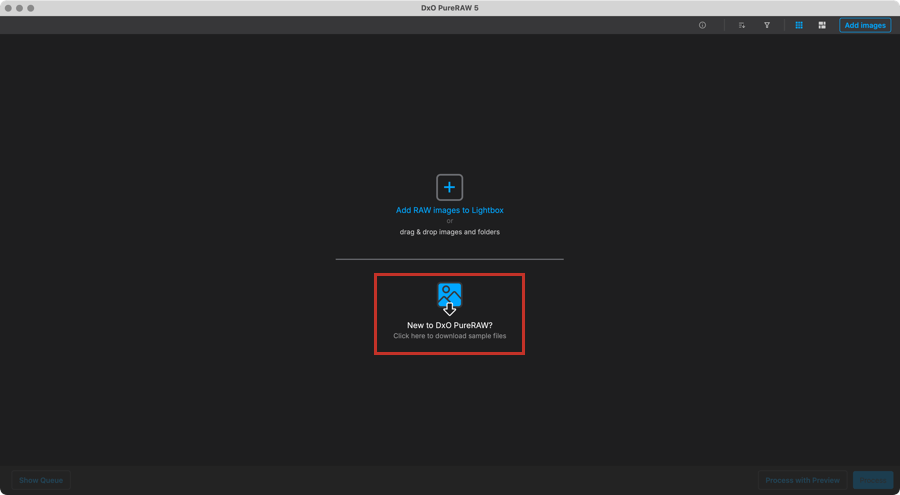
- Open DxO PureRAW in standalone mode.
- In the bottom half of the Lightbox, click to download sample images from DxO’s website (Internet connection required).
Installing and managing DxO Modules
DxO Modules
When you add images to DxO PureRAW for the first time, or new images taken with a new camera, the program will automatically ask you to download and install the DxO Modules that match the equipment used to take the images. This information is included in the EXIF metadata of the images.
DxO Modules improve lens performance and correct the following lens flaws:
- Vignetting: corrects darkening around the edges of the image, generally due to a large aperture or related to flaws in the design and quality of the lens.
- Distortion: deformation of straight lines, particularly with shorter focal lengths. Two types of distortion are identified: barrel (lines are curved towards the outside of the image) and pincushion (lines are curved towards the center of the image).
- Chromatic aberration: colored fringing shows along high contrast outlines, for example on tree branches against a bright sky. Colored fringing is generally most visible at the edges of an image, but it can also appear throughout the image.
- Lens sharpness optimization: Homogenization and optimization of the image sharpness.
Downloading and installing DxO Modules
Once images have been added, if no DxO Module has been installed or if the modules are missing, a window will automatically open and offer to download and install the DxO Module(s) that correspond to your equipment, the camera body and lens.
To do so, you will need to be connected to the Internet. This screen is made up of the following sections:
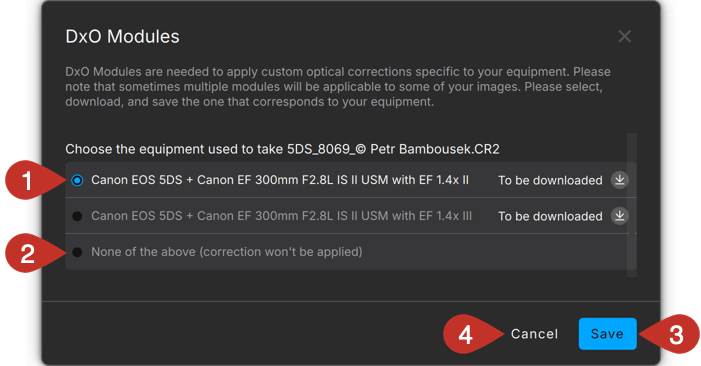
- DxO Module detected and ready to download.*
- None of the above (correction will not be applied): if the DxO Module offered does not match the equipment, you can check this option to prevent any optical corrections being made.
- Save: Start downloading the DxO Module(s). If you do not use them immediately, they will be suggested again the next time you add photos taken with the same camera-lens combination. The DxO Modules are installed immediately so you do not need to restart the program.
- Cancel: Closes the window without downloading or installing any modules.
*In the event of any ambiguity, for example if the EXIF metadata do not allow the program to determine which lens was used because there are multiple versions or generations available, the window will suggest several possible choices so you can select the correct DxO Module manually.
You can use the DxO Modules in one of three ways:
- To download and apply the DxO Module, click Save.
- To download but not to apply a DxO Module: select none of the above (correction will not be applied) for each module concerned and then click Save.
- To not download any DxO Module click on Cancel.
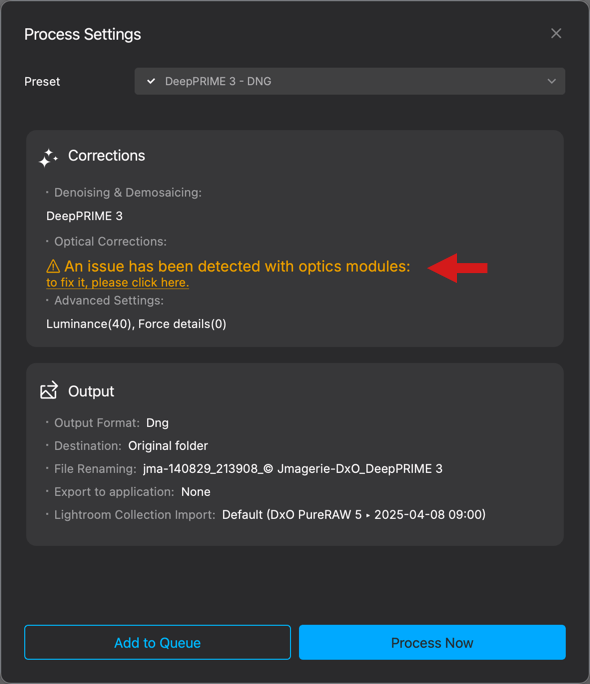
If you try to process an image without downloading or installing a DxO Module for the equipment used, the processing options window will show an alert. When you click on the yellow alert the dialog box for downloading optics modules will appear to enable you to install the missing module(s).
If you want to display the list of installed optics modules and those awaiting download, go to the DxO Modules menu and select the DxO Modules command.
The same window that appears during the downloading stage will open showing the status of the DxO Modules:
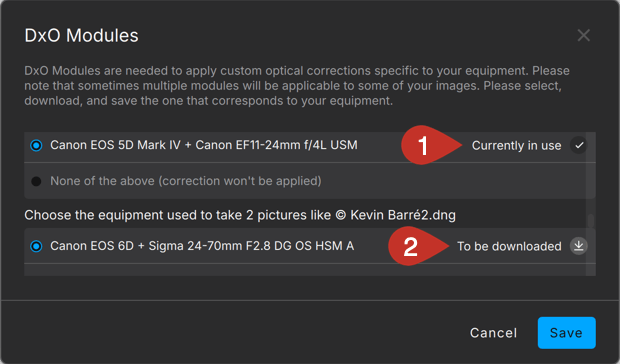
- Currently in use: Indicates the DxO Module is downaloaded and currently in use.
- To be downloaded: The DxO Module(s) can now be downloaded.
Selecting the photos
Select the photos in the Lightbox
Selecting your images means picking the photos you want to process. You can select a single photo, multiple photos, or all photos in a folder.
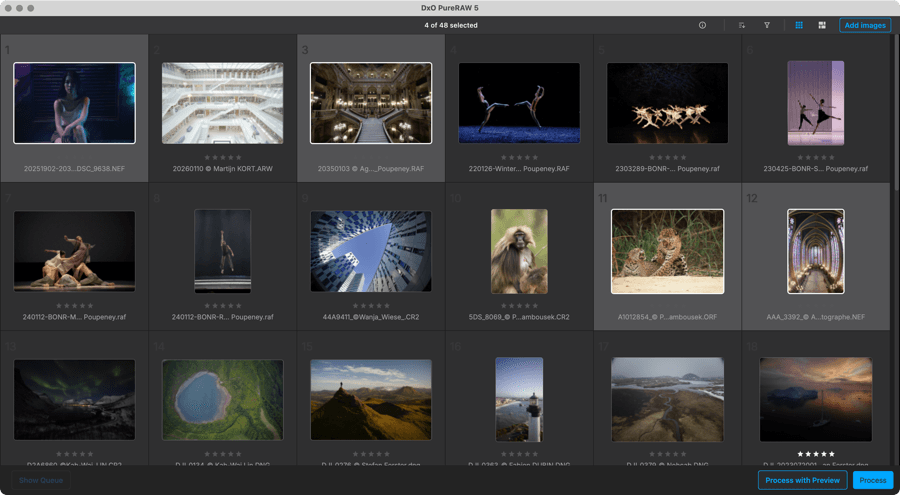
Selected images have lighter grey frame and a white border around the thumbnail. To select photos:
- One image: Click on the image.
- Multiple non-consecutive images: Click on each image you want to select while holding down the Cmd (Mac) or Ctrl (PC) key.
- Multiple consecutive images: Click on the first image in the series, then click on the last in the series while holding down the Shift key.
- All images: keyboard shortcut Ctrl+A (PC) or Cmd+A (Mac).
If you want to deselect specific images, click on the thumbnails with the lighter grey frame and the white border. To deselect all images, click anywhere in the empty areas of the Lightbox.
Starting photos processing.
After having chosen and selected the photos, you are ready to process them. This involves applying optical corrections, using the DxO Modules, and then denoising and demosaicing to generate either:
- A linear DNG file (which retains RAW file latitude) to finish processing in your preferred program.
- And/or a TIFF file (which you can also correct and retouch with your usual photo software).
- And/or or a JPEG file for immediate use to send or share.
To find a description of all processing options and settings, please check the Processing tools and setting page.
Start processing
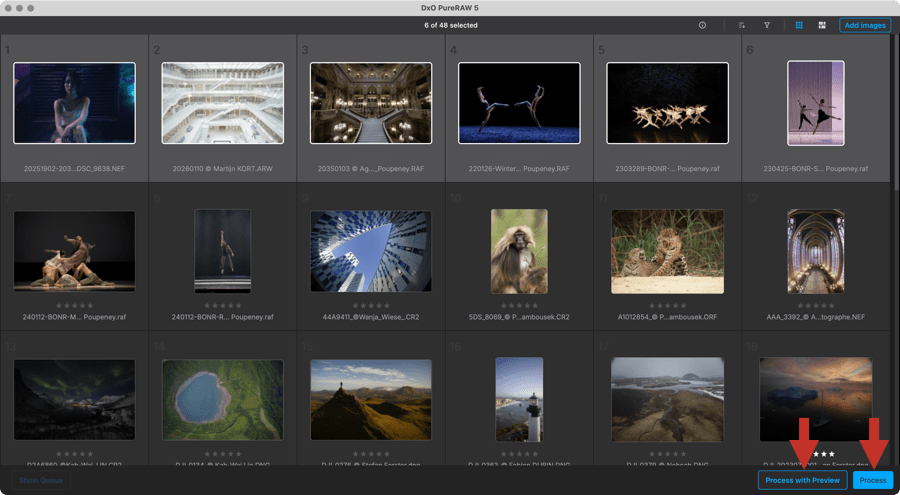

To start processing, you can click either on:
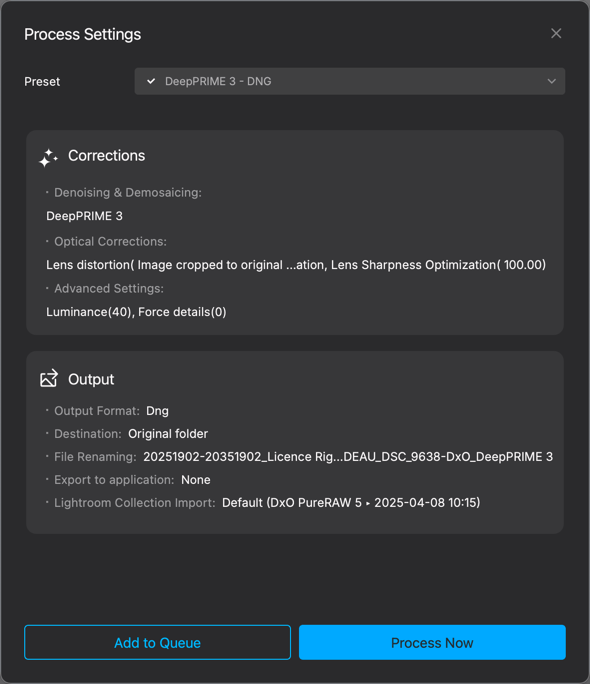
- Process: This will start processing without a preview (you can also right-click on your selection of images and choose, in the floating menu, Process files). A floating window will show you a recap all the processing options and settings, including renaming, destination folder and destination application. You will be able to edit your settings on the fly by clicking on the Edit buttons, which show when you hover the Corrections and Output fields with the mouse.
- Process with Preview: This will open the Process with Preview window, where you can choose and apply all the corrections, and compare, in real time, the result with the original RAW file.
Once you have chosen your options, you can start processing the selected photos:
- Click on:
- Process to start the processing immediately.
- Add to queue if you have to do batch processing and you expect to add more photos.
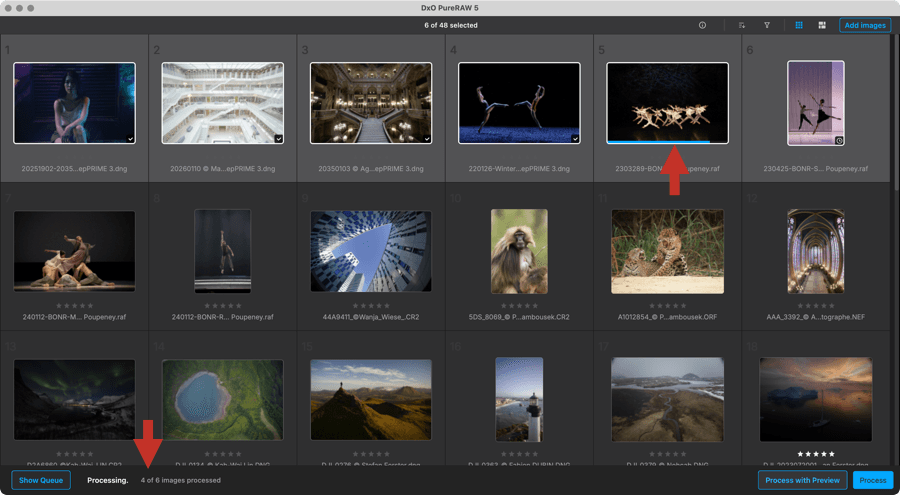
- The ongoing processing is indicated by:
- In the lower bar, the word Processing with animated dots.
- The number of images already processed against the total of selected images.
- A progress bar in the image thumbnails.
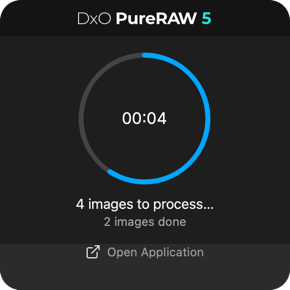
- If you collapse the main Window, you can check the progress in the Widget:
- Mac: the Widget is located in the upper macOS menu bar.
- PC: the widget is located in the lower Windows task bar, you need to click on the chevron located around the right side to access it.
- When the processing is done:
- Processed images are marked with a white checkmark, bottom right of each thumbnail.
- The image displayed in the Lightbox is now the optimized image, instead of the original.
- The name of the original is replaced by the name of the processed photo.
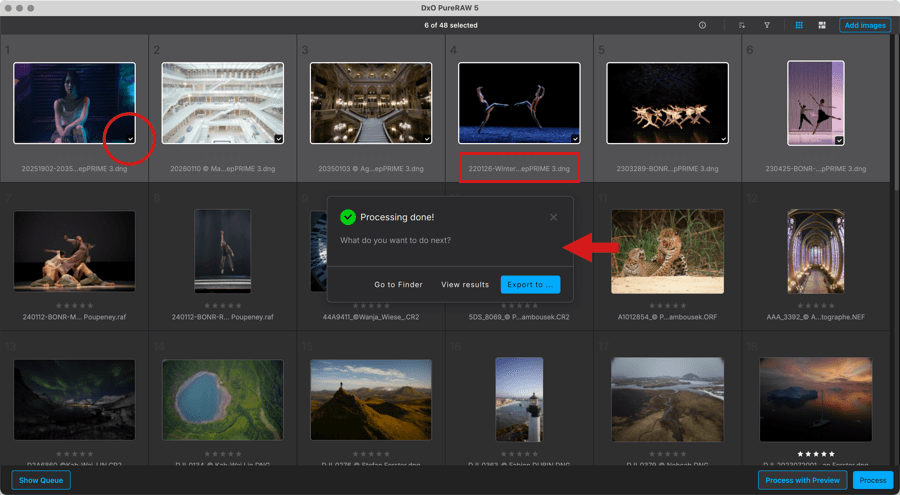
- A floating window tells you that processing is done and asks if you would like to:
- Export your processed photos to an external program.
- View the results in DxO PureRAW.
- Or open the Images folder in a system window (Finder on Mac or File Explorer on PC).
- if you don’t want to see the images immediately, click on X in the upper-right corner of the window.
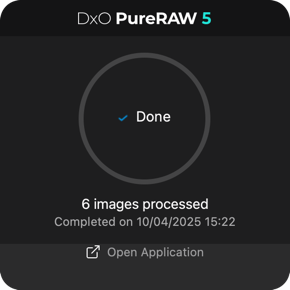
- If used, the Widget tells you too that processing is complete. If you want to display the DxO PureRAW main window, click on Full view.
Please note:
- During processing, the metadata from the original photos are kept with the processed images as well as the camera’s EXIF data (shooting parameters, GPS coordinates, etc.), creator and copyright information, star rating, keywords, and any information added to the IPTC fields (title, location, etc.) in your photo management software.
- If you opted for Linear DNG format, the size of generated files may increase by a factor of 2 or even 3 compared to the original RAW file.
- In the processing options window, click on the “?” to learn more about the RAW processing methods and formats.
Verifying and comparing photos
After processing your photos, and before proceeding with further corrections with your preferred editing software, DxO PureRAW lets you quickly check the results and compare them with the original files.
- Filtering photos
- Display, check, and compare photos
Filtering photos
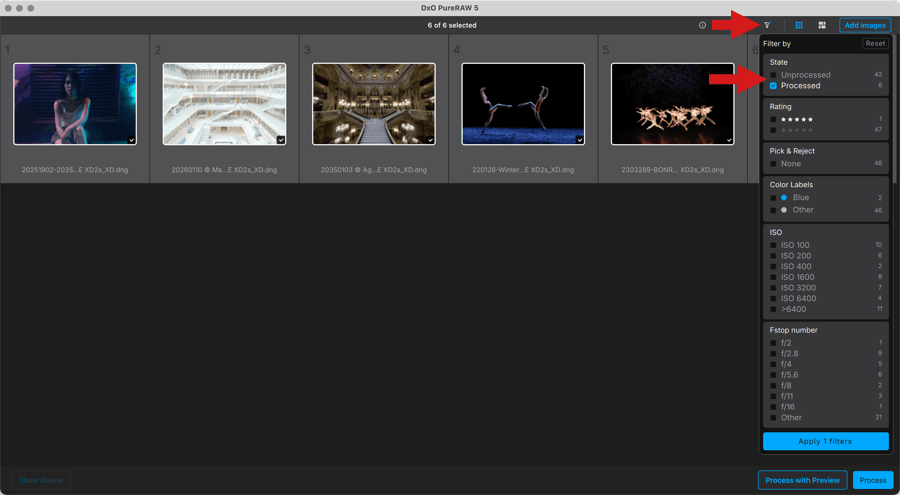
The Lightbox displays all of the images, whether processed or not. You can filter them using the sort and filter buttons in the top tool bar:
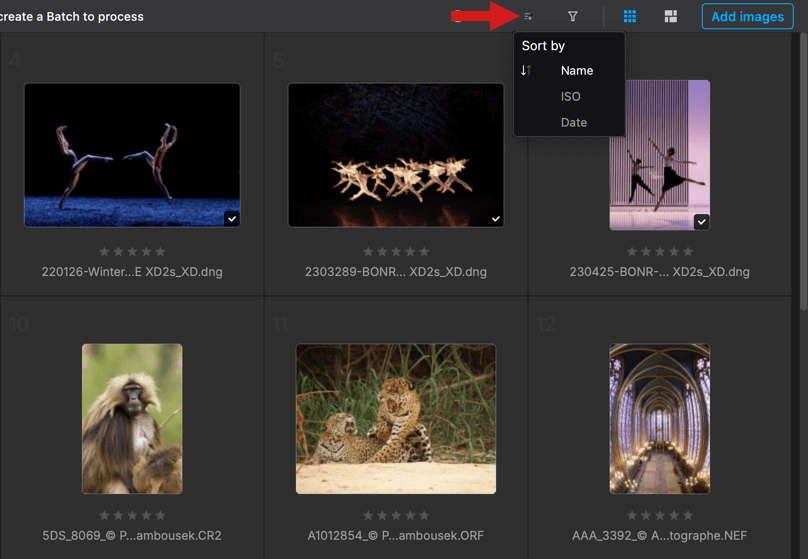
- Image sorting (left button): You can sort images by file name, date or ISO).
- Image Filtering (right button): You can filter images using any of the following states, and combine them by checking them in the list:
- Unprocessed: displays only unprocessed images.
- Awaiting processing: displays only queued images that have not yet been processed.
- Processed: displays only processed images.
Note that you can combine image sorting and filtering.
For more details about the sort and filtering options, please check the Interface chapter.
Display, check, and compare photos
Once the photos are processed, you can check them in the Viewer in two ways:
- Double-click on a thumbnail.
- Right-click on a thumbnail and select Compare processing results in the context menu.

Thanks to the split screen Viewer, you can easily compare the processed image with its original. If you have selected different output formats at once, for example JPEG+TIFF+DNG, you can swap and compare the output files by clicking the arrow on the right of the “Processed” box, in order to display the list of the different output files (see the screenshot below).
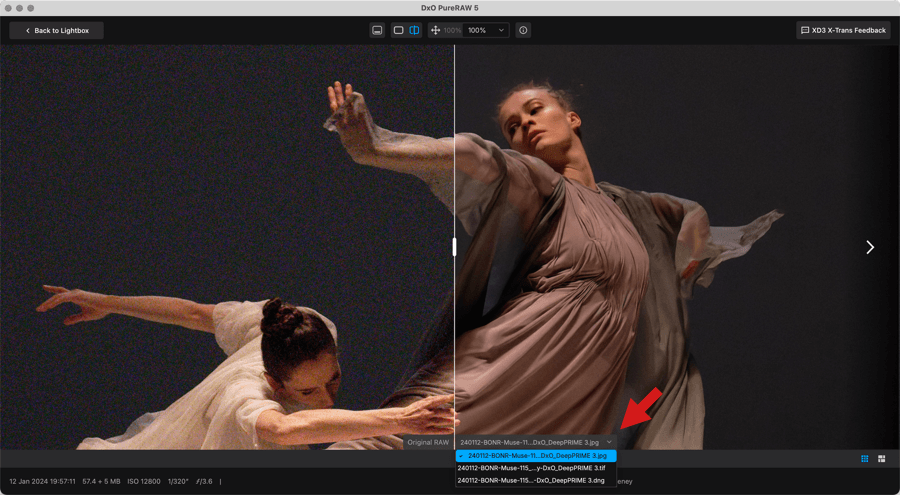
Inspect the effect of the corrections made by the DxO Module, and judge the improvements in sharpness and denoising. You can zoom into the image at 1:1 (that is, 100%) or you can use the mouse wheel to magnify the image up to 1600% to see the finest details.
You can use the left and right arrows on your keyboard to scroll through the images in the filmstrip. The checkboxes in the square thumbnails of the filmstrip let you select the images, even when you return to the Add photo screen (by clicking on the X button at the top right of the image), thus allowing you to immediately start exporting the selected images to your image editing program (see Working with processed images).
For more information about display and comparison modes, see the User Interface page.
Renaming the original files
DxO PureRAW can help you in your workflow. To this end, you can rename original files, either individually or in batches, with the same options as for naming output files.
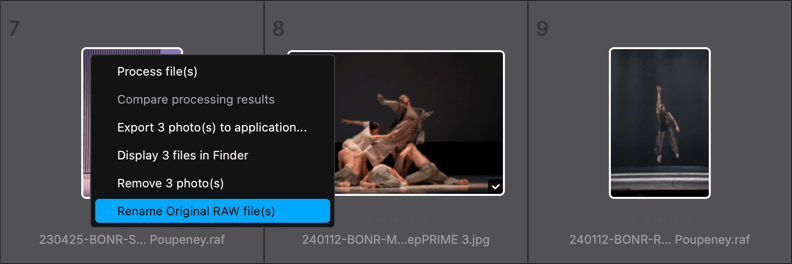
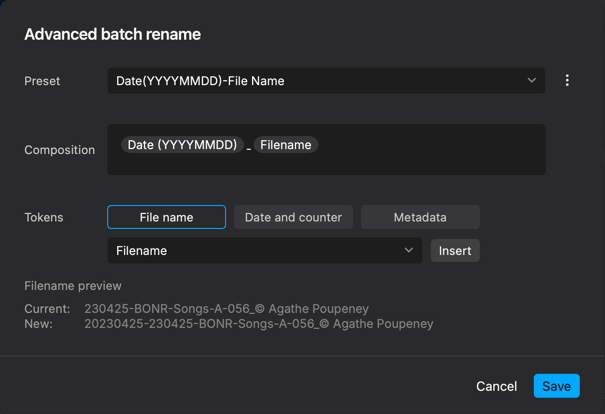
To rename your originals, right-click on an image or a selection of images, then select Rename original RAW file(s) from the context menu. This will open a dialog box with various renaming options, including:
- Renaming presets (supplied or customized).
- Tokens for adding metadata to file names.
- Dates and counter.
For more details on advanced renaming in DxO PureRAW, please refer to Processing tools and settings > Output file renaming.