

In this page, you will find a description of the following workflows:
- The workflow integrated in the operating system file management window.
- The generic workflow with third-party photo editing software.
Workflow with the system file management
DxO PureRAW lets you optimize your images directly from your Windows Explorer (PC) or Finder (Mac):


- In the Windows Explorer (PC) or the Finder (Mac), open the folder that contains your images.
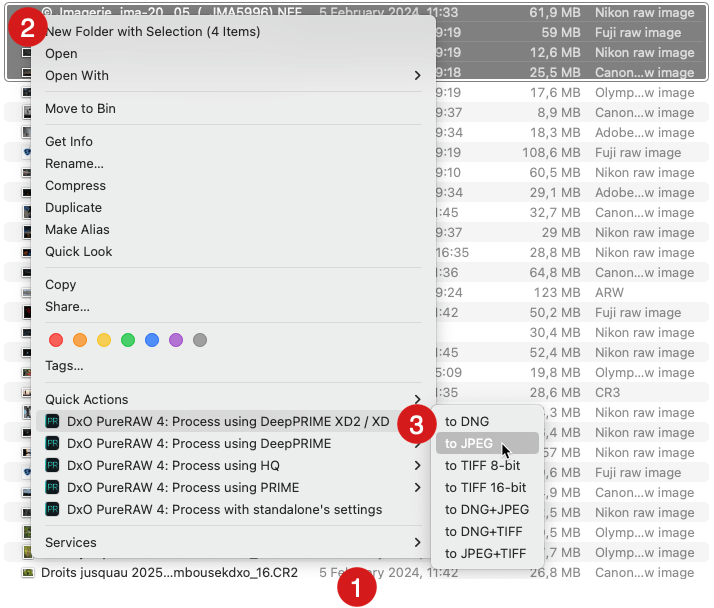
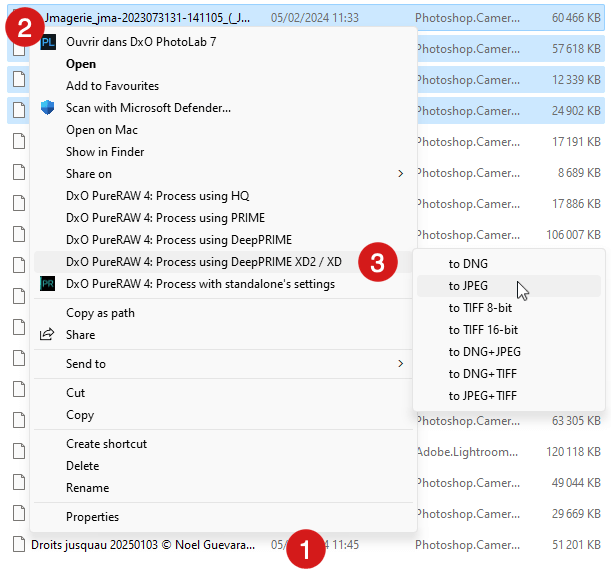
- Right-click on an image or selection of images.
- From the context menu, select one of the DxO PureRAW processing options and, in the submenu, choose the output format:
- Process with DeepPRIME XD (for Fujifilm RAW files), DeepPRIME, DeepPRIME XD2, HQ or PRIME.
- In DNG, JPEG, TIFF 8-bit, TIFF 16-bit, DNG+JPEG, DNG+TIFF or JPEG+TIFF.
- The DxO PureRAW: Process with the application settings lets you process the images with the last used settings. This includes the file format, therefore there is no sub-menu to select another format.
- If the DxO Optics Module has not yet been installed, a window will open prompting you to download and install it. The module will activate immediately, and you will not need to restart your machine. If the DxO Optics Module is already installed, skip to Step 6.
- A dialog box will appear showing the progress bar and the estimated time remaining. You can hit the pause button at any time or cancel by clicking on the X.
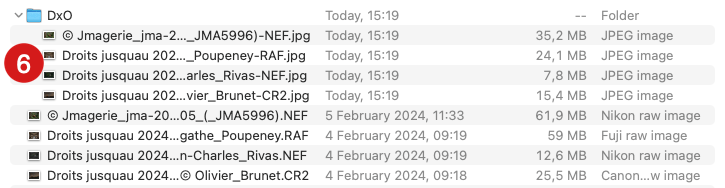
- Your images are available in the DxO sub-folder under your list of files in Windows Explorer (PC) or the Finder (Mac).
Please note:
- When using a system explorer to guide your workflow, the options regarding optical corrections, renaming and destination folder selection are not available.
- On Mac, to make DxO PureRAW options visible in the Finder’s right-click menu, you will need to allow extensions by going to the Apple menu > System Settings > Confidentiality and Security > Extensions > Added Extensions. Then, in the window that appears, scroll down to DxO PureRAW and check Finder Extensions (no restart required).
Workflow with third-party photo editing software
All images processed by DxO PureRAW can be used and edited in any photo software, as long as it is compatible with the output file formats (JPEG, TIFF, Linear DNG).
To export processed images to a third-party photo editor, do the following:
Export to application is automatic if you have activated the option in the processing options dialog (see photo processing chapter).
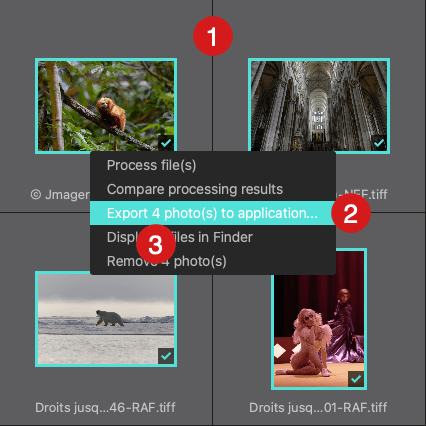
- In the Lightbox, select the processed images (you can use the filter function to just display Processed images).
- Right-click the image selection and, in the context menu, choose Export to application…
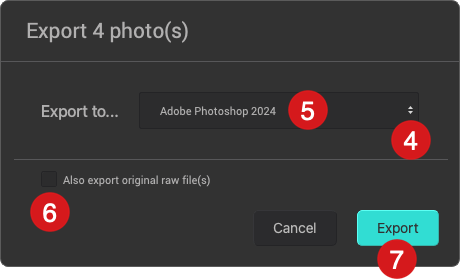
- The floating window shows the number of images to be exported.
- By default, the Export to… section features a list of Adobe programs. You can also choose another application. In which case, click Select software. Then, in the Applications folder (Mac) or the Programs folder (PC), select the desired application, and click Open.
- The name of the chosen application will appear in the window.
- By clicking on the checkbox, you can merge the original RAW files with files that have been processed by DxO PureRAW.
- Click on Export.
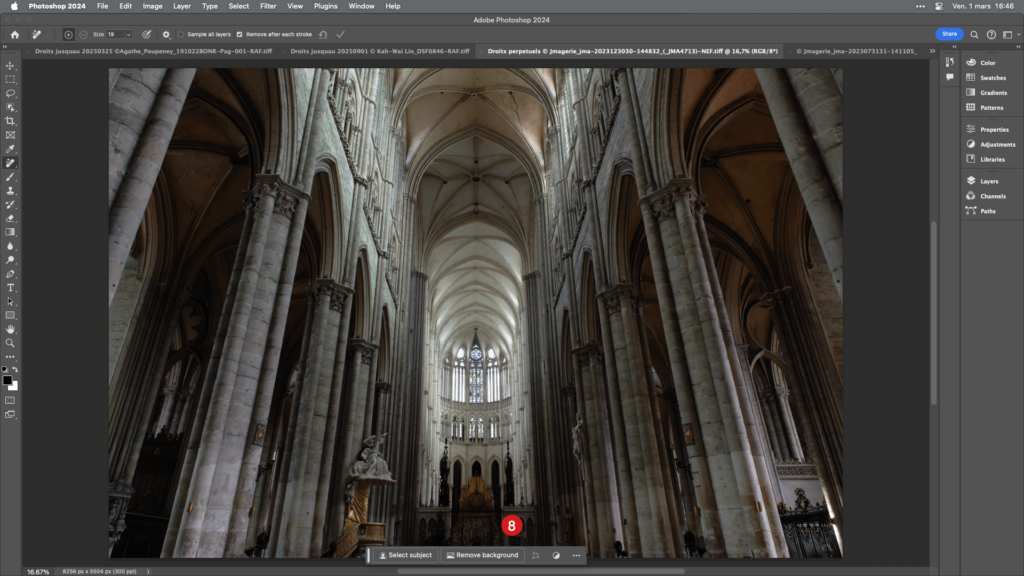
- The chosen application opens and displays the exported images.
Note that the Export window remembers the chosen application.
Exporting does not move the processed files; they remain in the same destination folder set during the processing stage.
Was this page helpful?
- 15 out of 15 found this useful -