

Thanks to the Lightroom Classic plug-in, you can process your images directly from the Adobe program, in one of two ways:
- Image processing with Plugin – Extras (File menu):
- Instant processing with DxO PureRAW.
- Preview and process with DxO PureRAW.
- Image processing with the Export option (from the right-click context menu).
This page will also give some advice for the possible Lightroom corrections and the ones to avoid, after processing with DxO PureRAW.
Image Processing with Plugin – Extras
All processing tools and options are described in the Processing tools and settings page, except everything specific to Lightroom Classic Collections, presented below.
Instant processing with DxO PureRAW
This scenario goes through the quick Process Settings window and, in that case, you still can check and compare the results in the Viewer after processing:
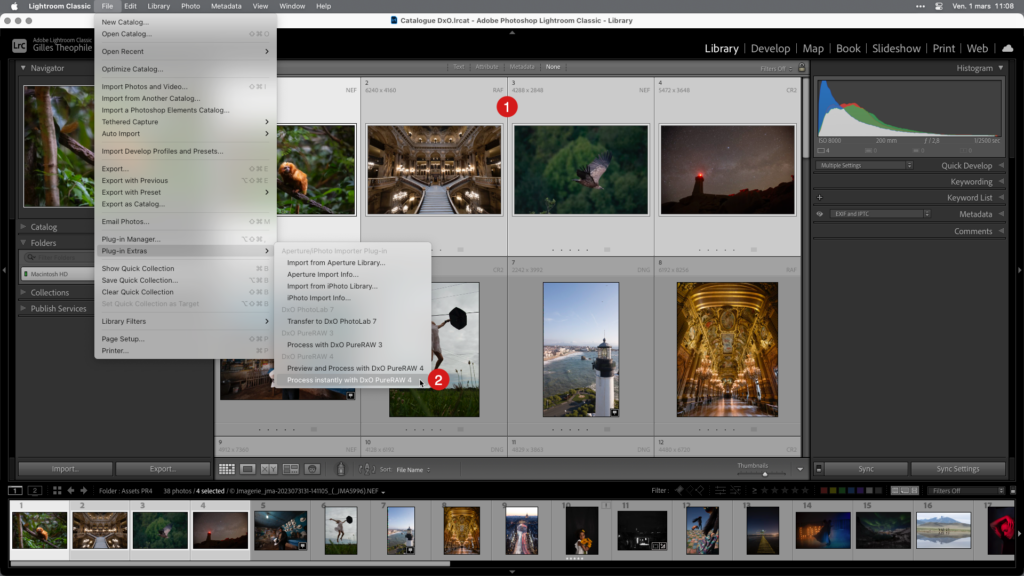
- In Lightroom Classic, select the image or images you would like to process.
- Go in the File menu and choose Plug-ins – Extras > Instant process with DxO PureRAW.
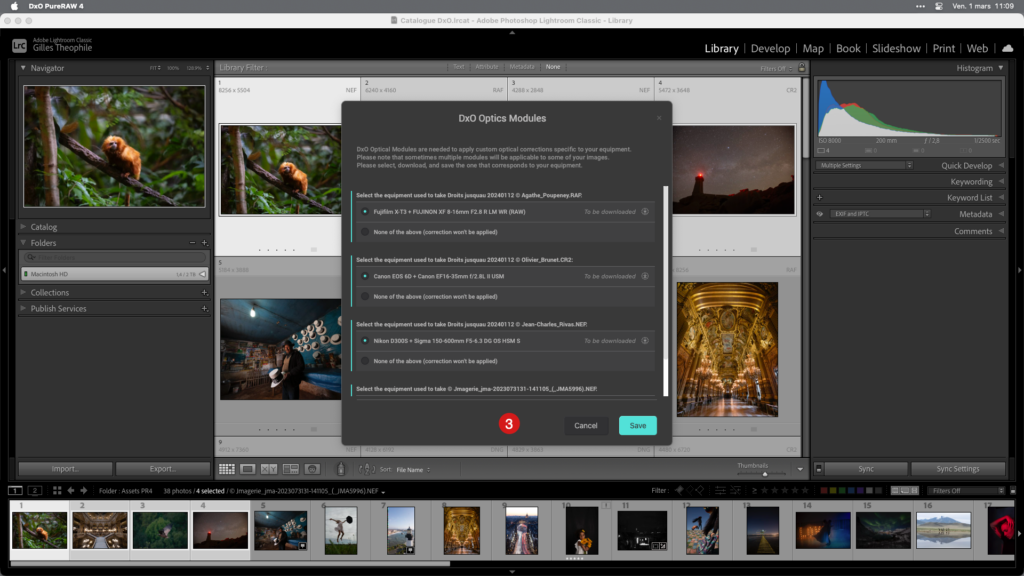
- The first time you use the plug-in, or if you are using a new camera and/or a new lens, a dialog box will ask you to download and install the relevant DxO Optics Module. If a dialog box does not open, skip to Step 4. Click on Download the selection. After installation, click Save. (You will not need to restart your computer*).
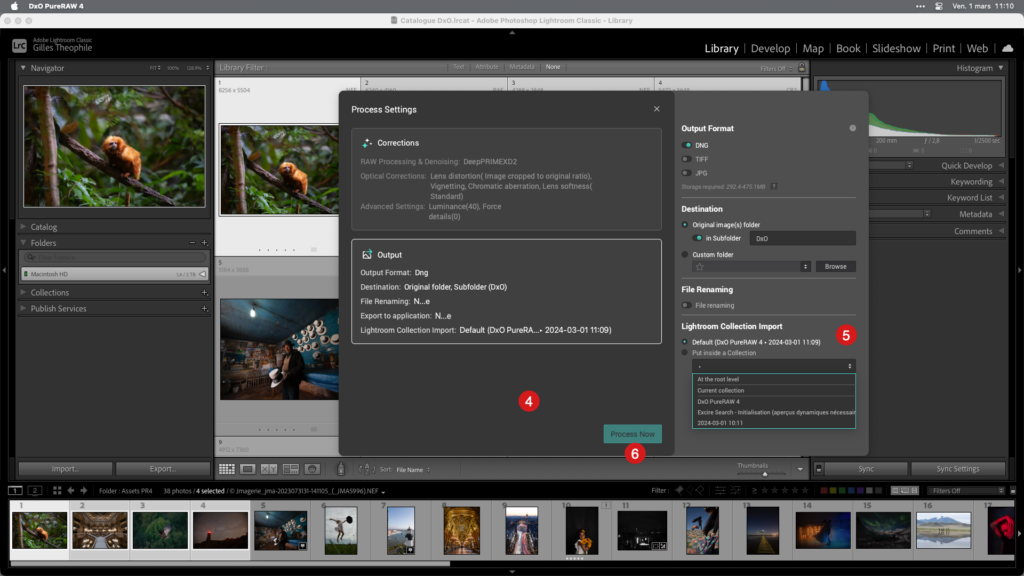
- The Process Settings floating window will show you a recap of all the processing options and settings, including renaming and destination folder if you need to. You will be able to edit your settings on the fly by clicking on the Edit buttons, which show when you hover the Corrections and Output fields with the mouse.
- For a better integration with Lightroom Classic’s workflow, you can also select the default Collection, select an existing Collection or create a Collection:
- Default: this is the default behavior where a DxO PureRAW Collection set is automatically created, and collections automatically add up after each processing. In that case, the collection name is YYYY-MM-DD HH:MN.
- Put inside a Collection: the menu lets you select an existing collection, the current collection (the one already selected), at the root level or within a Collection set. If you type in a Collection name, a Collection with that name will be automatically created in Lightroom Classic, right after the processing.
- At this step, you can click on:
- Process now to start the processing immediately.
- Add to queue if you have to do batch processing and expect to add more photos.
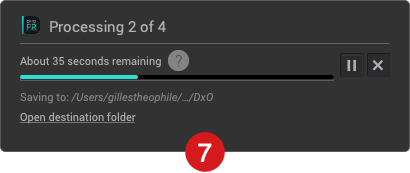
- After you click on Process now, a dialog box will show a progress bar and the estimated time remaining. You can cancel by clicking the “X” at the end of the progress bar.
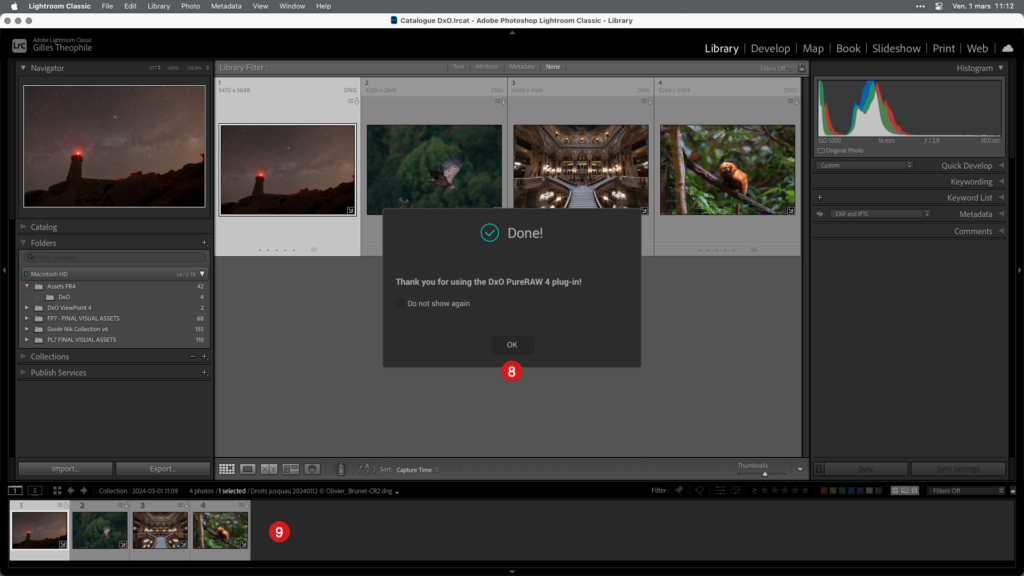
- A new dialog box will confirm that the photos have been processed. Click OK. (You can deactivate this window by clicking Don’t show again.)
- Once processing is complete, Lightroom Classic automatically shows the files in the Collection you have set or chosen at step 5.
Preview and process with DxO PureRAW
This scenario lets you use the Preview window, where you can select and adjust your settings, and check and compare the results and the original file in real time:
- In Lightroom Classic, select the image or images you would like to process.
- Go in the File menu and choose Plug-ins – Extras > Preview and process with DxO PureRAW.
- The first time you use the plug-in, or if you are using a new camera and/or a new lens, a dialog box will ask you to download and install the relevant DxO Optics Module. If a dialog box does not open, skip to Step 4. Click on Download the selection. After installation, click Save. (You will not need to restart your computer*).
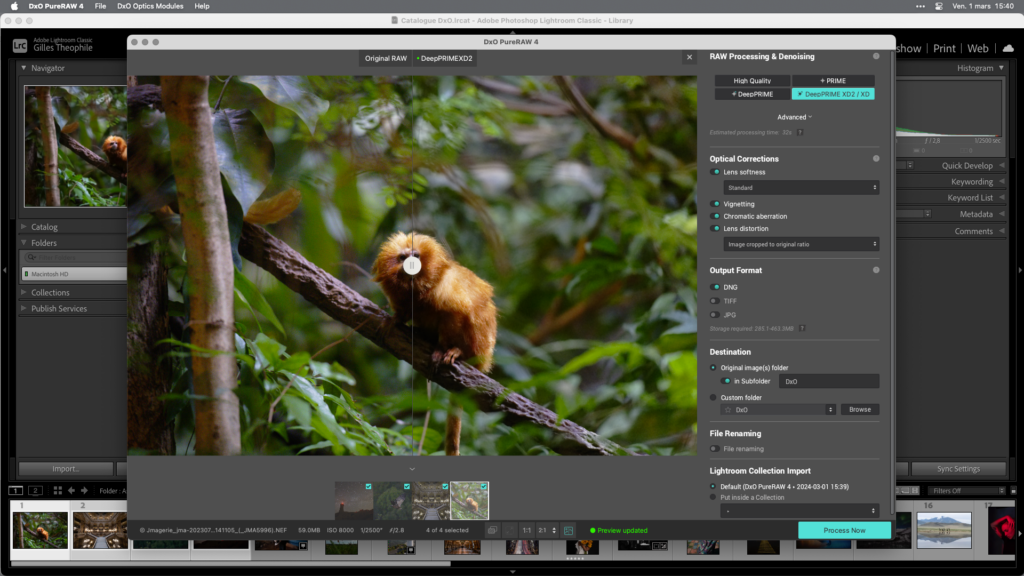
- The Preview window opens, where you can choose and apply all the corrections, and compare, in real time, the result with the original RAW file.
- Follow steps 5-9 of the Instant processing mode.
Image processing with the Export option
You can also choose an indirect method, via the Export menu:
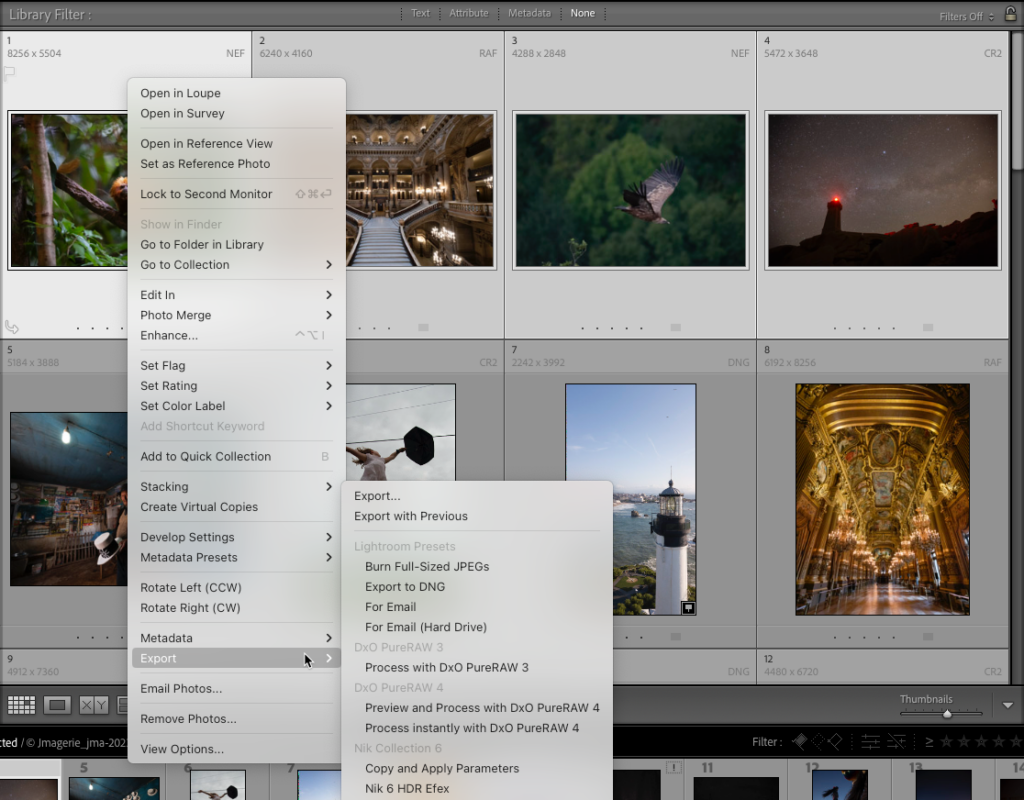
- In Lightroom Classic, select the image or images you would like to process.
- Right-click on your selection of images and then, in the drop-down context menu, choose one of the following scenarios:
- Instant processing with DxO PureRAW.
- Preview and process with DxO PureRAW.
- Follow the steps described above, in the relevant sections of this page.
Useful info and do/don’t do
Please note:
- All metadata from the original images are transferred to the processed images, including the star rating, keywords, IPTC fields, EXIF data, etc.
- If you process images that have already been edited in Lightroom Classic, any changes made to the originals will be applied automatically to the processed images. This applies to all tools in the Develop module, including masks (local adjustments), crop, and black-and-white conversion tools as well as the application of input profiles and pre-defined development settings.
- If you process images a second time, the suffix “-2” is simply added to the name of the processed images. Further edits are tagged with “-3,” “-4,” etc.
What you can do in Lightroom Classic
While the JPEG or TIFF files produced by DxO PureRAW should be thought of as finished files ready to be shared or printed, Linear DNGs are more like RAW files that you can edit without any limitations in Lightroom Classic:
- White Balance
- Tone, Automatic or Manual (Exposure, Highlights, etc.), Tone Curve.
- Presence (Clarity, Texture, Dehaze, Saturation, Vibrance).
- Color (HSL, Color Point, Color Grading, black & white conversion, etc.).
- Masks (local adjustments).
- Export to external editors (Photoshop, Nik Collection by DxO, DxO ViewPoint, DxO FilmPack, etc.)
- Creative tools
- Photo Merge (HDR, Panorama, Panorama HDR).
- Enhance (Super Resolution).
- Lens blur.
What you have to avoid in Lightroom Classic
On the other hand, because the following corrections have already been applied by DxO PureRAW, you should not use the following tools:
- Lens corrections: Do not combine DxO and Adobe optical corrections.
- Noise Reduction and AI Noise Reduction: This may smooth out details and thus counteract the action of DxO denoising tools, especially DeepPRIME and DeepPRIME XD2.
- Sharpness (in the Develop module and Output Sharpening when exporting): Use sparingly as DxO PureRAW has already optimized sharpness.