

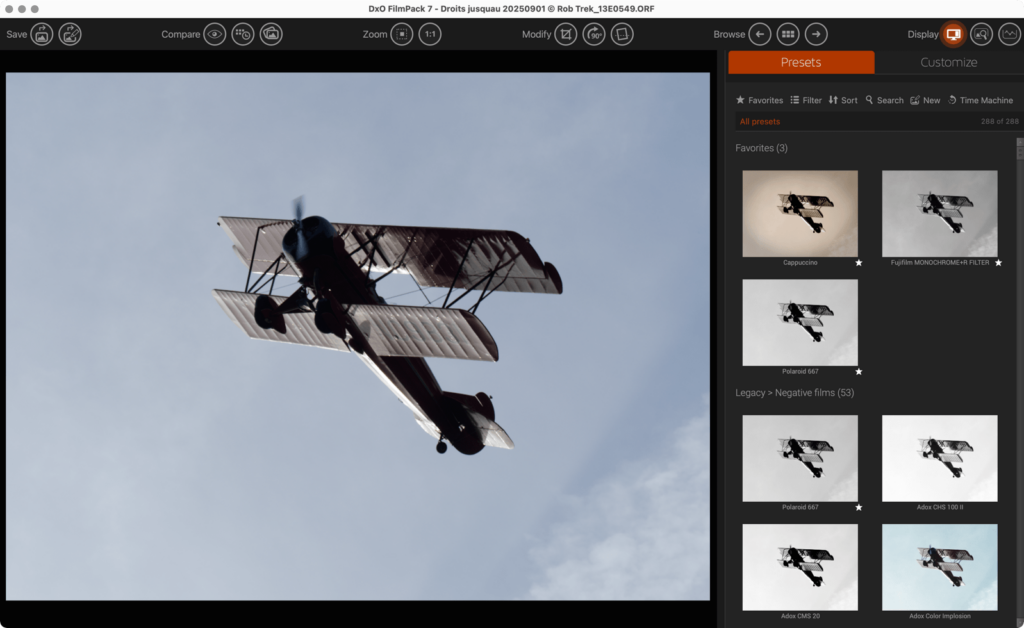
About the Presets tab
The Presets tab contains all the presets and preset categories offered by DxO FilmPack. These presets are presented as thumbnails generated from the image opened in the program, and allow you to view, filter, apply, and even create your own presets, either from an existing preset or entirely developed by yourself, notably thanks to the color and black and white correction tools available in the Customize tab.
The following renderings are exclusively compatible with RAW images captured using a Fujifilm camera:
- Fuji PROVIA/STANDARD
- Fuji Velvia/VIVID
- Fuji ASTIA/SOFT
- Fuji CLASSIC CHROME
- Fuji CLASSIC CHROME +
- Fuji PRO Neg. Hi
- Fuji PRO Neg. Std
- Fuji CLASSIC Neg.
- Fuji ETERNA/CINEMA
- Fuji ETERNA BLEACH BYPASS
- Fuji SEPIA
- Fuji Nostalgic Neg.
Using presets
Filtering presets
Selecting and managing the different presets occurs in the top of the Presets tab, as do the sorting and filtering criteria which appear just below the field. The different criteria are:
- Favorites: The Controls panel displays the thumbnails of the Favorites rendering, identified by the star underneath each thumbnail on the right. The field itself will display the word Favorites.
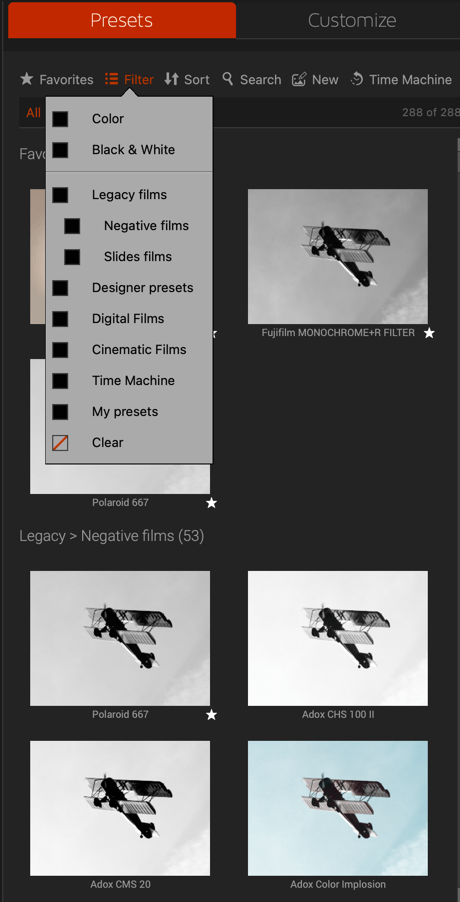
- Filter: A floating menu is displayed containing various options you can check. Each option that is checked appears in the display field, and the corresponding presets will be displayed in either one or two columns.
- Color,
- Black & White,
- Legacy films, which contains Negative films and Slides films sub-categories,
- Designer presets,
- Digital film, Cinematic film,
- Time Machine,
- My presets,
- Clear checkbox unchecks all selected categories.
- Sort: A floating menu is displayed containing the sort options: Favorites First, Alphabetical Order, By Type.
- Search: A floating menu is displayed in which you can enter the names of presets and films, etc.
- New: The image settings panel displays, letting you create your own preset using the different tool palettes whose settings have been reset.
- Time Machine: Lets you access and apply historic image renderings.
The names entered appear in the display field. You can reset the entry field by clicking on it.
You can have the presets appear in a single column or in two columns by going to View menu > Display presets on 1 column or Display presets on 2 columns.
The number visible to the right of the display field is the number of available presets, depending on the filtering and sorting criteria. The various filters and criteria can be combined.
Time Machine
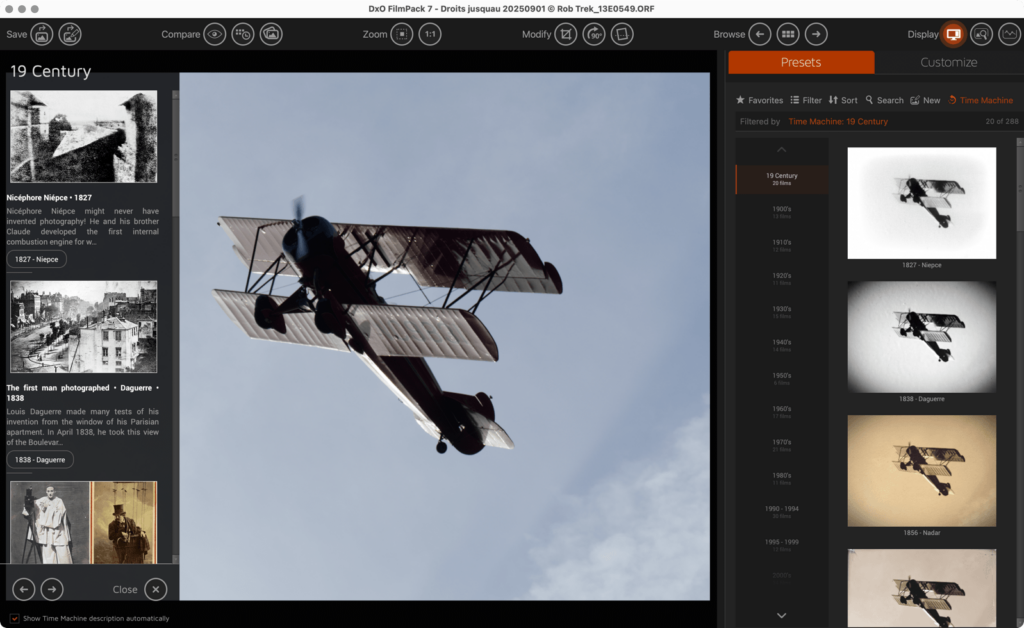
The Time Machine function allows you to place analog film presets in a historical context for an even richer and more entertaining image processing experience. Access it by clicking on Time Machine in the header of the Presets tab.
Once activated, Time Machine displays on the right a list of time periods from the 19th century to the present. To display the presets related to a particular decade, click on it in the list.
Time Machine also displays a panel on the left in which the historical context of the selected period is presented, with significant events, facts, and anecdotes related to the photograph, as well as illustrations. When you click on an illustration, both it and the accompanying text are displayed in a larger size in the viewer. To move to another event, click on the left of its illustration.
The arrows in the bottom left panel allow you to go to the previous or next period, and to close the left panel. You can also activate or deactivate the automatic display of the Time Machine by checking the box located at the bottom of the panel. When the option is unchecked, the contents of the left panel are not displayed when you click on the list of decades in the right panel.
Preset thumbnails
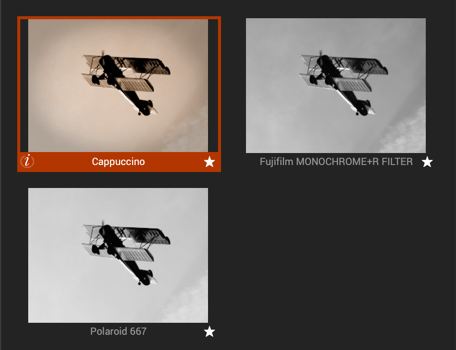
When you hover a preset thumbnail with the mouse, it shows an orange frame (which is sticky if you click on the thumbnail), with some information in the bottom edge (from left to right):
- i icon: Clicking on it will display information on the left panel. The information is related to the rendering and its intent.
- Preset name: The name depends on the preset type, it can be a particular rendering (Cappuccino) or a film (Kodak T-Max 100).
- Star: Click on the star to mark the preset as a favorite, click again to remove it from the favorites. To see all your favorite presets in one place, use the Filter at the top of the Presets tab.
Applying a preset

Applying a preset of any kind (color or black & white film, digital, cinema, custom, Time Machine-inspired) is extremely simple, and the process is the same for all:
- Open your image via the File > Open menu or by double-clicking on a thumbnail in the Image browser.
- In the Presets tab, select the category of the preset you want by using the preset selection filter.
- Click on the thumbnail of the preset you want to apply: it will be instantly applied to the photo in the display window.
- The selected thumbnail is framed in orange, and a checkmark in a small orange circle is also displayed.
- In the upper control bar, save the image by clicking on the Save as button, or in the File > Save as menu.
Custom presets and favorites
About custom and favorite presets
DxO FilmPack lets you create custom presets from the settings and corrections that you are in the process of applying. You can modify an existing preset or start from zero, depending on what you want to achieve and on your creativity. You can also designate any preset as one of your favorites to find it again more easily, and to group together all of your favorite presets.
Custom and favorite presets can be searched for and filtered in the same way as the presets delivered with the software.
Creating and saving a custom preset
- Proceed to correct and change your image. You can start from an existing preset or do all your corrections yourself in the Customize tab.
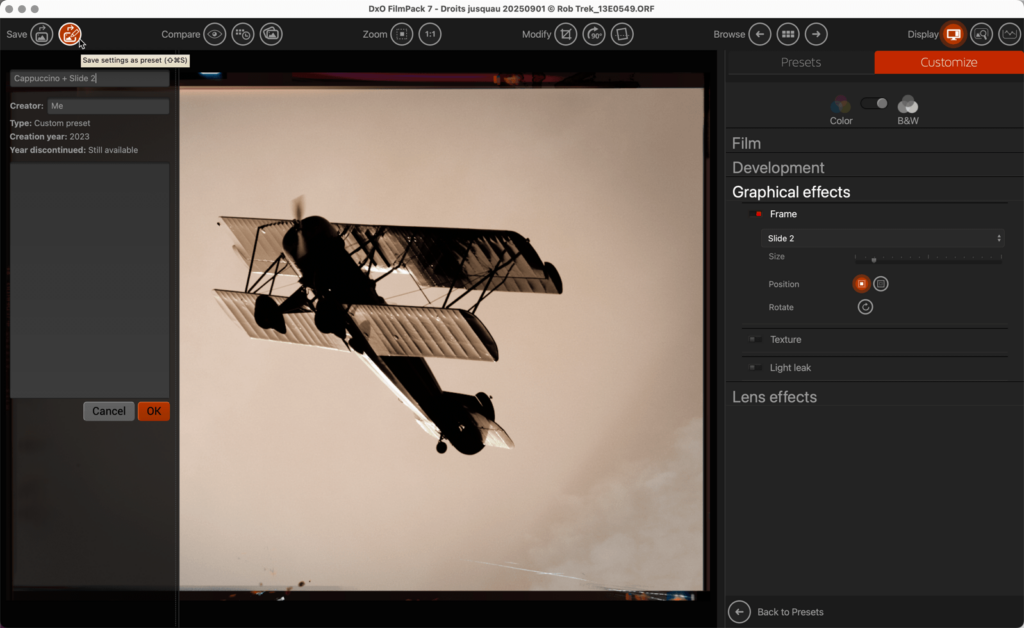
- In the upper command bar, click on the Save settings as a preset button.
- In the panel that slides from the left, enter the name of your custom preset. You can also write a description, a creator name (by default: Me) and the creation year is set automatically
- Validate by clicking on OK.
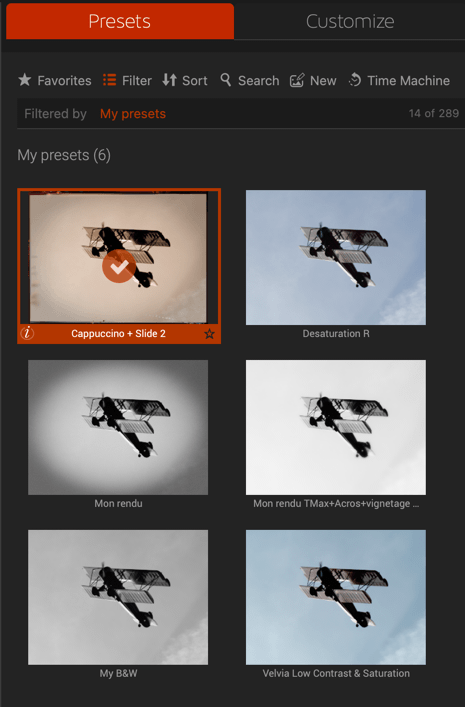
- Your custom preset appears in the Presets tab, and you can see it easily if you select My presets in the Filter list.
To directly save a custom preset, you can also right-click on the image and then click on Save settings as preset in the floating menu.
Modifying, renaming, and deleting a custom preset
- Modify a custom preset:
- Access My presets in the Filter menu of the Presets tab.
- Make the necessary changes to the settings in the Customize tab.
- Return to the Presets tab.
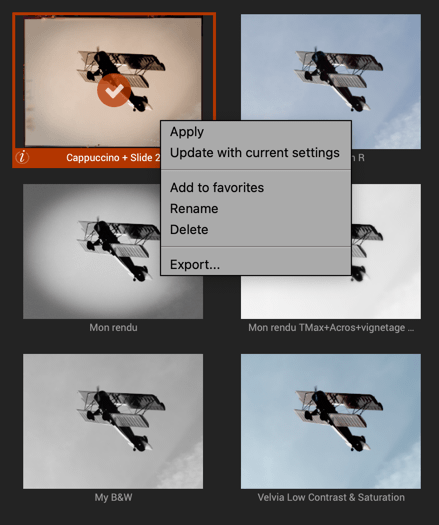
- Right-click on the thumbnail and then, in the context menu window, select Update with current settings.
- A dialog box will ask you to validate your choice by clicking on Yes.
- The thumbnail updates with your new settings.
- Rename a custom preset:
- In the thumbnail, double-click on the custom preset name. You can also right-click and select Rename in the contextual menu.
- Type the new name.
- Press Enter.
- Delete a custom preset:
- Right-click on the thumbnail of the custom preset you want to delete.
- In the context menu, select Delete.
- A dialog box will prompt you to validate (Yes) or not (No).
You can delete only custom presets.
Exporting and importing custom presets
The custom preset export/import feature allows you to share your settings parameters with other DxO FilmPack users.
- Exporting a custom preset
- In the Presets tab, right-click on the thumbnail of the custom preset that you want to export.
- Select Export.
- In the dialog box, enter the name that you want to give your preset and indicate the destination folder.
- Exporting all custom presets
- Go to File > Export all custom presets (Mac) or to Menu > Import presets > Export all custom presets (PC).
- In the dialog window, indicate the folder in which you want to save your presets.
- Click on Choose.
- Importing a custom preset
- Go to File > Import presets (Mac) or to Menu > Import presets > Import presets (Win).
- In the dialog window, choose the folder in which the preset you want to import is located and select the file with the extension “.preset.”
- Click on Open.
- A dialog window will inform you that the preset was correctly imported, and that it is available in your collection of custom presets visible in the Presets tab.
Favorite presets
To add a preset to Favorite presets:
- Choose a preset in the Presets tab.
- Click on the star located on the top right of the preset thumbnail, or right-click and select Add to favorites. A favorite preset is indicated by a white star in the bottom right corner of the thumbnail.
- Follow the same procedure to remove a preset from the favorites.
Searching for a preset
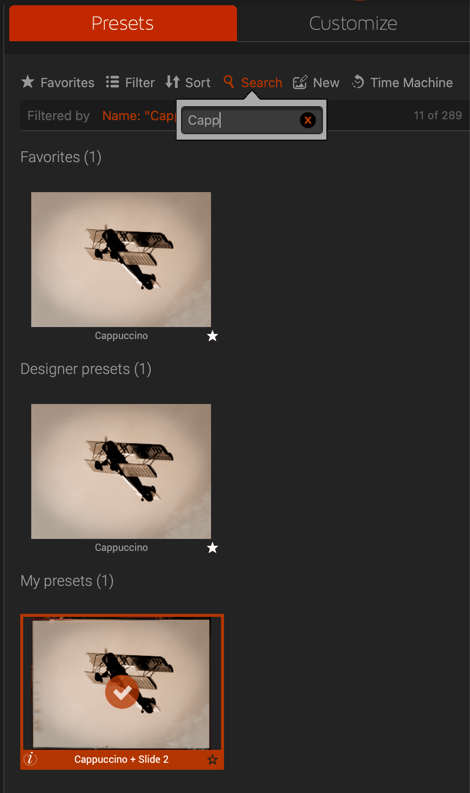
In the Preset tab top toolbar, click on Search, and then enter the name of the preset, film or otherwise. The thumbnails of the presets that correspond to the name entered will be displayed.