

The image browser
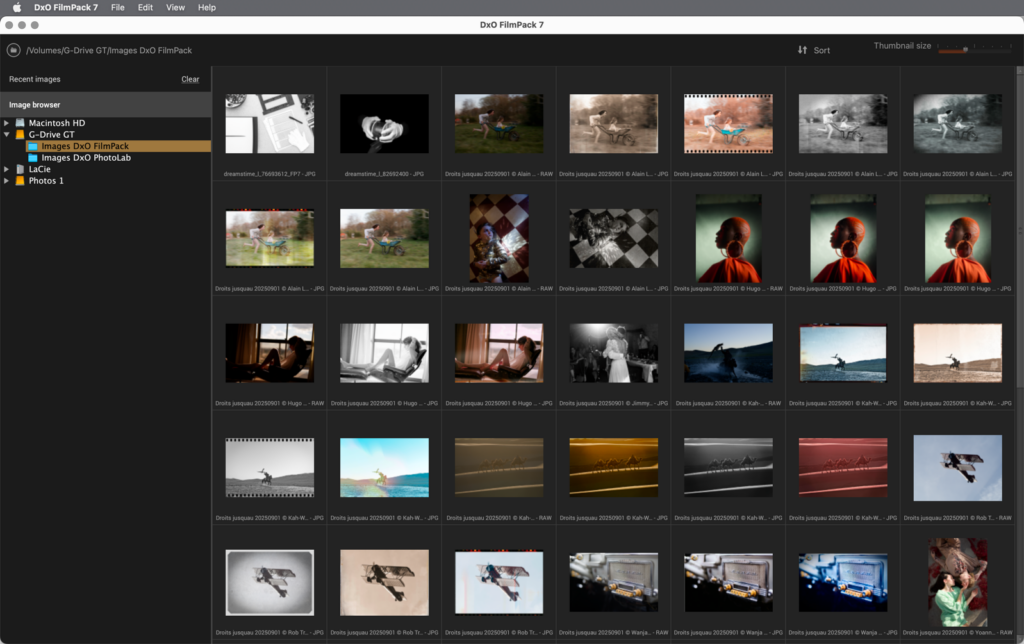
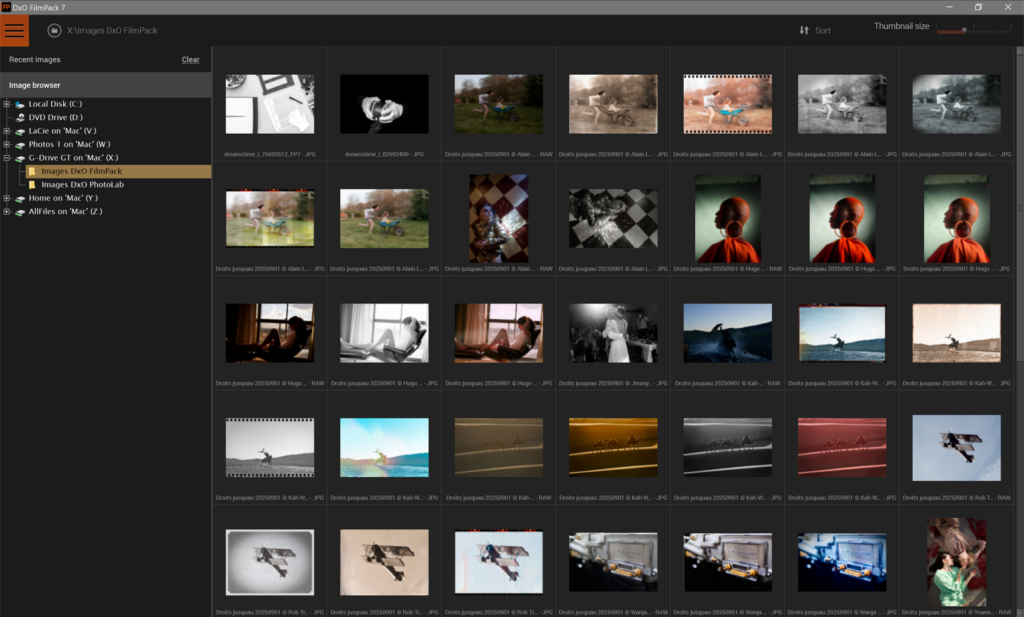
When you open DxO FilmPack as a standalone program, it displays the Image browser, which is a window that shows the folder tree on your computer, and the images which are available in any folder you click on.
When you launch DxO FilmPack for the first time, the Image browser displays the demo images supplied with the software.
The width of the Image browser can be adjusted by dragging the separating line with the thumbnail section.
Opening an image folder
You can access any folder of images on your hard drive by clicking on it in the folder tree.
You can also proceed as follows:
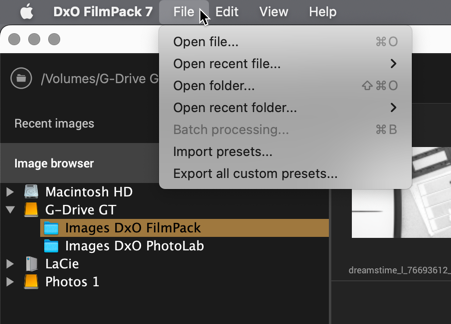
- Mac: Menu File > Open folder.
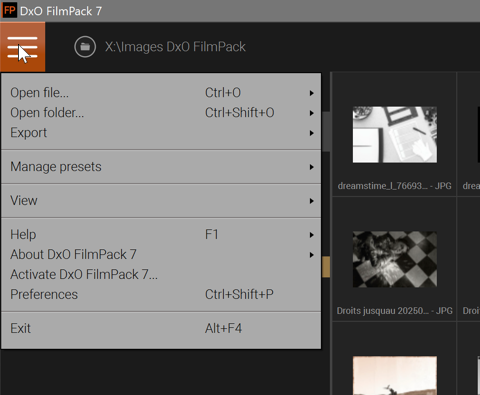
- PC: Click on the Menu button on the top left, then on Open.
In both cases, a system window will open that will allow you to choose the folder you want.
Opening an image
Whatever how you access and open folders, the content is displayed as thumbnails. To open an image for processing in DxO FilmPack, you can:
- Double-click on the thumbnail.
- Right-click on the thumbnail and select Open in the context menu.
- Select a thumbnail and then press Enter.
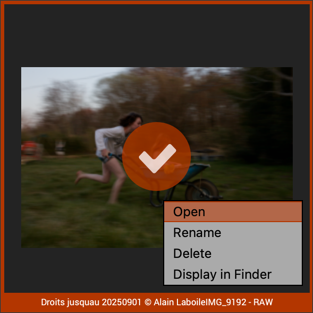
By right-clicking on a thumbnail, you will have access to a context menu that provides the following functions:
- Open: opens the selected image in the DxO FilmPack processing area.
- Rename: lets you rename a file by directly entering a new name in the field under the image thumbnail (one image at a time).
- Delete: lets you delete one image or a selection of images.
- Display in browser (Windows) or in the Finder (Mac): opens the image folder in a system window.
The Delete command deletes the image from your hard drive. If you delete a file in error, you will be able to find it again in your computer’s trash can.
Recent folders and images
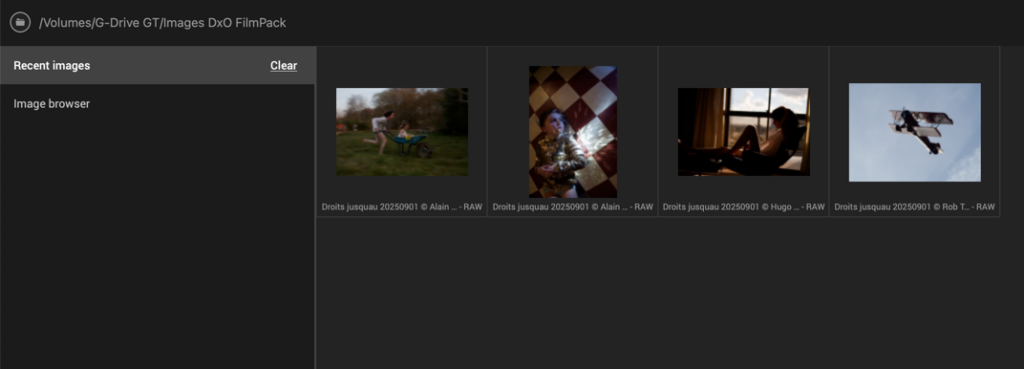
You can access recently-opened folders and files.
In the top part of the Image browser, click on Recent images to display the last images processed in DxO FilmPack. You can also clear the list by clicking on Clear.
It is also possible to access recent items as follows:
- Mac: go to File menu > Open recent file or Open recent folder (Mac).
- PC: Menu > Open and then choose one of the folders or files listed in the context menu.
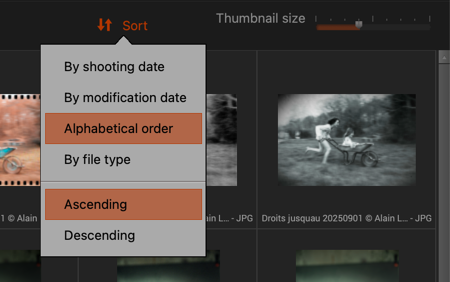
Image sorting
The Sort menu lets you display your available images according to different criteria: by shooting date, date of last modification, by alphabetical order, or by file type.
Thumbnail size
You can adjust the size of the image thumbnails in the Image list by using the slider provided.
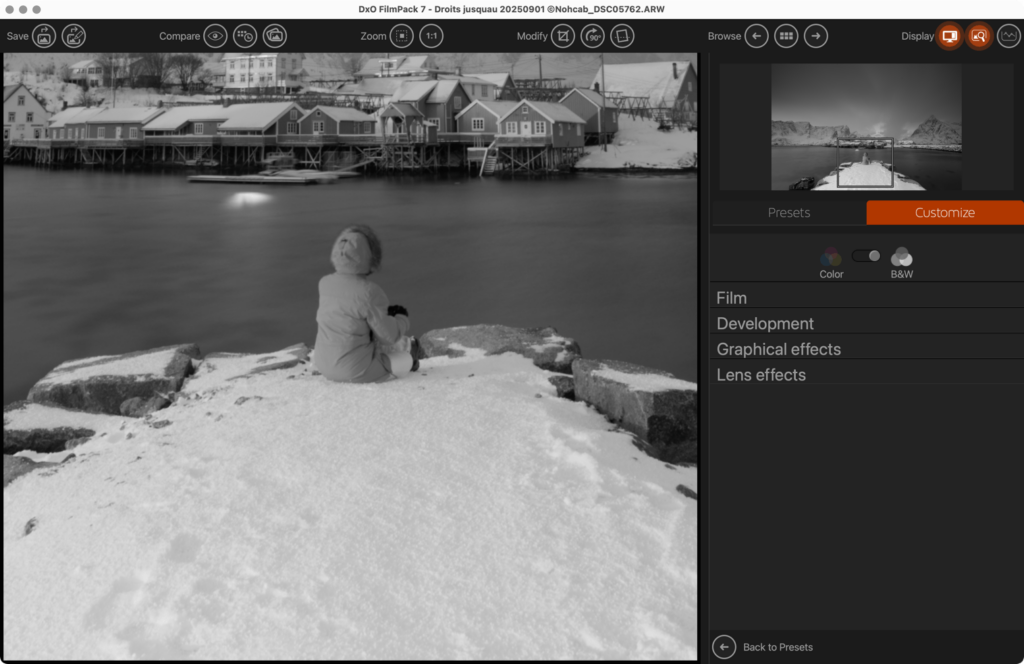
The Customize interface
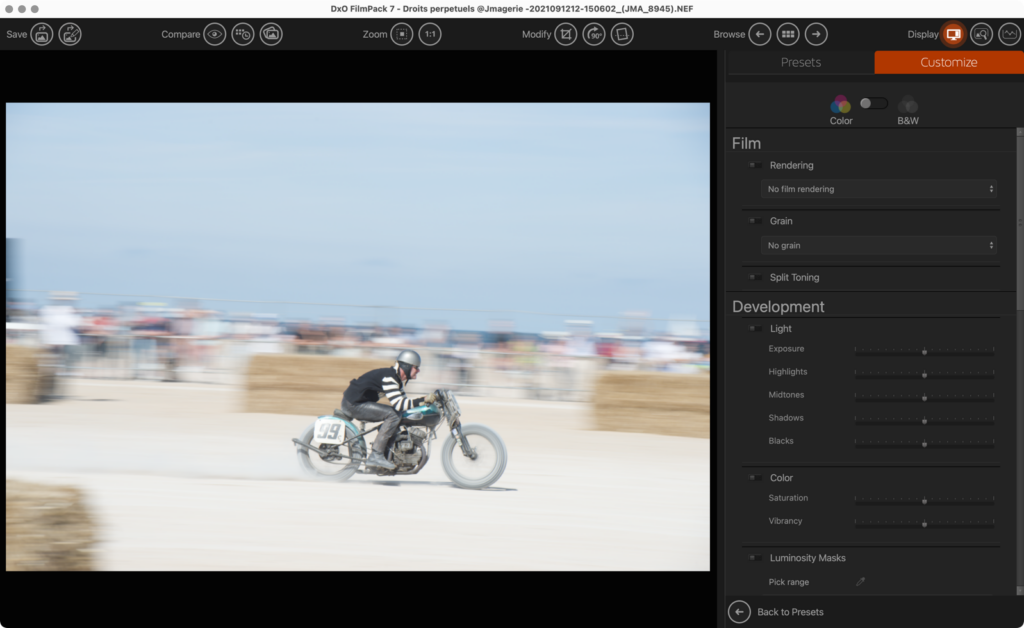
DxO FilmPack’s image Customize interface is composed of 4 principal parts:
- The upper toolbar, which comprises the tools for saving, comparing, zooming, changing, navigating, and displaying and accessing the Images list.
- The Image display area.
- The Controls pane, on the right side, split in 2 tabs: Presets and Customize. Presets includes the previewing of all presets, and Customize contains the entirety of the correction tools for color and black & white photos, as well as lens and graphical effects. The tools are divided in sections, and each section has a switch to toggle the corrections temporarily on/off. You can close or open each section by clicking next to the name, and the active section, where you are working, is indicated by the orange on/off switch, and by the orange border on the left side.
- The Information pane, popping out on the left side, which explains the history of the film or designer preset being applied to the image.
The Presets and Customize tabs are covered in the respective chapters of this user guide.
The upper toolbar

The DxO FilmPack upper toolbar includes the following functions:
- Menu (PC only): provides access to various commands (see details afterwards).
- Save:
- Save image as: lets you save the corrections and changes you have made to an image.
- Save settings as a preset: lets you save your current settings as a custom rendering.
- Compare:
- Compare with reference image: lets you compare the image with current settings to the original image or a snapshot designated as the reference image (see below).
- Change reference image: lets you select which image will serve as the reference image, be it the original image or a snapshot. (The floating window lets you create snapshots; see below.)
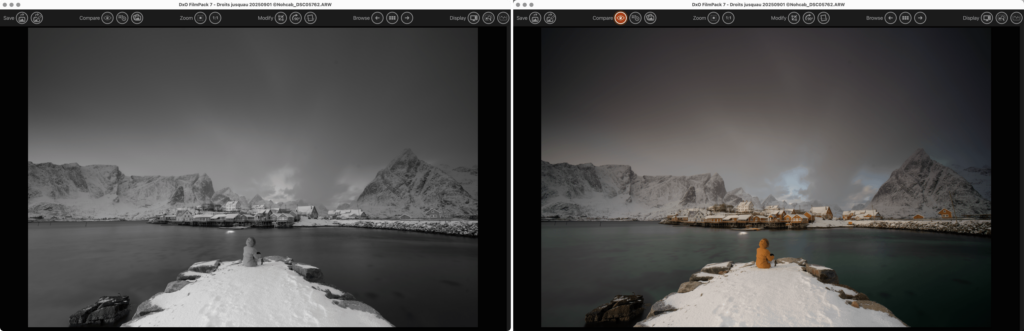
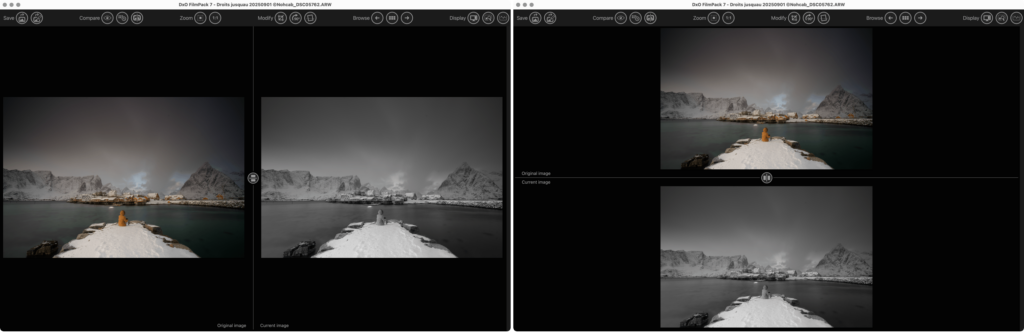
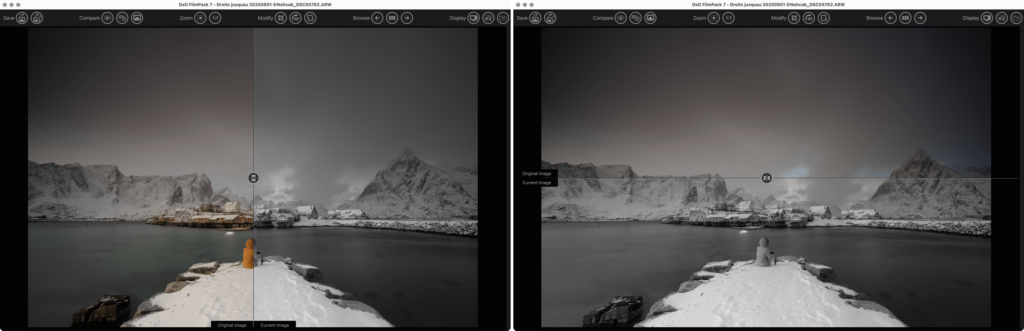
- Single image preview / Side-by-side preview / Split preview: with successive mouse clicks, lets you go from the single-image view (image with current settings) to the side-by-side view (image before processing to the left, after processing to the right), or to the split view (a single image with before and after zones and movable dividing line, before processing to the left, after processing to the right).
- Zoom:
- Fit zoom: displays the entire image in the display area.
- 100% Zoom (or 1:1): displays the image at 100% (i.e., 1 image pixel = 1 screen pixel).
- Modify:
- Crop: lets you activate the crop tool to reframe the image.
- Rotate right: turns the image by 90º with each click.
- Horizon : allows you to straighten a tilted image.
- Browse:
- Previous image / Next image: lets you pass from one image to another in the Image list.
- Return to image browser: lets you return to the Image browser (which displays the contents of a folder).
- Display:
- Hide / Show controls: hide or display the Controls panel.
- Activates the display of the Navigator palette above the Controls panel.
- Histogram: displays or hides the histogram above the Controls panel.
In Side-by-side preview and Split preview modes, the iconin the center of the image lets you select the orientation of the view (horizontal or vertical). In Split preview mode, click on the icon to move the separation line between the two areas in the image.
The Navigator
The Navigator is hidden by default. To display it, click on the Navigator button, located in the Display group, in the upper toolbar. To hide the navigator, perform the same operation.
You can also temporarily display the Navigator by hovering over the Navigator icon in the upper toolbar.
When you enlarge the image, you can move within it by moving the white navigation rectangle within the thumbnail.
The Histogram
The histogram is hidden by default. To display it, click on the Histogram button, located in the Display group, in the upper toolbar. To hide the histogram, perform the same operation.
You can also temporarily display the histogram by hovering over the histogram icon in the toolbar.
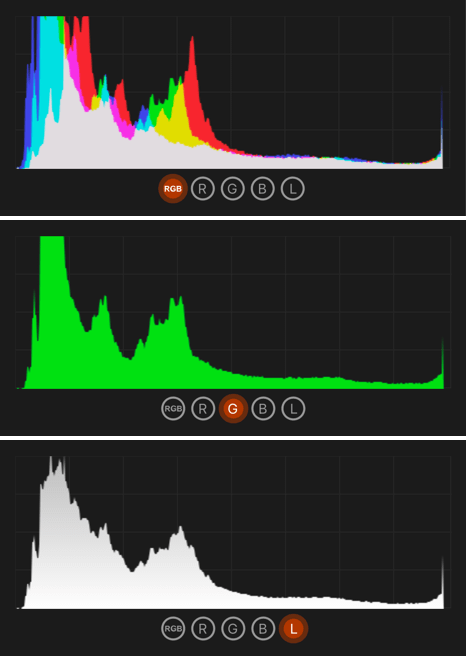
The DxO FilmPack histogram calculates the light values for each RGB (red, green, blue) channel and superimposes the values on the graph. This makes it possible to see the areas of overlap among the different channels of the three additive colors (red, green, blue).
You can also display each channel individually by clicking on the corresponding buttons on the right side of the palette:
- RGB: Displays all the channels simultaneously.
- R, G, or B: Displays only the selected channel.
- L: Displays the overall luminance channel.
The Menus
PC
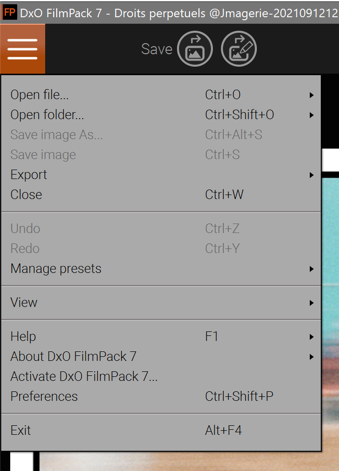
The Menu button displays a context menu divided into sections, each of which has sub-sections that are accessible in a context menu (indicated by a tiny arrow). The elements of the Menu are the same whether in the Image list or in Processing.
1st section:
- Open file: opens an image or a recently-opened image file, and access to Batch processing.
- Open folder: opens a folder or a recently-opened folder.
- Save as: save as, save, print.
- Close: closes an image, opens a dialog box for saving changes to the image.
2nd section:
- Undo: cancels the last action or correction.
- Redo: reestablishes the last action or correction.
- Import presets: imports custom presets, exports all custom presets.
3rd section:
- Full screen: enters/exits full-screen mode, show/hide Controls panel, display of presets in one or two columns.
4th section:
- Help: accesses online help, the DxO Academy (tutorials), search for updates, information about product activation.
- Preferences: access to application options (see below for more details).
5th section:
- Quit: closes the application, displays a dialog box for saving changes.
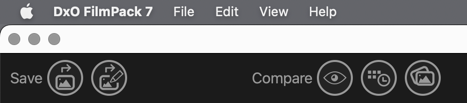
Mac
- DxO FilmPack 7: Accesses “about” information and Preferences; contains command for exiting the application.
- File (standalone application): Opening files and folders (including recent files and folders), saving, printing, batch processing, import/export of presets, and closing images.
- File (plugins version): Saving corrections and import/export of presets.
- Edit: Includes Undo/Redo commands for canceling or reapplying a step in correcting an image.
- View: Activates full-screen mode, hides/shows Controls panel, and display of presets in one or 2 columns.
- Help: Accesses online help, online user guide, online support and resources, DxO Learning Hub, DxO website and checking for updates.
In the standalone application version of DxO FilmPack, the File > Save command overwrites the original file; the File > Save As command creates a new file instead, thus preserving the original. In the plugin version, the Save button works the same as the File > Save command and thus overwrites the original file.
Preferences
The Preferences dialog box is accessible via the Menu button (Windows) or in the DxO FilmPack menu (macOS). It contains two tabs: General, for all settings tied to running the application; Processing, for setting the default JPEG compression.
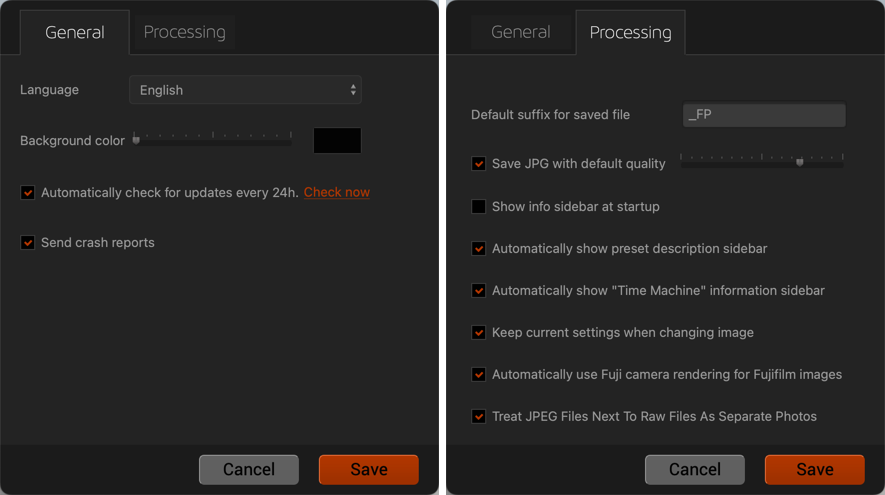
General tab
- Language: Changes the language of the program (English, French, German, Japanese, Chinese – Simplified); requires restarting the application.
- Background color: Changes the intensity of the gray in the image display area (to return to the default setting, double-click on the slider).
- Automatically check for updates every 24 hours: Actives/deactivates this feature. This button’s function is essentially duplicated by the “Check now” button (requires an internet connection).
- Send crash reports: Activates/deactivates this feature, which will automatically send an error report if the application crashes.
- Cancel: Cancels the changes and closes the Preferences window.
- Save: Records the changes made in the Preferences window.
Processing
- Default suffix for saved files: By entering a suffix in the provided field, you can add it to the name of all your files processed in DxO FilmPack (for example, if you enter the suffix “_FP”, the original file IMG_1234.CR2 will, after saving, give a file named IMG_1234_FP.JPG).
- Save JPG with default quality: Lets you set the default quality for the JPEG files created with DxO FilmPack.
- Show info bar at startup: Activates or deactivates the program information bar, which is located on the left during program launch.
- Automatically show preset description sidebar: whenever you select a preset in the presets display panel, a description of the rendering will be displayed in a panel to the left of DxO FilmPack (the display of the information can also be deactivated in the bar itself).
- Automatically show ‘Time Machine’ information sidebar: Whenever you select a decade in the Time Machine (in the presets panel), the panel on the left will display events and anecdotes from that period.
- Keep current settings when changing images: the current settings are kept while going from one image to another image.
- Automatically use Fuji camera rendering for Fujifilm images: applies the rendering you have set in your Fuji camera.
- Treat JPEG files next to RAW files as separate photos: if checked, this option will display both pictures if you shoot in JPEG + RAW mode. If not check, only the RAW file will be shown in DxO FilmPack.
- Cancel: Cancels the changes and closes the Preferences window.
- Save: Records the changes made in the Preferences window.
Keyboard shortcuts
Main
| Command | PC | Mac |
|---|---|---|
| Open file | Ctrl + O | Cmd + O |
| Open folder | Shift + Ctrl + O | Shift + Cmd + O |
| Save image | Ctrl + S | Cmd + S |
| Save image as | Alt + Ctrl + S | Opt + Cmd + S |
| Ctrl + P | Cmd + P | |
| Close window | Ctrl + W | Cmd + W |
| Batch processing | Ctrl + B | Cmd + B |
| Quit | Alt + F4 | Cmd + Q |
| Undo | Ctrl + Z | Cmd + Z |
| Redo | Ctrl + Y | Shift + Cmd + Z |
| Show/Hide toolbar | Shift + P | Shift + P |
| Display presets on 1 column | Shift + D | Shift + D |
| Preferences | Ctrl + Shift + P | Cmd + , |
| Full screen | F11 | Ctrl + Cmd + F |
| Exit full screen | Esc | Esc |
| Temporary selection of Hand tool | Spacebar | Spacebar |
| Show/Hide snapshots | S | S |
| Help | F1 | Cmd + ? |
Toolbar
| Command | PC | Mac |
|---|---|---|
| Save image as | Alt + Ctrl + S | Opt + Cmd + S |
| Save settings as preset | Shift + Ctrl +S | Shift + Cmd + S |
| Compare with reference image | D | D |
| Single image/Split preview | C | C |
| Fit to screen | F3 | Cmd + 0 |
| 100% zoom | F4 | Cmd + 1 |
| Zoom in/Zoom out | Ctrl + +/Ctrl+- | Cmd + +/Cmd + – |
| Crop | R | R |
| Rotate left | Ctrl + L | Cmd + L |
| Rotate right | Ctrl + R | Cmd + R |
| Horizon | S | S |
| Previous image | Ctrl + left arrow | Cmd + left arrow |
| Return to image browser | Ctrl + W | Cmd + W |
| Next image | Ctrl + right arrow | Cmd + right arrow |
| Show/Hide controls pane | P | P |
| Show/Hide navigator | T | T |
| Show/Hide histogram | H | H |