DxO ViewPoint readily fits into the workflow of photographers who use Adobe software. When used as a plugin in Adobe Photoshop, Adobe Photoshop Elements or Adobe Lightroom Classic it runs directly from the host application for an image that is already open.
With Lightroom Classic
To correct an image with DxO ViewPoint when working in Lightroom Classic:
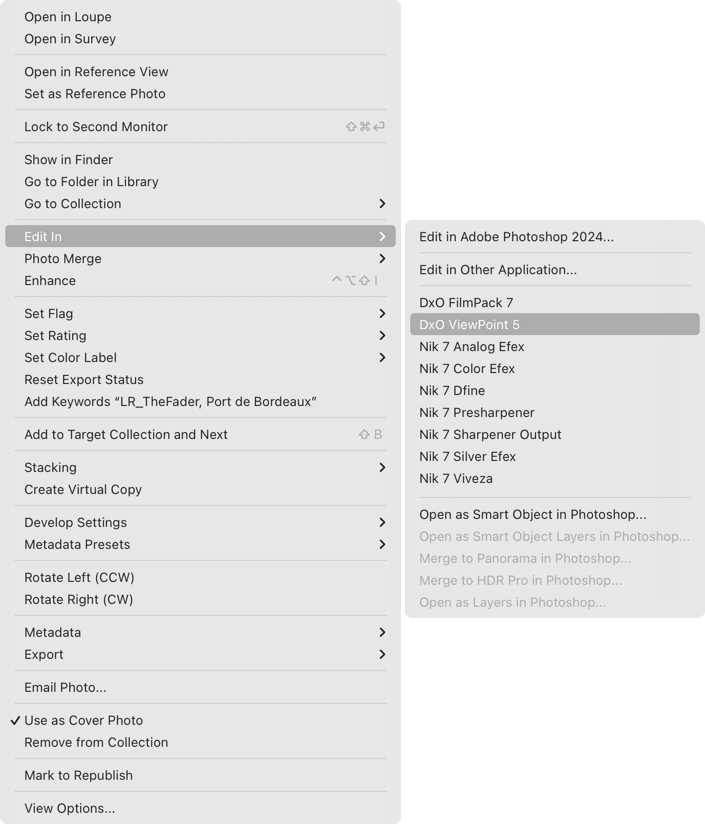
In Lightroom Classic, right-click on an image and then select Edit in > Edit in DxO ViewPoint 5.
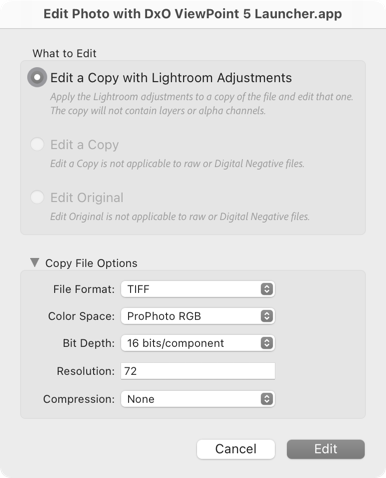
A dialog box opens with the option to Edit a copy with the selected Lightroom adjustments. This Option lets you retouch your image with DxO ViewPoint using the image you corrected in Adobe Photoshop Lightroom.
The file format as well as its characteristics are set in Preferences > Edit Lightroom Classic plugin. The dialog box shows you the file characteristics, which you can modify if you wish.
Click the Edit button to launch DxO ViewPoint.
External editor menu and options in Lightroom Classic.
With Photoshop
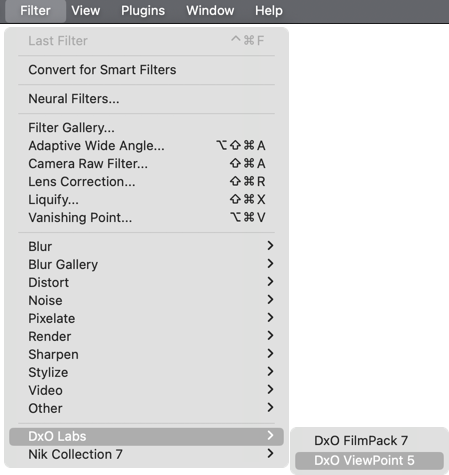
To correct a JPEG or TIFF image in DxO ViewPoint when working with Adobe Photoshop, launch the application by selecting Filters > DxO Labs > DxO ViewPoint 5.
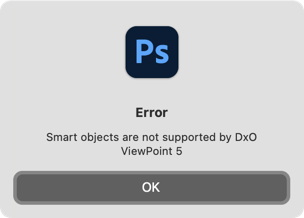
Please, be aware that DxO ViewPoint, used as an Adobe Photoshop plug-in, doesn’t support Smart Objects and Filters, and the relevant reversible workflow. If you try to use an image converted to a Smart Object, you will get the warning shown below.
With Photoshop Elements
To correct a JPEG or TIFF image in DxO ViewPoint when working with Adobe® Photoshop Elements, launch the application by selecting Filters > DxO Labs > DxO ViewPoint 5.
With DxO PhotoLab
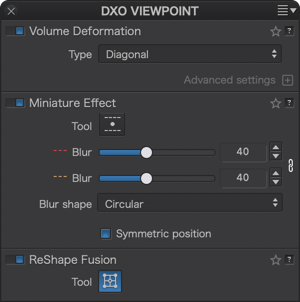
The DxO ViewPoint palette in DxO PhotoLab.
Additional Tools
If both programs are installed on your computer, DxO ViewPoint will be integrated into DxO PhotoLab as a palette, named DxO ViewPoint, displaying the following tools:
Volume Deformation.
Miniature effect.
ReShape Fusion.
Flip.
These functions are exactly the same, but the user interface is different (see below).
The advantage of using it in DxO PhotoLab is that it maintains a RAW non-destructive workflow and forgoes the need to switch to DxO ViewPoint as an external editor.
Common tools
The following common tools are integrated into DxO PhotoLab (Elite version), so do not appear in the DxO ViewPoint palette:
Distortion.
Perspective.
Horizon.
Crop.
Tools not added
The Guide tool remains exclusive to DxO ViewPoint and is not added to DxO PhotoLab.
In DxO PhotoLab, the lines in the Perspective and Horizon tools are not available with a magnification loupe.
Volume Deformation
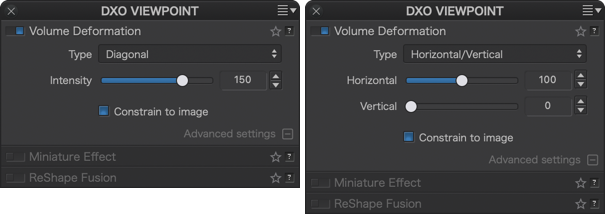
The Volume deformation sub-palette contains the following elements:
Figure Menu: a choice between horizontal/vertical or diagonal correction.
Intensity Slider: click the “+” button (Mac) or on Advanced Settings (PC) to reveal it.
Miniature Effect
The Miniature Effect tool is available in three locations on the DxO PhotoLab interface:
The upper toolbar.
Lower toolbar.
The miniature effect sub-palette, in the DxO ViewPoint palette.
The upper toolbar
A button for the Miniature Effect tool is available in the DxO PhotoLab upper toolbar as well as in the Miniature Effect sub-palette.
Lower toolbar
The toolbar is located under the image. It contains the following elements:
Icon and name of tool.
Line color: lets you change the colors of the solid lines (red by default) and the dashed lines (orange by default).
Always display: lets you permanently display or hide the tools on the image. If the checkbox is unchecked, the tools will only be visible when the mouse passes over the image display area.
Reset: resets corrections to zero.
Close: approves the corrections and closes the tool.
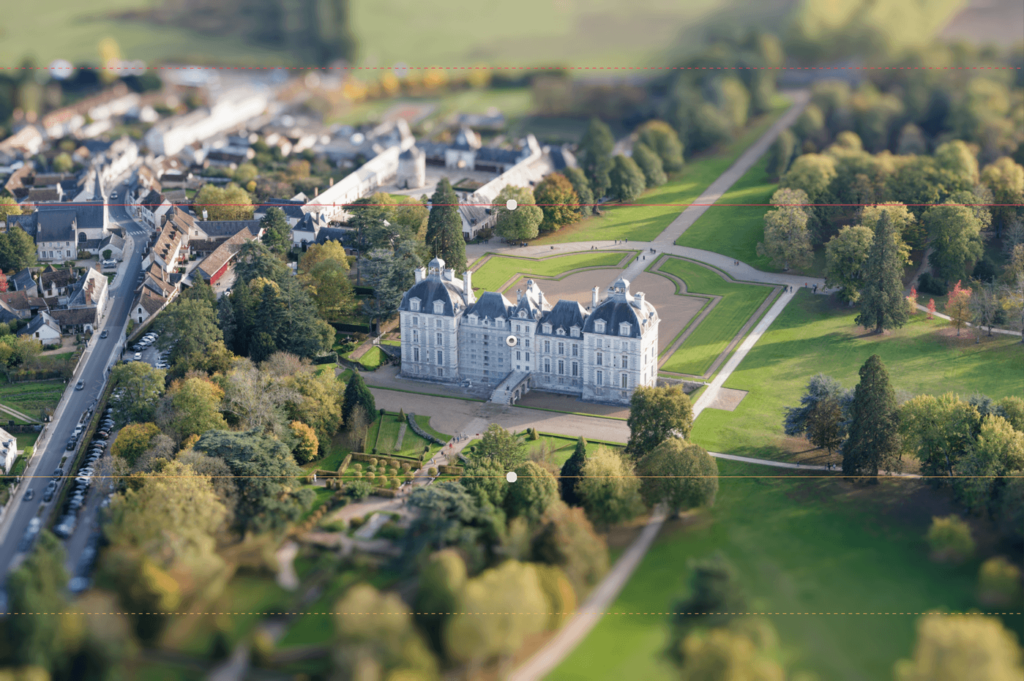
Display of the miniature effect tools in DxO PhotoLab.
Sub-palette
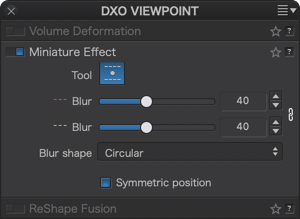
Display of the miniature effect tools in DxO PhotoLab.
The Miniature Effect sub-palette contains the following tools:
Tool: this button activates the tool.
Blur: sliders to adjust the degree of blur in the image (unlike in DxO ViewPoint, there are no Blur sliders on the blur lines.) The link icon on the right lets you synchronize or disassociate the settings.
Shape: selects the shape of the blur effect.
Symmetric position: checked by default, unchecking this box unlinks the positioning of the blur lines on both sides of the sharp zone.
ReShape Fusion
The ReShape Fusion tool is available in three locations on the DxO PhotoLab interface:
The upper toolbar
Lower toolbar (Mac) or Floating Toolbar (PC)
ReShape Fusion sub-palette, in the DxO ViewPoint palette.
The upper toolbar
A button for the ReShape Fusion tool is available in the DxO PhotoLab upper toolbar, as well as in the ReShape Fusion sub-palette.
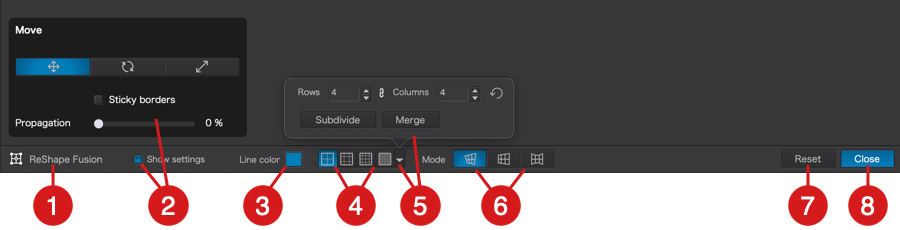
Lower toolbar (Mac)
The toolbar is located under the image. It contains the following elements:
Icon and name of tool.
Settings check box and palette: displays the tool palette for the Free transform, Perspective and Volume deformation tool.
Line color: lets you change the color of the grid (blue by default).
Grid Presets: These 4 buttons let you select a predefined grid in rows and columns 4 x 4, 8 x 8, 16 x 16, or 32 x 32.
Rows and Columns (click the arrow):
These fields indicate the number of rows and columns in your grid, you can change them by typing numbers directly into the fields or by clicking on the up/down arrows. The minimum number is 1, the maximum is 32.
Clicking on the chain icon in between the Rows and Columns fields toggles on or off the synchronization between the number of rows and the number of columns. Deactivate it if you wish 8×16, 24×6, etc. grids (up to 32 for each value). Keep it activated to have the same values for rows and columns.
Subdivide/Merge : to quickly change the grid, each time you click the Subdivise button, it will be subdivided by 2 (a 4×4 grid becomes a 8×8 grid and so on, up to 32×32). The Merge button works the other way (a 8×8 grid becomes a 4×4 grid).
Reset grid: the rounded arrow returns the grid to its default 4 x 4 layout. It also cancels current corrections.
Modes: lets you select one of the Free transform, Perspective and Volume deformation modes.
Reset: cancels corrections and resets the grid to its default 4 x 4 layout.
Close: applies the corrections and closes the ReShape Fusion tool.
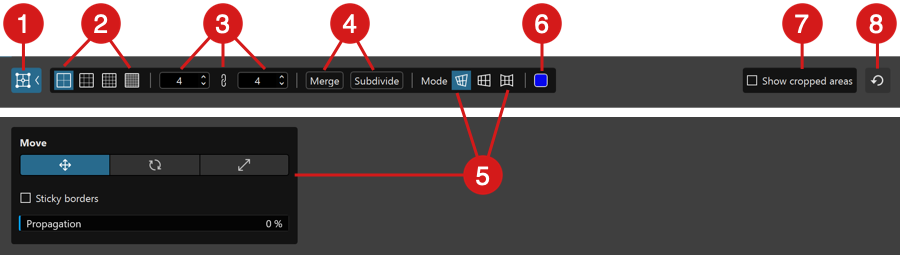
Floating Toolbar (PC)
The floating toolbar is located at the top of the image. It contains the following elements:
ReShape Fusion button: shows/hides the toolbar.
Grid Presets: These 4 buttons let you select a predefined grid in rows and columns 4 x 4, 8 x 8, 16 x 16, or 32 x 32.
Rows and Columns:
These fields indicate the number of rows and columns in your grid, you can change them by typing numbers directly into the fields or by clicking on the up/down arrows. The minimum number is 1, the maximum is 32.
Clicking on the chain icon in between the Rows and Columns fields toggles on or off the synchronization between the number of rows and the number of columns. Deactivate it if you wish 8×16, 24×6, etc. grids (up to 32 for each value). Keep it activated to have the same values for rows and columns.
Subdivide/Merge : to quickly change the grid, each time you click the Subdivise button, it will be subdivided by 2 (a 4×4 grid becomes a 8×8 grid and so on, up to 32×32). The Merge button works the other way (a 8×8 grid becomes a 4×4 grid).
Modes: lets you select one of the Free transform, Perspective and Volume deformation modes. This is also displaying the tool palette.
Line color: clicking on the blue tile (default color) opens a color picker to change the color of the grid lines to alter their visibility relative to the colors and brightnesses in the image.
Show cropped areas: Display all of a cropped image. The out-of-frame areas are indicated by a dark translucent mask.
Reset grid: this button on the far right side of the display area returns the grid to its default 4 x 4 layout. It also cancels current corrections.
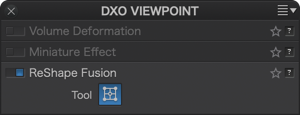
Sub-palette
The ReShape Fusion sub-palette contains the following:
Tool: this button activates the tool.
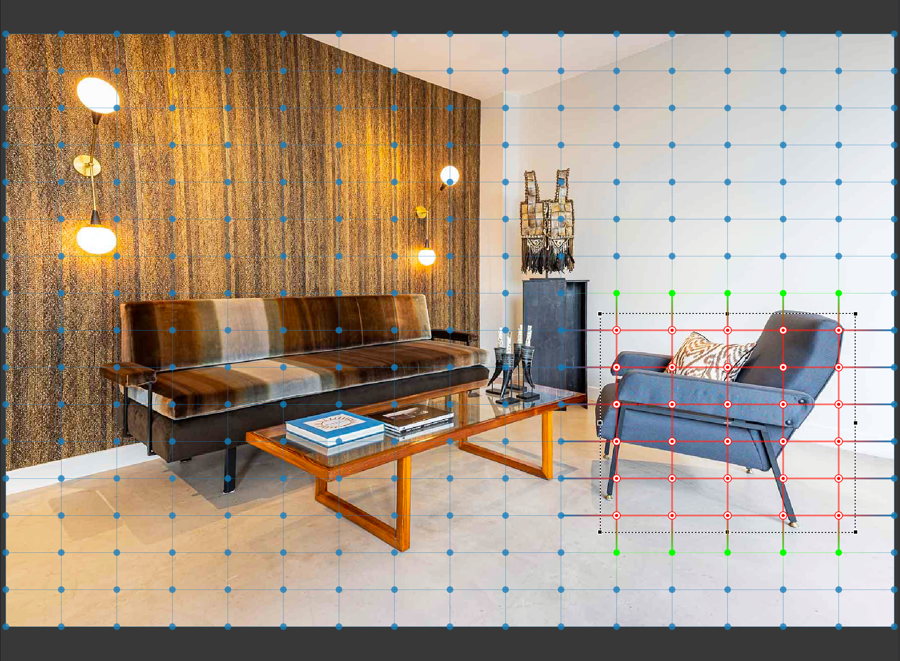
Display of the grid and deformation points
Grid and ReShape Fusion tool deformation points in DxO PhotoLab.
In DxO PhotoLab, the grid and the dots use different colors from those in DxO ViewPoint:
Blue: unused and inactive.
Red, white with a red dot in the middle: active point, currently in use.
Blue with white dot: inactive modified point.
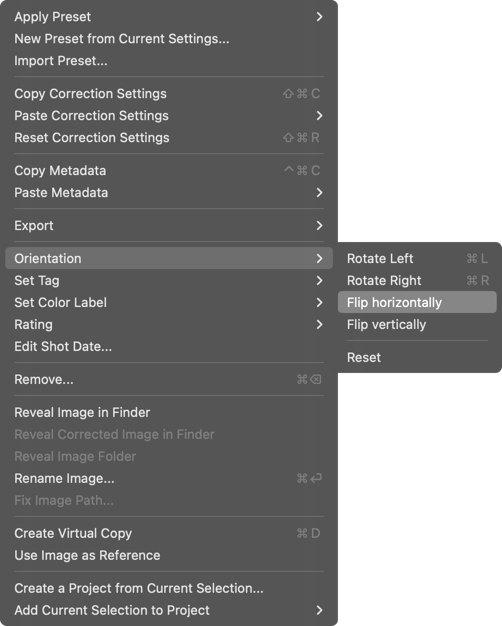
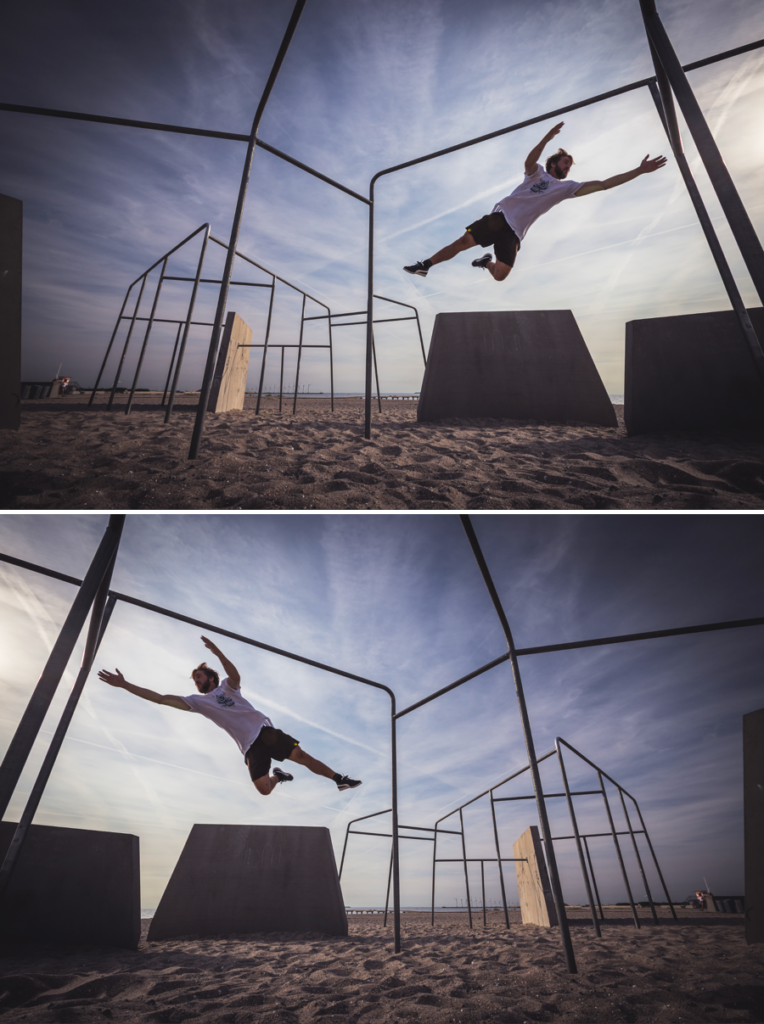
Flip
DxO ViewPoint’s vertical and horizontal flip tools can also be found in DxO PhotoLab in the following locations:
Image > Orientation > Flip horizontally or Flip vertically.
Right click > Orientation > Flip horizontally or Flip vertically.