

The interface
About the interface
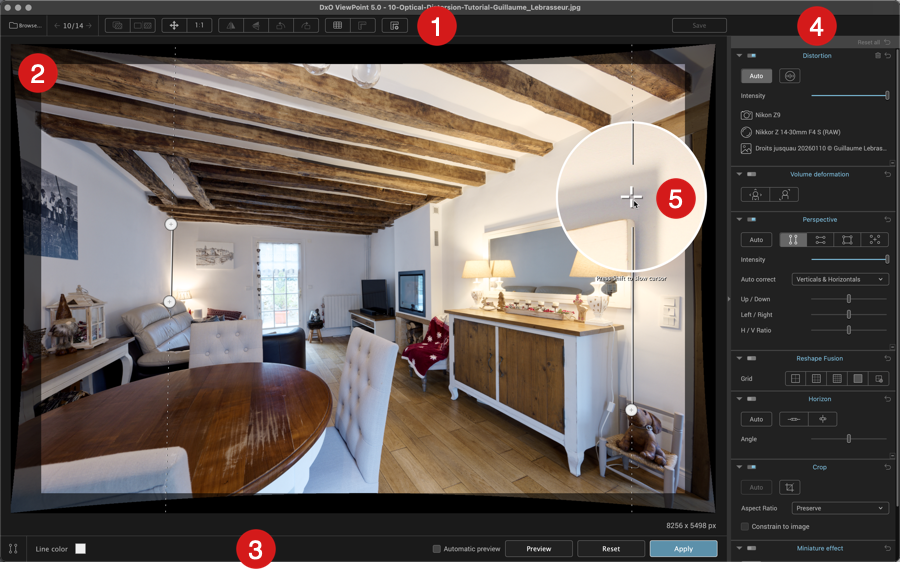
The DxO ViewPoint interface is divided into 5 main areas:
- The upper toolbar
- The image display and file store (in standalone mode).
- The lower toolbar.
- The control panel (with the correction tool palettes).
- The control line magnification loupe (Perspective and Horizon tools).
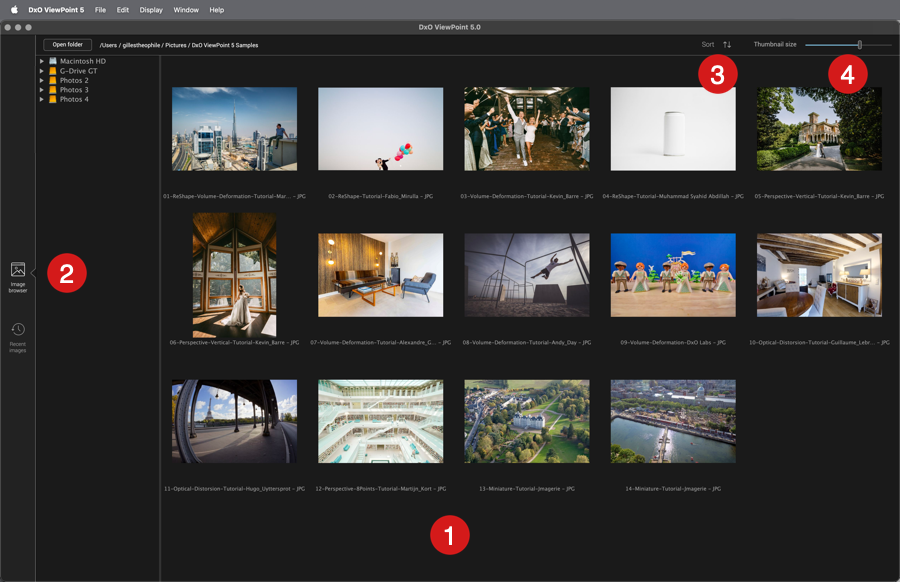
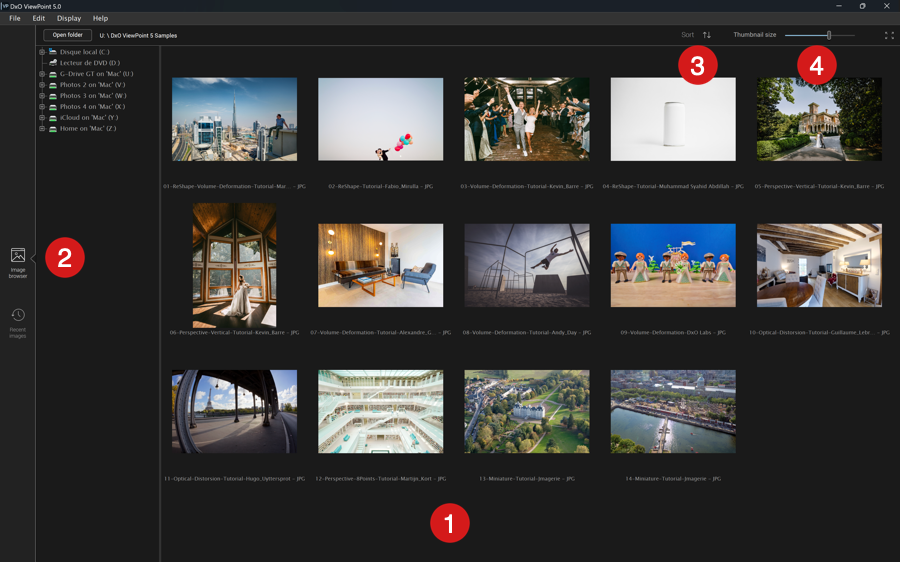
In standalone mode, DxO ViewPoint also has the Image Browser which has the following components:
- The thumbnails display area.
- The side toolbar to switch to the recent images view.
- Sort images.
- Set thumbnail size.
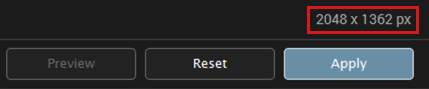
When an image is opened in the correction section, the bottom right-hand corner of the display area shows the width and height of the image in pixels. The dimensions are refreshed each time an image is resized.
The Image Browser
When DxO ViewPoint is first opened in standalone mode, the Image Browser displays the sample images that came with the program.
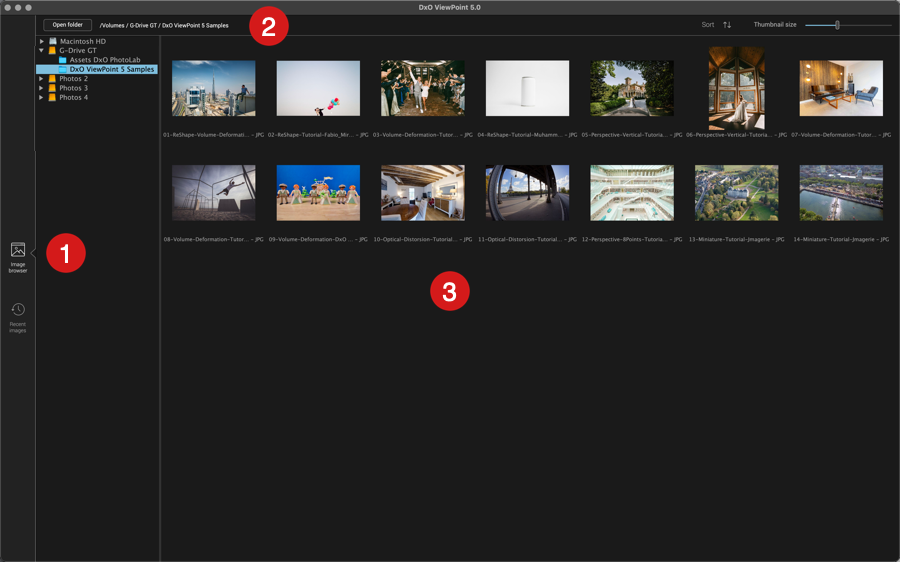
The Image Browser is organized as follows:
- Source browser (sidebar):
- Image Browser: displays the folder hierarchy on your hard drive in an adjustable-width panel. Click on a folder to view its contents.
- Recent images: displays recently processed images.
- The upper toolbar:
- Open folder: Opens a system dialogue box to select and display images from a particular folder.
- File path: shows the pathway to the selected folder.
- Sort: lets you display images according to certain criteria (shooting date, modification date, alphabetical order, and file type) in ascending or descending order.
- Thumbnail Size: Thumbnail size slider.
- Image Display Area:
- Displays the image contents of a folder as thumbnails (click to select a thumbnail, double-click to open it in the correction section.)
Toolbars
The upper toolbar
Located in the top part of the DxO ViewPoint window, it features tools to open, save, and correct the image, as well as different display and navigation modes. The options available will depend on the mode (standalone or plugin).


- Managing files (standalone mode)
- Return to image browser: Takes you back to the Image Browser and the folder tree.
- Previous/Next Image: lets you switch from one image to another within the selected folder.
- Image count: Indicates the number of images in the selected folder and the order of the currently displayed image.
- Display modes
- Compare with the original image: clicking and holding this button lets you quickly switch from the corrected image to the original image in the display area (and vice versa by releasing).
- Display before and after correction side by side: Display the image before correction (left) and after correction (right) at the same time.
- Display size
- Fit to screen: The image is displayed in its entirety, taking up all the available space in the display window.
- 1:1 display: the image is zoomed to 100% (1 image pixel = 1 screen pixel).
- Flip and rotation tools (can be used in combination)
- The first two buttons flip the image horizontally and/or vertically.
- The other two rotate it by 90° to the left or right.
- Display Grid and Guides
- The left button lays a reference grid over the image (the default size of each square is 50×50 px by default, but can be modified in Preferences).
- The button on the right shows or hides the guides (see paragraph 6 below).
- Displaying Guides
- Lets you show or hide the toolbar for reference guides.
- Save (standalone mode)
- In standalone mode, lets you finalize and save your corrections.
- Display Fullscreen (PC)
- The DxO ViewPoint window will fill your entire screen. To return to the usual display, just click the button again.
The lower toolbar
Depending on the current correction tool, a toolbar is displayed below the image (Perspective, Horizon, ReShape, and Crop tools). It includes specific options for the active tool, as well as the common commands as follows:

- Selected tool: this icon is a simple reminder of the active tool.
- Line / grid color: by clicking on the white tile (default color), you can change the color of lines in the Perspective, ReShape, Horizon and Crop tools.
- Automatic preview: check to display the corrections on the fly.
- Preview: Available only with the Perspective and Horizon tools, this tool lets you refresh the image after making corrections.
- Reset: Cancels all corrections made and returns to the original image.
- Apply: Applies the corrections and closes the lower toolbar.
Second Lower toolbar (plugin mode)

In the plugin version of DxO ViewPoint a second lower toolbar appears with the following options:
- Preferences: Opens the program settings window.
- Help: opens DxO ViewPoint online help (Internet connection required).
- Cancel: exits DxO ViewPoint, a dialog will ask if you want to save your changes before closing. The Cancel option in the dialog box lets you stay in DxO ViewPoint.
- Save: Applies the corrections permanently and then closes the plugin before returning to the host application.
Control Panel
The different correction tools – Distortion, Volume deformation, Perspective, ReShape, Horizon, Crop and Miniature effect – will be looked at in more detail in the corresponding sections. Here we describe the general features of the palettes and the options that they have in common.
Some tools are also likely to display warning messages, shown below.
Control panel
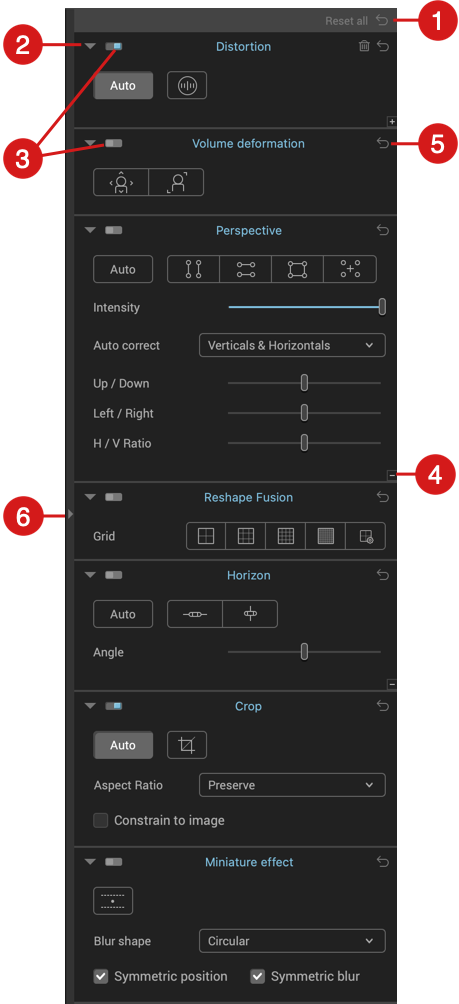
- Reset all: Cancels all corrections and returns to the original image. See Reset correction below.
- Expand or collapse controls: the control palettes contain numerous options and adjustment sliders. To expand them, click on the arrow-shaped icon in the top left corner of each section. Do the same thing to collapse them.
- Enable / disable palette: The button indicates the palette’s operating status (left and gray: disabled; right and blue: enabled). Click on the switch to activate it, or temporarily deactivate it, and its associated corrections.
- Hide tools: When a palette is fully expanded (with all tools and sliders showing), you can return to the standard view of options by clicking on the “-” (minus) sign in the bottom right-hand corner of the palette.
- Reset correction: Each tool in a palette has a reset button.
- Hide/show controls: Click to hide or reveal the side panel.
Warning Messages
Warning messages about EXIF data or DxO optics modules may appear in the Distortion, Volume deformation, or Perspective palettes in DxO Viewpoint.
Distortion palette
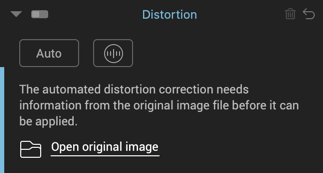
- EXIF data: in plugin mode, if no EXIF data is available, a dialog box lets DxO ViewPoint retrieve information from the original file. If this is not possible, the automatic distortion correction will be inactive.
- DxO Optics Modules: different messages about ambiguity (several modules available for the same equipment), availability, and updates to DxO optics modules. If no DxO optics module is available, automatic distortion correction will be disabled.
Perspective and Volume deformation Palettes
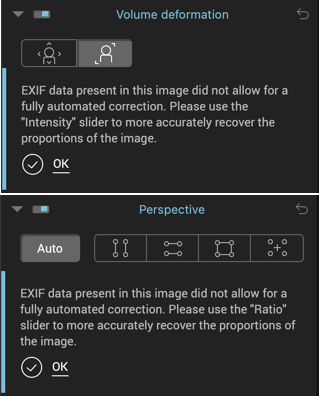
If there is no EXIF data, automatic correction will not be permitted, and a message will suggest manually adjusting the H/V Ratio slider to adjust the image proportions or intensity.
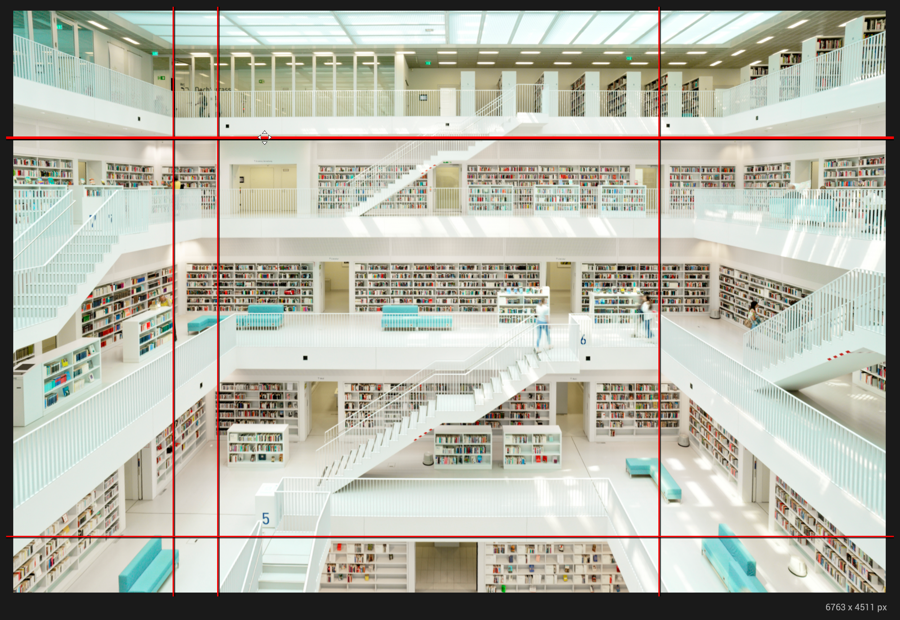
The Guide Tool
About the Guide Tool
While DxO ViewPoint provides you with a grid overlay for the image, the Guide tool goes further by letting you draw and position up to 10 horizontal and/or vertical lines. This lets you place a straight reference line anywhere in the image to fine-tune your geometric corrections, whatever they may be: distortion, volume deformation, perspective, ReShape, or horizon, etc.
Guides have no influence on geometric corrections, they are only intended as visual aids.
Adding Guides

To add guides:
- Go to the upper toolbar and click on the Guides button (the last button on the right).
- In the toolbar under the image, click on the Vertical Guide or Horizontal Guide button.
- Position the mouse at the desired point in the image (the pointer will be a 4-direction arrow).
- Click to place the guide.
- You can move the guide around using the mouse.
- Click somewhere else in the image to place another guide (and change its orientation by clicking on the appropriate button in the toolbar).
- Click Apply to confirm the position of the guides.
Using Guides

The Guides work as follows:
- The two buttons located in the toolbar let you create either vertical guides (left button), or horizontal guides (right button), with the maximum number of guides being 10.
- An active guide is highlighted by black line on its right side (vertical guide) or on its lower side (horizontal guide).
- To re-activate a guide, just click on it.
- To remove a guide, click on it to activate it and then hit Delete on your keyboard. You can also double-click on it to delete it.
- To change the color of the guides, click on the Line Color tile in the toolbar. This will display a color picker dialogue so you can select a different color.
- The Reset button in the toolbar will remove all guides.
- Guides can be temporarily hidden or displayed using the Show/Hide Guides button in the upper toolbar.